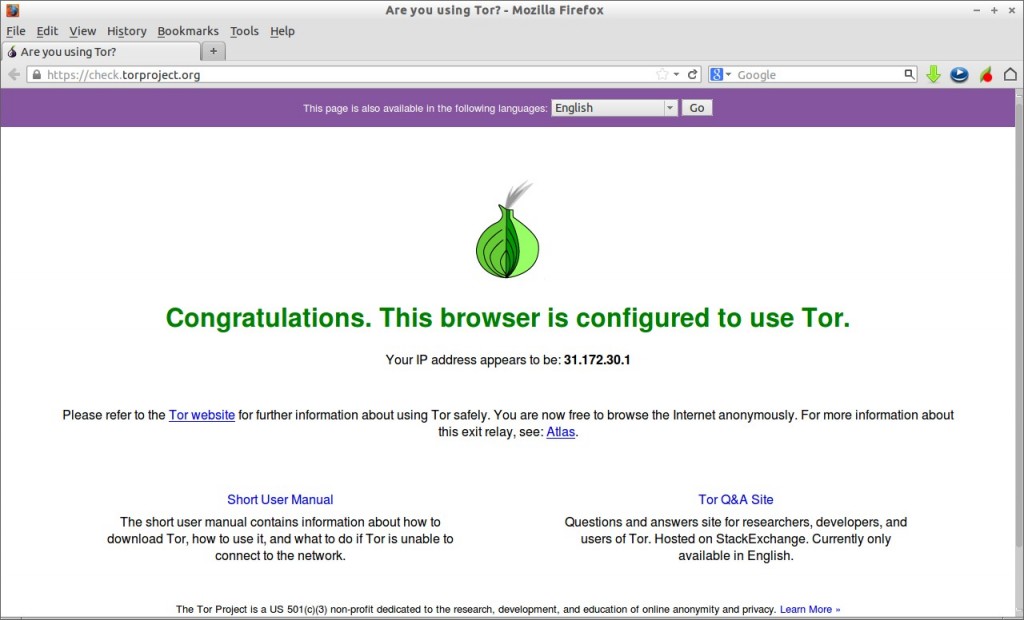
Tor, The Onion Router, is a network of Virtual Tunnels that allows users to communicate securely and as well as anonymously over Internet. Tor allows organizations and individuals to share information over public networks without compromising their privacy. We can use Tor to keep websites from tracking us and also our family members, or to connect to news sites, instant messaging services, or the websites which are blocked by the Internet providers and Network Administrators.
Tor was originally designed, implemented, and deployed as a third-generation onion routing project of the U.S. Naval Research Laboratory. It was originally developed with the U.S. Navy in mind, for the primary purpose of protecting government communications. Today, it is used every day for a wide variety of purposes by normal people, the military, journalists, law enforcement officers, activists, and many others.
In this quick how-to let us learn how to use Tor with our browsers. The steps provided here were tested on Ubuntu 13.04 Desktop, but it should work on all Debian/Ubuntu and its derivatives.
Install Tor & Vidalia On Ubuntu / Debian / Linux Mint
Tor is available in the default repositories of Debian/Ubuntu, but they might be bit outdated. So add Tor repository to your distribution source lists.
Edit file /etc/apt/sources.list,
$ sudo nano /etc/apt/sources.list
Add the following lines depending upon your distribution version. As i am testing this on my Ubuntu 13.04 desktop, i added the following lines.
[...]
deb     http://deb.torproject.org/torproject.org raring main
Save and close the file. If you’re using Ubuntu 13.10, then the lines should be,
deb http://deb.torproject.org/torproject.org saucy main
For Debian 7 Wheezy,
deb http://deb.torproject.org/torproject.org wheezy main
Add the gpg key using following commands:
$ gpg --keyserver keys.gnupg.net --recv 886DDD89
$ gpg --export A3C4F0F979CAA22CDBA8F512EE8CBC9E886DDD89 | sudo apt-key add -
Update the repository list and install vidalia using commands:
$ sudo apt-get update
$ sudo apt-get install tor vidalia deb.torproject.org-keyring
During installation, you’ll be asked which user should be able to control Tor service. Select the user and click Ok.

Configure Firefox Browser
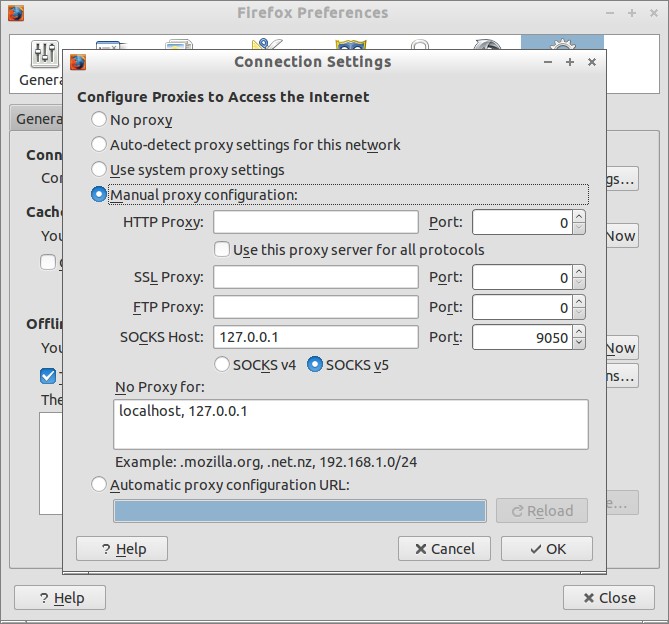
Open your browser. Go to Edit -> Preferences -> Advanced -> Network ->Settings. Select manual Proxy Configuration. In the SOCKS Host column, enter localhost or 127.0.0.1 and in the port column enter 9050 as shown in the below screenshot.


Note: If you want to use Tor for anonymous web browsing, please read our article about Tor Browser Bundle. It comes with readily configured Tor and a browser patched for better anonymity. To use SOCKS directly (for instant messaging, Jabber, IRC, etc), you can point your application directly at Tor (localhost port 9050), but see this FAQ entry for why this may be dangerous.
That’s it. Good Luck! Stay Safe!


