About MySecureShell
MySecureShell is an Open Source, Multi-platform, very secure FTP server based on OpenSSH. Since it is based on OpenSSH, you have the high level of security of it MORE functionality and POWERFUL FTP server. It is easy to install, configure and administrate. The goal of MySecureShell is to offer the power and security of OpenSSH, with enhanced features (like ACL) to restrict connected users. What else you need? We can have a perfect SFTP server in minutes using MySecureShell. It will work on several types of Operating Systems like Linux, Mac OS X, Solaris, BSD and Windows (with Cygwin).
Why MySecureShell?
You might ask me why MySecureShell instead of traditional FTP server. There are several reasons including:
- You do not have to open some dedicated firewall ports for file transfers ;
- You are using one of the most used and secure protocol (SSH) ;
- You do not have to manage SSL certificates to guaranty the security ;
- As easy to use as a classical FTP server ;
- As many or more features that you can find on any classical FTP servers ;
- Easy to install, configure, maintain and use.
Features
Concerning about MySecureShell, we can list the following:
- Control of bandwidth ;
- Security rights information ;
- Only authorized files and folders can be shown ;
- Easy installation and administration of the server with a graphical interface ;
- Management of activity of the server with logs ;
- Restrictions of users by ip, groups ;
- Power Encryption ;
- No certificate problems non-certified or certificate generation ;
- Support public and private keys for secure authentication without password ;
- Only one port to open for SSH and SFTP (port 22 by default) ;
- The protocol used is much more optimized than FTP because it is based on the protocol of the NFS ;
- Free and open source ;
- Advanced logging information ;
- ACL can be made with IP/Usernam/Groups/VirtualHost/… ;
- Confined environments (chroot, which is also available in the latest version of OpenSSH) ;
- Restrict users to have sftp only (shell access is disabled by default) ;
- And more…
Install MySecureShell On Linux
Add the MySecureShell repository depending upon the distribution you use. All steps should run as ‘root’ user.
To switch to root user, run:
sudo su
Or
su
On Debian:
MySecureShell is available in the default repositories of Debian 8.
To install it, simply run:
apt-get install mysecureshell
For Debian 7 and previous versions:
Edit /etc/apt/sources.list file,
nano /etc/apt/sources.list
Add the following lines:
deb http://mysecureshell.free.fr/repository/index.php/debian testing main
deb-src http://mysecureshell.free.fr/repository/index.php/debian testing main
To import GPG key, enter:
gpg --keyserver hkp://pool.sks-keyservers.net --recv-keys E328F22B; gpg --export E328F22B | apt-key add -
OR
wget -O - "http://pool.sks-keyservers.net:11371/pks/lookup?op=get&search=0x7601D76CE328F22B" | apt-key add -
Now update the source list and install MySecureShell as shown below.
apt-get update
apt-get install mysecureshell
On Ubuntu:
MySecureShell is available in the default repositories of Ubuntu 15.04, so we can install it using command:
apt-get install mysecureshell
On Ubuntu 14.04 and previous versions, Edit file “/etc/apt/sources.list” and add the following lines,
deb http://mysecureshell.free.fr/repository/index.php/ubuntu testing main
deb-src http://mysecureshell.free.fr/repository/index.php/ubuntu testing main
To import GPG key, enter:
gpg --keyserver hkp://pool.sks-keyservers.net --recv-keys E328F22B; gpg --export E328F22B | apt-key add -
OR
wget -O - "http://pool.sks-keyservers.net:11371/pks/lookup?op=get&search=0x7601D76CE328F22B" | apt-key add -
Now update the source list and install MySecureShell as shown below.
apt-get update && apt-get install mysecureshell
On RHEL/CentOS:
Edit file “/etc/yum.conf” and the following lines at the end.
[mysecureshell]
name=MySecureShell
baseurl=http://mysecureshell.free.fr/repository/index.php/centos/$basearch/
enabled=1
gpgcheck=0
Update Repository and install MySecureShell as shown below.
yum update
yum install mysecureshell
On Fedora:
Edit file “/etc/yum.conf” and add the following lines:
[mysecureshell]
name=MySecureShell
baseurl=http://mysecureshell.free.fr/repository/index.php/fedora/$basearch/
enabled=1
gpgcheck=0
Update Repository and install MySecureShell as shown below.
yum update
yum install mysecureshell
We have installed MySecureShell. Let us now see how to use it.
Usage
Adding users to MySecureShell
First, we have to find where MySecureShell is installed.
To do that, run:
whereis mysecureshell
Sample output:
mysecureshell: /usr/bin/mysecureshell /usr/share/man/man8/mysecureshell.8.gz
As you in the above output, mysecureshell installation path is /usr/bin/mysecureshell. Verifying MySecureShell installation path is must, because, we should specify that path while creating new FTP users or assign exiting users to access the SFTP server.
Now, Create a new user with command:
useradd -m -s /usr/bin/mysecureshell unixmen
passwd unixmen
Also you can assign the existing users to access and use MySecureShell using command:
sudo usermod -s /usr/bin/mysecureshell sk
Mow you can connect to your SFTP server from your clients as shown below.
sftp unixmen@192.168.1.102
Sample output:
unixmen@192.168.1.102's password:
Connected to 192.168.1.102.
sftp>
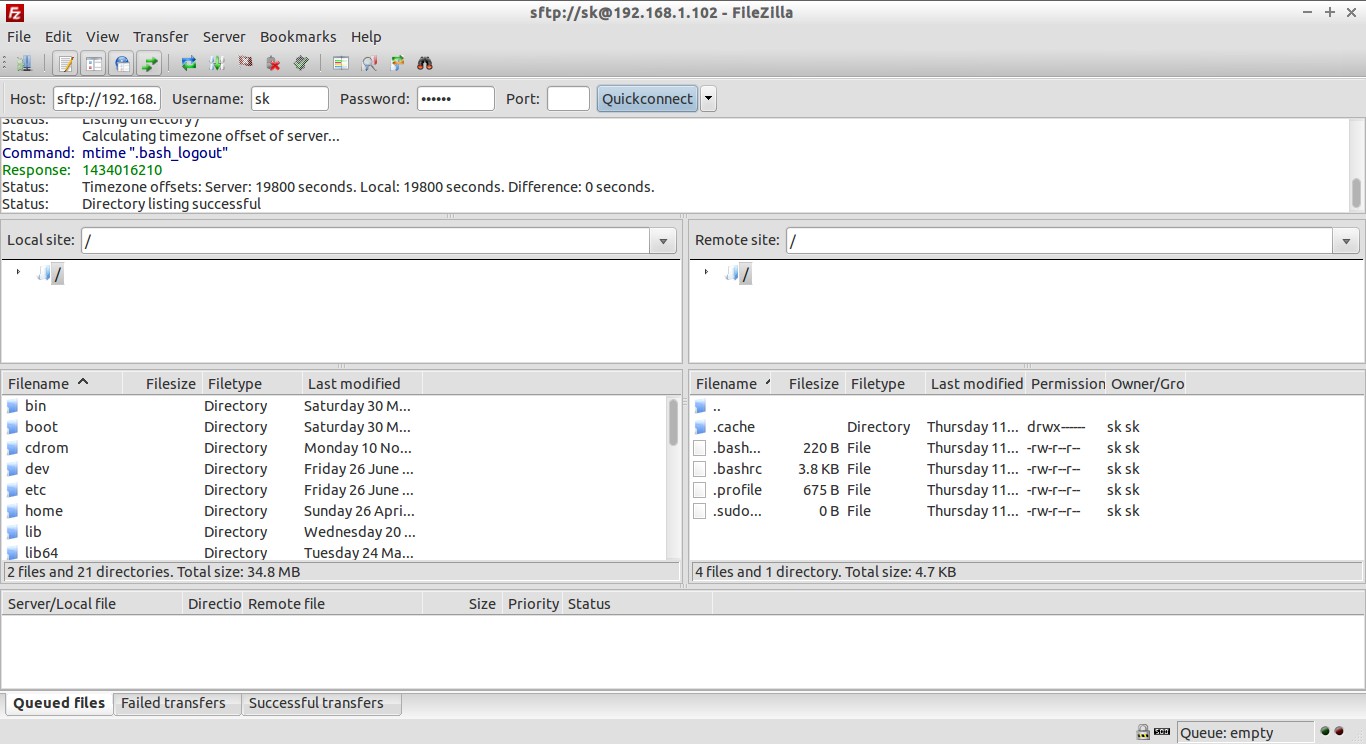
Also you can login to your SFTP server with any graphical clients such as FileZilla from your client system.
Open your favourite FTP client (Ex.FileZilla). Enter sftp://IP-address, user name, password, and SFTP port 22 and click Connect.
Unlike vsftpd or other FTP servers, MySecureShell SFTP server is lot easy to install and configure.
Configure MySecureShell
The main MySecureShell config file is /etc/ssh/sftp_config. MySecureShell will work well with default configuration. The options in the configuration are self-explanatory, so I didn’t cover them.
You can adjust or specify various options such as specify upload and download bandwidth, chroot users, the max. amount of connections etc., in the MySecureShell configuration file. You can set this options to either everybody or just for a particular group.
Say for example, Let us limit the download speed for the FTP users to 25K. To do that open MySecureShell main configuration file.
nano /etc/ssh/sftp_config
Find the following line and set the download limit to 25k under Default section.
[...]
<Default>
GlobalDownload          25k     #total speed download for all clients
[...]
Save and close the file. Restart MySecureShell service to take effect the saved changes.
service mysecureshell restart
Or,
systemctl restart mysecureshell
Now the FTP users will be able to download files at 25k speed.
MySecureShell Commands
MySecureShell has the following set of commands to administrate your SFTP server.
- sftp-admin
- sftp-kill
- sftp-state
- sftp-user
- sftp-verif
- sftp-who
Let us see a brief description of each command.
sftp-admin
This command allows to manage a MySecureShell waiter remotely.
Usage:
sftp-admin [ssh options] user@hostname
sftp-kill
It will disconnect the user from the FTP server.
Usage:
sftp-kill unixmen
sample output:
Kill unixmen on PID 6753
No lamer to kill ?
The above command will disconnect the user ‘unixmen’ from FTP server.
sftp-state
It allows you to control activity of the server.
sftp-state
Sample output:
Server is up
sftp-user
This command allows you to create a SFTP user.
Usage:
sftp-user create test
The above command will create a user called test.
sftp-user delete test
The above command will delete the the user test.
sftp-user list
Sample output:
test
unixmen
The above command will list SFTP users.
sftp-verif
This command will verify and correct problems on a MySecureShell server.
Usage:
sftp-verif
Sample output:
################################################################################
MySecureShell Verification Tool
################################################################################

### Verifing file existance ###

/bin/MySecureShell                                                       [ OK ]
/bin/sftp-who                                                            [ OK ]
/bin/sftp-kill                                                           [ OK ]
/bin/sftp-state                                                          [ OK ]
/bin/sftp-admin                                                          [ OK ]
/bin/sftp-verif                                                          [ OK ]
/bin/sftp-user                                                           [ OK ]

### Verifing rights ###

Verifing file rights of /etc/ssh/sftp_config                             [ OK ]
Verifing file rights of /bin/sftp-who                                    [ OK ]
Verifing file rights of /bin/sftp-verif                                  [ OK ]
Verifing file rights of /bin/sftp-user                                   [ OK ]
Verifing file rights of /bin/sftp-kill                                   [ OK ]
Verifing file rights of /bin/sftp-state                                  [ OK ]
Verifing file rights of /bin/sftp-admin                                  [ OK ]
Verifing file rights of /bin/MySecureShell                               [ OK ]

### Verifing rotation logs ###

Rotation logs have been found                                            [ OK ]

### Verifing server status ###

Verifing server status (ONLINE)                                          [ OK ]

### Verifing server dependencies ###

Show only error(s) :

### Verifing server configuration ###

Show only error(s) :
Trying user: root

### All tests dones ###
sftp-who
This command will tell you who is currently logged-in to the FTP server.
Usage:
sftp-who
Sample output:
--- 1 / 10 clients ---
Global used bandwidth : 0 bytes/s / 0 bytes/s
PID: 1472   Name: unixmen   IP: sk
    Home: /home/unixmen
    Status: idle    Path:
    File:
    Connected: 2015/06/26 17:29:44 [since 03s]
    Speed: Download: 0 bytes/s [5.00 kbytes/s]  Upload: 0 bytes/s [unlimited]
    Total: Download: 134 bytes   Upload: 23 bytes
MySecureShell GUI Front-end
Managing MySecureShell via command line is not that difficult. However if you’re looking for a graphical management tool for MSecureShell, there is a MySecureShell GUI front-end is available.
You Can install this GUI tool in any of your client system and start managing your SFTP server graphically as well as remotely. Also you have to install Java on your system before installing this front-end tool.
Please note: Before using MySecureShell GUI, you must adjust the configuration file to allow the SFTP server to be managed remotely.
To do so, go to your SFTP server, edit file /etc/ssh/sftp_config,
nano /etc/ssh/sftp_config
Find and uncomment the following line.
[...]
#<Group sftp_administrator>
        IsAdmin         true            #can admin the server
[...]
Save and close the file. Restart mysecureshell service to take effect the changes.
systemctl restart mysecureshell
Or,
service mysecureshell restart
Now, download the MySecureShell client from here or download it directly from your Terminal using command:
wget http://sourceforge.net/projects/mysecureshell/files/MySecureShell%20Graphical%20Tools/v1.90/MSS_Frontend_v1.9.zip
Extract and run it as shown below.
unzip MSS_Frontend_v1.9.zip
java -jar sftp-mss.jar
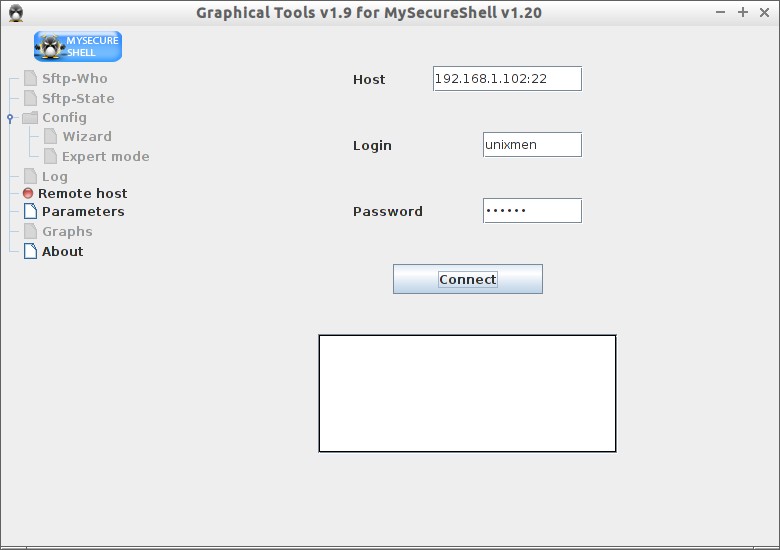
The following screen should appear. Enter the your remote SFTP server username and password and click Connect.
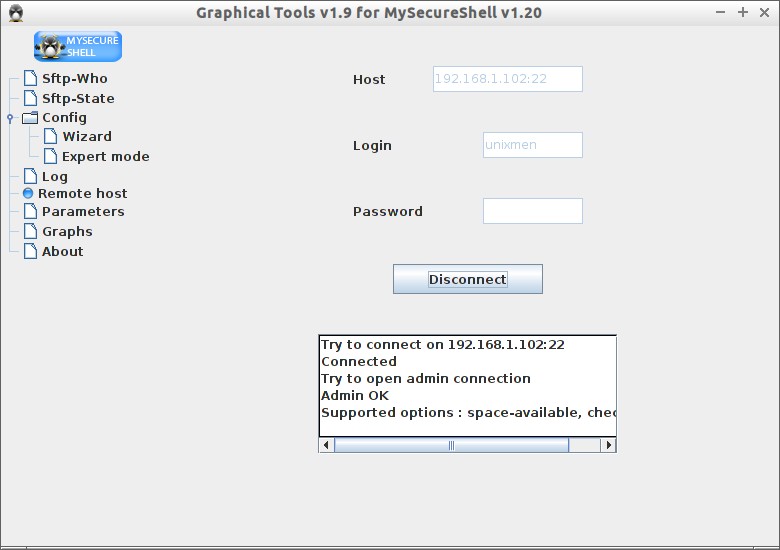
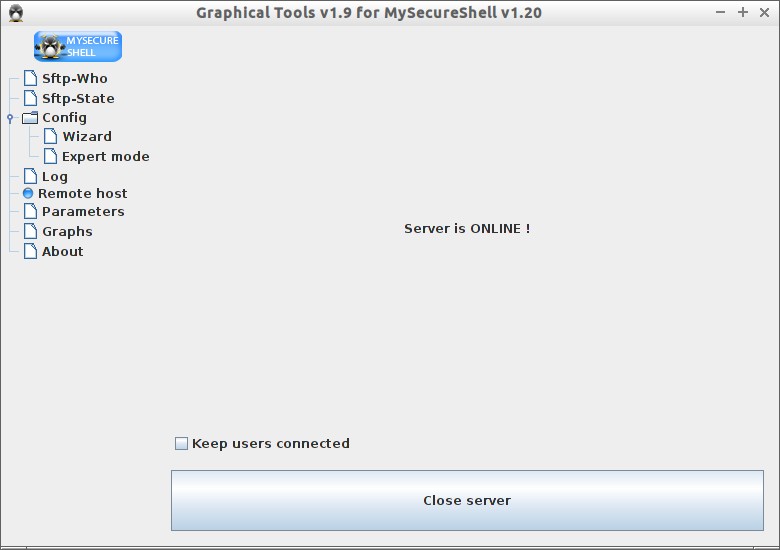
After connecting to the SFTP server it will look like below.
Now you can manage your SFTP server remotely.
Sftp-who
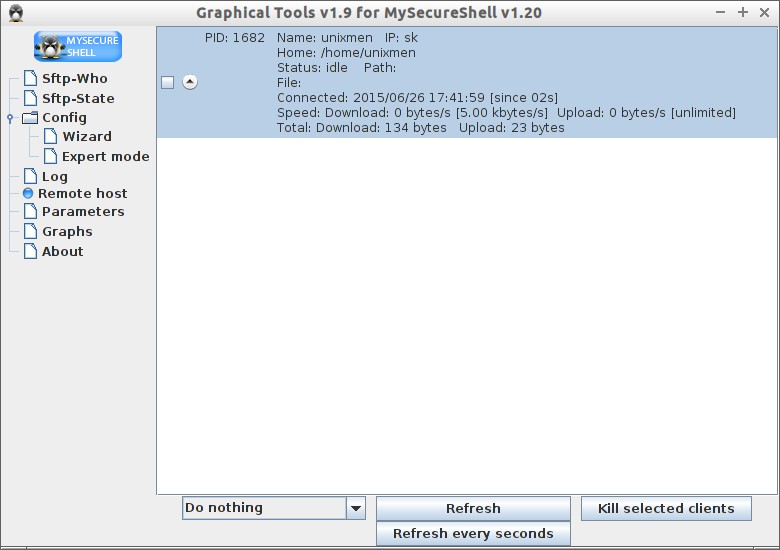
To see the connected users to SFTP server click on sftp-who tab. It will show the current users connected to the SFTP server.
Sftp-state
To view the SFTP server status, click on sftp-state tab.
Config Wizard
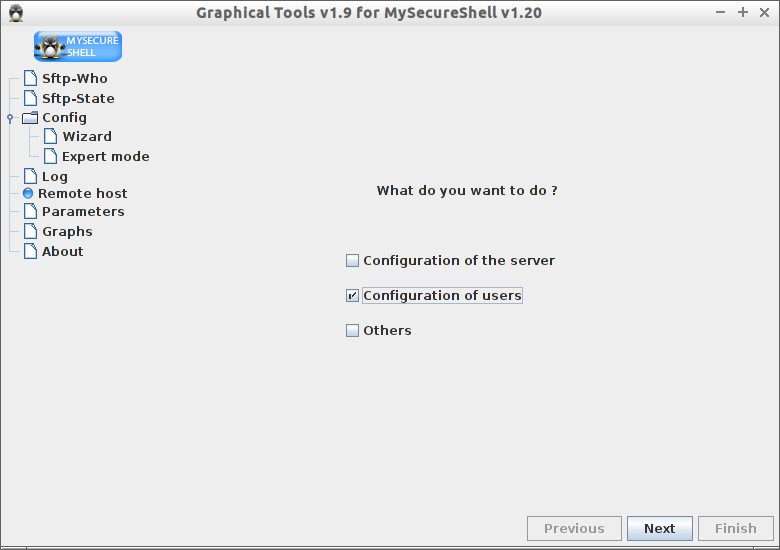
To create user, go to Wizard tab. Select Configuration of users:
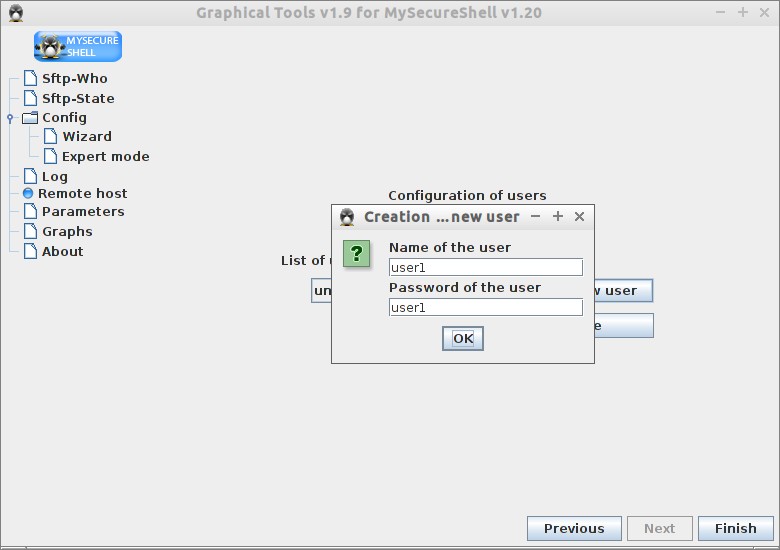
Click Create New user. Enter the new user name and password. Finally click Ok and Finish.
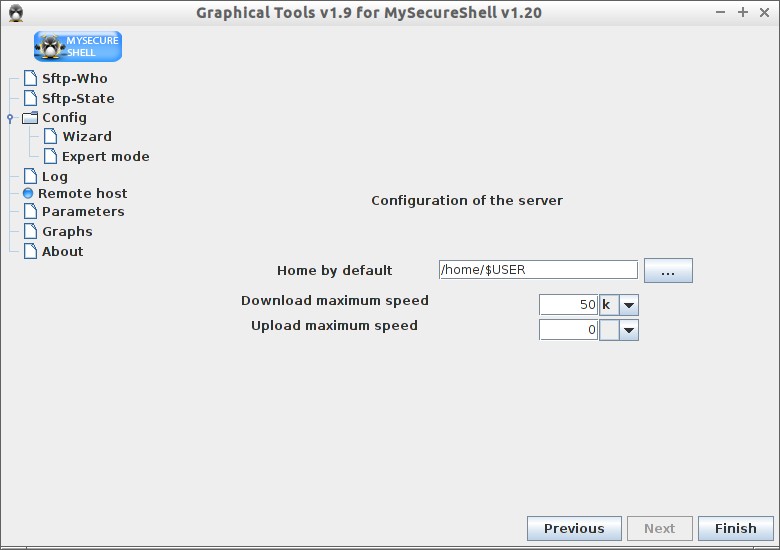
Also you can change the default home directory, global download/upload speed of the ftp users. To do that, go to Wizard -> Configuration of Server. Enter the new values and click Finish.
Expert Mode
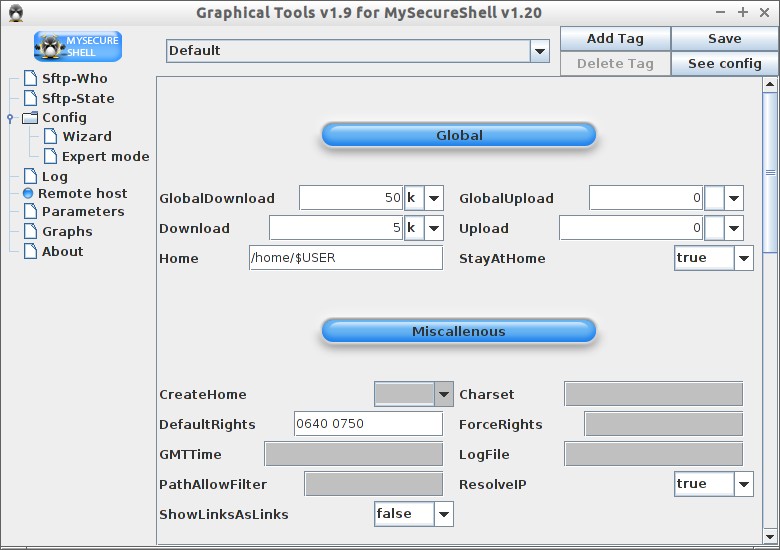
In the expert mode, you can adjust/modify various configuration options like Global, Security ad Advanced security. It’s not that difficult. Every option is self-explanatory.
Log
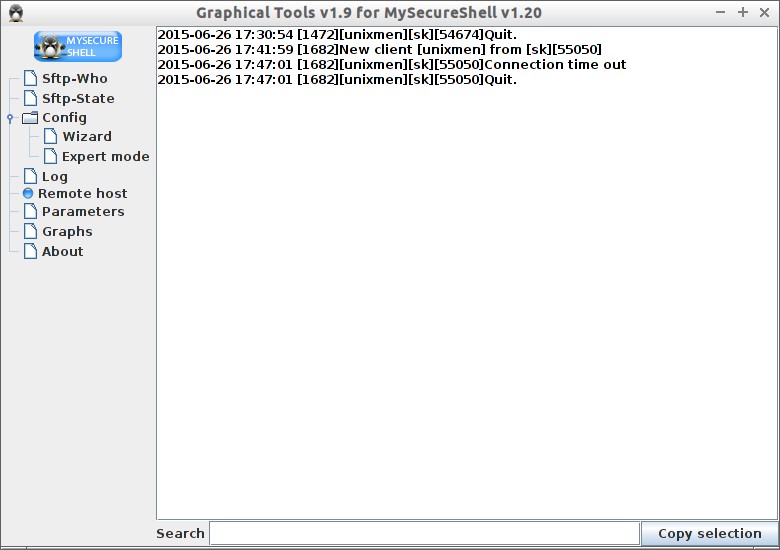
You can analyze what’s happening in the SFTP server using logs.
That’s all for now. At this stage, you will have a working SFTP server.


