
For users of Unix and Linux operating systems, managing file permissions is a vital aspect of system administration and security. There are numerous tools that you can deploy for this purpose. One of these tools is chmod recursive. This is a powerful and efficient command used for modifying permissions across entire directory structures. This article will explore the intricacies of this command, exploring its functionality, usage, and importance in maintaining a secure and well-organized file system.
What is chmod?
The chmod (change mode) is a command commonly used to modify file and directory permissions in Unix and Linux systems.
Understanding File Permissions in Unix/Linux
Before we explore the command, it is important to understand the basics of file permissions in Unix and Linux systems. These permissions are divided into three categories:
- Owner permissions
- Group permissions
- Others permissions
Each category can have read (r), write (w), and execute (x) permissions. These permissions are represented both symbolically (rwx) and numerically (0-7).
For example:
- rwxr-xr-x is equivalent to 755
- rw-rw-r– is equivalent to 664
Grasping this foundation is crucial for effectively using chmod recursive.
The Chmod Command Basics
Here is basic syntax for the chmod command:
The “mode” can be expressed in symbolic (using letters and symbols) or octal (using numbers) notation.
For example:
What Makes Chmod Recursive Special?
Chmod recursive takes the power of the chmod command to the next level by allowing you to modify permissions for an entire directory tree in a single operation. This is especially useful when dealing with large projects, complex file structures, or when setting up new environments.
The recursive functionality is activated by using the “-R” or “–recursive” option with the chmod command.
Syntax and Usage of Chmod Recursive
The basic syntax used with this command includes:
For example, to give read, write, and execute permissions to the owner for all files and directories under “projects”:
You can also use symbolic notation:
This command gives the owner full permissions while removing all permissions for group and others.
Common Scenarios for Using Chmod Recursive
- Web server configuration: When setting up a web server, you might need to ensure that all files within the web root are readable by the web server process.
chmod -R 644 /var/www/html - Securing sensitive data: If you have a directory containing confidential information, you can restrict access using chmod recursive.
chmod -R 700 /home/user/confidential - Preparing for collaboration: When setting up a shared project directory, you might want to ensure that all group members have read and write access.
chmod -R 775 /home/shared/project - Fixing permission issues after file transfer: After transferring files between systems, permissions might get altered. Chmod recursive can quickly rectify this.
chmod -R 644 /home/user/transferred_files<br />
Industry’s Recommended Best Practices and Precautions
While chmod recursive is powerful, it should be used with caution. You should observe these recommendations.
- It is important to always double-check your command before execution.
- Use the “–preserve-root” option to prevent accidental changes to system directories.
- Consider using the “-v” (verbose) option to see what changes are being made.
- Be aware of the implications of changing permissions, especially for system files.
- Regularly audit your file permissions to ensure security.
What are the Alternatives to Chmod Recursive
There are alternative tools the chmod command that can provide the same functionality.
- find command with -exec:
find /path/to/directory -type f -exec chmod 644 {} + - ACLs (Access Control Lists): For more fine-grained control, consider using setfacl:
setfacl -R -m u:username:rwx /path/to/directory - Graphical file managers: Many GUI file managers offer bulk permission changing features.
Troubleshooting Chmod Recursive Issues
There are some common issues that can arise while using this command. Some of these issues include:
- Permission denied errors: This errors occurs when you don’t have administrator privileges. To avoid this you need to ensure that you have sufficient privileges to modify the files.
- Unexpected permission changes: When you suddenly change the permissions, you can experience using the command. It is recommended to use the “-v” option to see what’s being changed.
- Symbolic links: Be cautious when using chmod command with symbolic links. This is because it can affect the target files.
Advanced Chmod Recursive Techniques
- Using umask with the command: Set a umask before running chmod recursive to ensure newly created files have specific permissions.
- Combining chmod with chown: Change both ownership and permissions in one go:
chown -R user:group /path && chmod -R 755 /path - Using the command along with find for more granular control:
find /path -type d -exec chmod 755 {} + && find /path -type f -exec chmod 644 {} +
Chmod Recursive in Scripts and Automation
Incorporating chmod recursive into your scripts can help automate permission management:
In deployment scripts: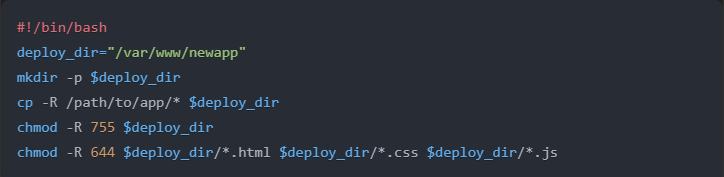
In backup scripts:

By mastering the chmod command, as Unix user you will be equipped to efficiently manage file permissions across your Unix and Linux systems. Remember, with great power comes great responsibility – always use this command judiciously to maintain system integrity and security.
Similar Articles
Linux – How to recursively chmod a folder?
How to Recursively Change the File’s Permissions in Linux
More Articles from Unixmen

