Introduction:
This is the part-I of a Cassandra No-sql Database Series, in This first part we will configure Apache Cassandra with Ubuntu 15.04, will go little bit deeply in upcoming series.
Apache Cassandra is a massive scalable NoSQL database, it is designed to handle very larg amount of data across various servers, It is a peer-to-peer architecture data base, cassandra provide a high availability data center with no point of failure, it provides very high wright and read throughput. At present it is used in numerous data centers to manage their critical data infrastructure, Modern businesses turns to NoSQL/cassandra when they require a massive performance at high scale.
Prerequisites:
Ubuntu 15.04 Desktop OS.
Oracle JDK/JRE
JNA (Java Native Access)
Installation:
Install Ubuntu desktop 15.04
Install oracle-jkd 7 (java)
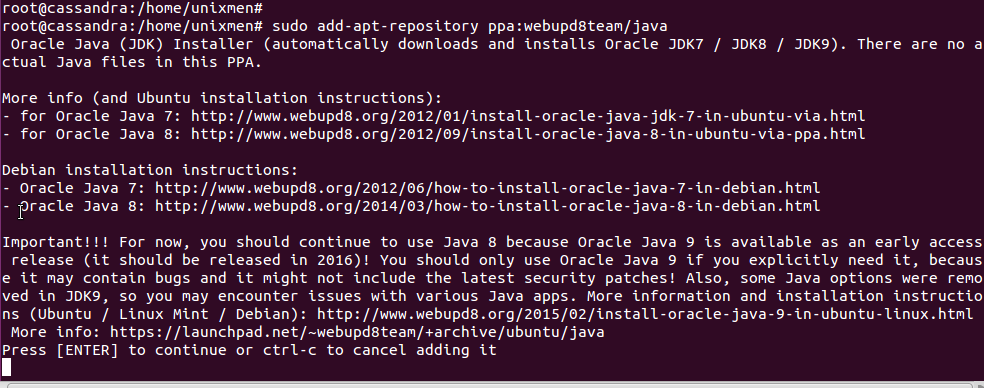
sudo add-apt-repository ppa:webupd8team/java
Update System:
sudo apt-get update
sudo apt-get install oracle-java7-installer
Press OK:
Set Oracle-java-7 up automatically, run
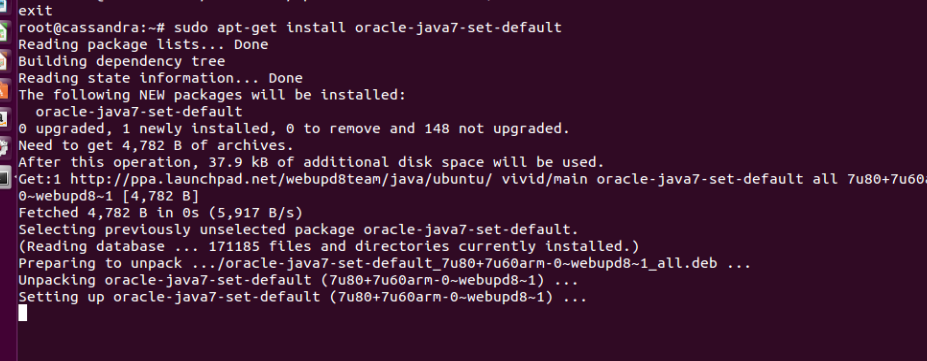
sudo apt-get install oracle-java7-set-default
Now, you will need to install JNA, it will improve the performance of the cassDB server.
JNA is available with github.com/twall/jna, download jna.jar.
wget https://maven.java.net/content/repositories/releases/net/java/dev/jna/jna/4.1.0/jna-4.1.0.jar
Move JNA to appropriate folder.
cd /usr/share/java
Copy the jna.jar to that folder.
Create a new user ‘cassandra’:
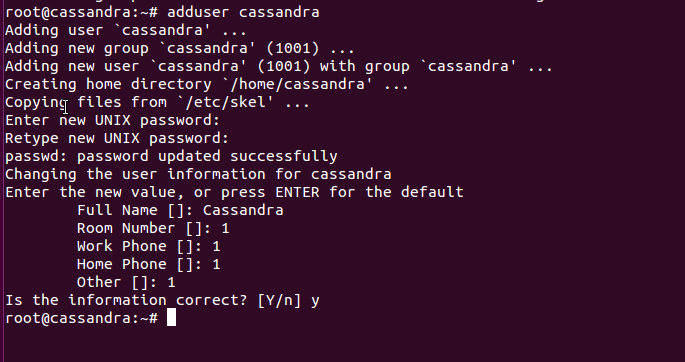
adduser cassandra
Assign password to that newly created user ‘cassandra’, to configure apache cassandra.
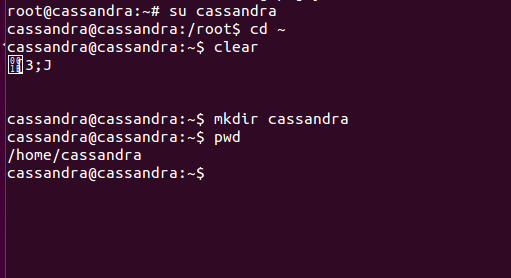
Switch to “cassandra” user, and create a new folder named as “cassandra” in home directory of “cassandra”, we will download apache-cassandra into that folder of “cassandra” user:
su cassandra
mkdir cassandra
cd cassandra
Have a look where exactly you are, with pwd.
pwd
Now, download apache-cassandra in to that folder. of “cassandra user”
wget http://mirror.cogentco.com/pub/apache/cassandra/2.1.7/apache-cassandra-2.1.7-bin.tar.gz
Extract the package.
tar -xvf apache-cassandra-2.1.7-bin.tar
gunzip apache-cassandra-2.1.7-bin.tar.gz
have a look into extracted apache-Cassandra folder
Now, create a soft link of JNA, in cassandra lib folder.
cd /home/cassandra/cassandra/apache-cassandra-2.1.7/
ln -s /usr/share/java/jna-4.1.0.jar jna.jar
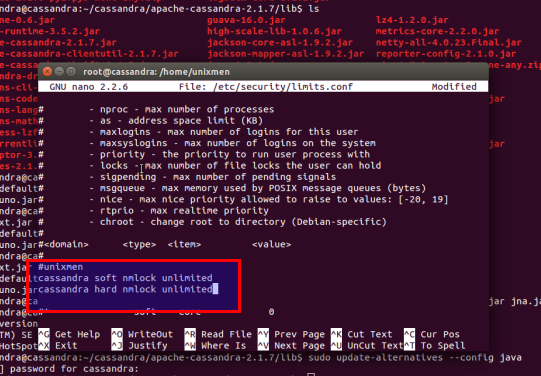
edit /etc/security/limits.conf to assign memory limit for cassandra as unlimited.
describe soft and hard memory utility limit (Red colored)
vim /etc/security/liits.conf
sample output:
#Each line describes a limit for a user in the form:
#
#
#
#Where:
# can be:
#        - a user name
#        - a group name, with @group syntax
#        - the wildcard *, for default entry
#        - the wildcard %, can be also used with %group syntax,
#                 for maxlogin limit
#        - NOTE: group and wildcard limits are not applied to root.
#          To apply a limit to the root user,  must be
#          the literal username root.
#
# can have the two values:
#        - "soft" for enforcing the soft limits
#        - "hard" for enforcing hard limits
#
#unixmen
cassandra soft nmlock unlimited
cassandra hard nmlock unlimited

# can be one of the following:
#        - core - limits the core file size (KB)
#        - data - max data size (KB)
#        - fsize - maximum filesize (KB)
#        - memlock - max locked-in-memory address space (KB)
#        - nofile - max number of open files
#        - rss - max resident set size (KB)
#        - stack - max stack size (KB)
#        - cpu - max CPU time (MIN)
#        - nproc - max number of processes
#        - as - address space limit (KB)
#        - maxlogins - max number of logins for this user
#        - maxsyslogins - max number of logins on the system
#        - priority - the priority to run user process with
#        - locks - max number of file locks the user can hold
#        - sigpending - max number of pending signals
#        - msgqueue - max memory used by POSIX message queues (bytes)
#        - nice - max nice priority allowed to raise to values: [-20, 19]
#        - rtprio - max realtime priority
#        - chroot - change root to directory (Debian-specific)
#
#
#

#*               soft    core            0
#root            hard    core            100000
Edit cassandra.yaml:
Go to conf Directory of apache-cassandra installation folder and edit cassandra.yaml to define cluster name.
nano /home/cassandra/cassandra/apache-cassandra-2.1.7/conf/cassandra.yaml
cluster_name: 'unixmen'
Create Required Directories and assign proper access rights:
Switch to root user and Create ‘/var/lib/cassandra/’ and ‘/var/log/cassandra’ directories, define permission accordingly:
mkdir /var/lib/cassandra/
mkdir /var/log/cassandra
Define permissions:
chown cassandra.cassandra /var/lib/cassandra
chown cassandra.cassandra /var/log/cassandra
Test Cassandra:
Now, switch to cassandra user, go to bin director available with apache-cassandra installation directory.
cd /home/cassandra/cassandra/apache-cassandra-2.1.7/bin
Run cassandra script present in bin directory with -f option.
./cassandra -f
This ./cassandra -f, command is very time taking and lengthy process, leave it as such and open a new terminal, to run next commands.
Leave ./cassandra in background and login to ‘cassandra’ user from new terminal, go to bin of apache-casaandra installation directory, and run ./cassandra-cli, cassandria-cli is the older version, (you should switch to ‘cqlsh’ utility, we will explain uses of ‘cqlsh’ in upcoming series)
cd /home/cassandra/cassandra/apache-cassandra-2.1.7/bin/
./cassandra-cli

Let’s have some examples:
bin/cassandra-cli --host localhost
[default@unknown] connect localhost/9160;
9160 is the port utilized by cassandria.
Let’s try to create some keyspace, keyspace can be considered as database of mysql.
[default@unknown]create keyspace unixmen;
[default@unknown]describe cluster;
At last let’s have a look in cqlsh utility.
bin$./cqlsh
Thats it.
Have Fun!!


