Hello everyone.
Today, we will go through how we can use btrfs file system for creating, extending and decreasing partition size. We will use openSUSE 42.1 Linux distribution for this .
What is btrfs?
Btrfs (B-tree file system), is a file system for Linux OS. This is based on the copy-on-write mechanism. This file system is initially designed at Oracle Corporation in 2007 for use in Linux. Btrfs file system focused on fault tolerance, file system repair and easy administration. Btrfs licensed under the GPL and open for contribution from anyone around the world. It has some great features like dynamic inode allocation, space-efficient packing for small size files, space-efficient for indexing directories, writable snapshots, read-only snapshots, offline filesystem check and lot other great features.
Creating Btrfs Filesystem
Before creating any new btrfs, I am considering that you have already installed OpenSUSE 42.1 on your machine.
Now a days, btrfs package comes as pre-installed in most of the latest Linux distributions. If your OpenSUSE 42.1 system does not have btrfs package installed, please issue the following command to install it. Though this package suppose to be there automatically after install.
sudo zypper install btrfsprogs
After successful installation of the above command, now we need to enable the Kernel module for btrfs so that kernel can load the btrfs driver for us. To do so, issue the below command.
sudo modprobe btrfs
For this tutorial, you will need 3 unformatted disk drives or empty disks on to the system to create a btrfs file system. Though you can convert your existing disk drives into btrfs as well. In that case, you will lose your data for those drives. I am attaching 3 Disks with 4GB size and all of them are empty disks. I hope you know how to create partitions by using fdisk command.
Use this command to show your all hard disks drives information.
sudo fdisk -l
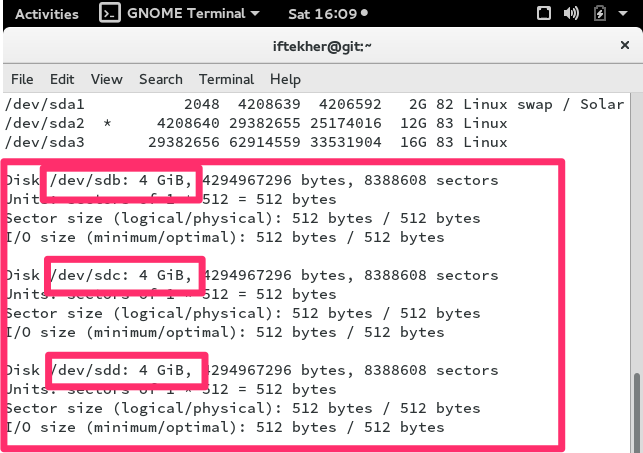
From the below screenshot, you can see that I have 3 drives each with a size of 4GB. /dev/sdb, /dev/sdc & /dev/sdd are those 3 drives for me. The above command will show yours disks drives.
To create a btrfs file system on /dev/sdb, /dev/sdc, and /dev/sdd, simply run the following command
sudo mkfs.btrfs /dev/sdb /dev/sdc /dev/sdd
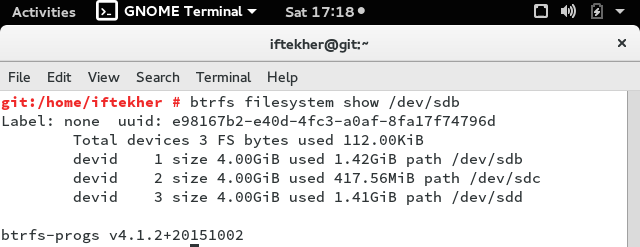
If you want to know details about your newly created btrfs file system, issue the following command in your terminal and you will see something like this which may be similar to your’s if you use 3 disks and if the disks names are as same as mine.
sudo btrfs filesystem show /dev/sdb
If you want to get a list of all btrfs file systems of you system, just type the following on your terminal.
sudo btrfs filesystem show
Mounting btrfs File Systems
Let’s mount our newly created btrfs file system. To do so, open a terminal and create a folder or directory so that we can mount our btrfs file system over there. The folder that we will create now will be used as mount point for the btrfs file system.
sudo mkdir /newbtrfsdir
Here, newbtrfsdir is the folder name and it will be used as mount point for the btrfs file system that we just created earlier.
And now, mount the btrfs file system on newbtrfsdir folder.
sudo mount /dev/sdb /newbtrfsdir
Our btrfs has been mounted on newbtrfsdir folder. To view whether it is mounted or not, let’s issue the below command.
sudo df -h
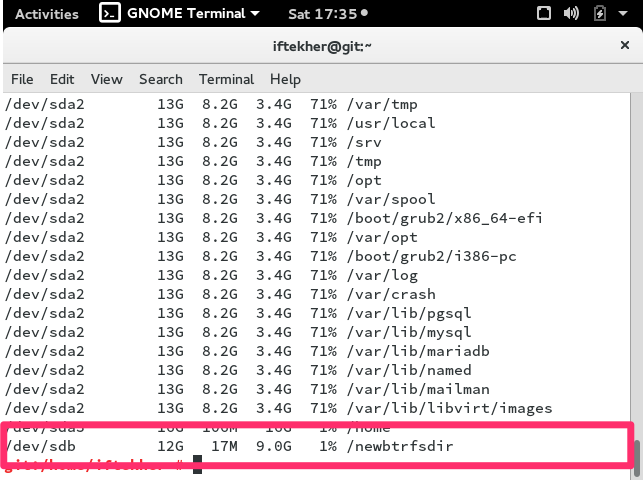
After issuing the above command, you will see that the btrfs file system has been mounted on /newbtrfsdir location. Here is a screenshot taken from my system for you guys.
From the above image, you can see that the size of my btrfs file system is 12G cause I use 3 disks drives with 4GB size.
Re-sizing btrfs File Systems
btrfs file systems can be resized online to meet your needs so there is no need to unmount the volume / partition or no need to reboot your system. Amazing feature.
To decrease your /newbtrfsdir volume by 3GB, just simply type the following in your terminal
sudo btrfs filesystem resize -3g /newbtrfsdir
And we are done reducing our 12GB to 9GB. Let’s check the disk free status to make sure that we reduce the capacity of it. To check it, issue the below command
sudo df -h
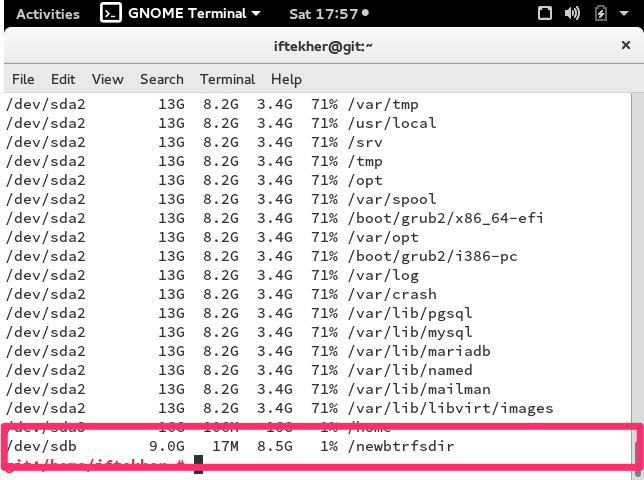
I am attaching my system screenshot over here so that you can understand it.
From this screenshot, you can see that current disk size has been reduced to 9GB. But when we mount it, it was 12GB. Just scroll up a bit in this article, and you can see the previous screenshot where original disk size was 12G.
We are done reducing the disk size.
Let’s increase the size now by 2GB. Issue the below command to increase the size by 2GB.
sudo btrfs filesystem resize +2g /newbtrfsdir
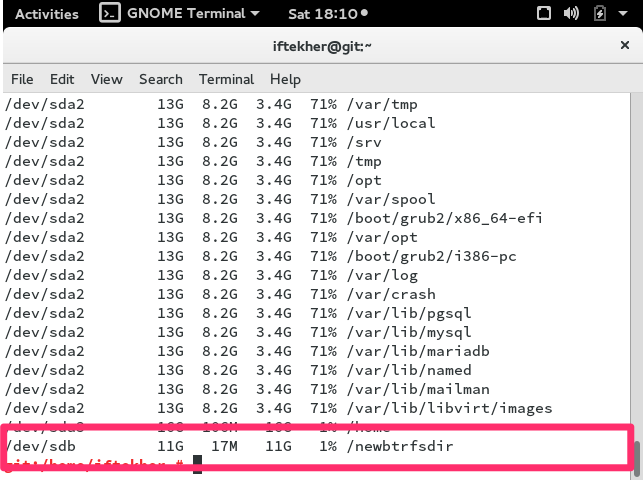
Let’s check the disk free status again to make sure that we increase the capacity of it.
sudo df -h
You can see that current size is 11GB. So, we increased the size by 2GB.
Note: Is not advised to perform these operations on a LIVE or Production server. Do not do this on a LIVE or Production server unless it is required.
Add / Delete Hard Disks Drives
Say, you want to add or delete a drive to your existing btrfs file system. With our current tutorial, we have three (3) disk drives and they are /dev/sdb, /dev/sdc & /dev/sdd. Let’s add one more to it. To do so, issue the below command in a terminal.
sudo btrfs device add /dev/sdX /newbtrfsdir
Where sdX is the new disk drive. if your disk drive is sde, then the command should be something like this.
sudo btrfs device add /dev/sde /newbtrfsdir
To spread meta data all over 4 disk drives, you need to issue the below command on your terminal. This is must.
sudo btrfs filesystem balance /newbtrfsdir
To remove a hard disk drive, simply type the following in the terminal.
sudo btrfs device delete /dev/sdb /newbtrfsdir
The above command will remove /dev/sdb disk form your btrfs file system.
I hope you will like the article and it will help you to learn more about btrfs with OpenSUSE.
Have a great day.


