Introduction
Elasticsearch is an Open Source Search Server based on Lucene, A platform for RESTful search and analytics. It stores all of the logs, provide a scalable searching solution.It is java based with real time and it can scale to thousand of nodes immediately.
Features
Full Text search
When database grows, performance of query operations got affected, to resolve this indexing and cataloging the words in text filed is adopted.Elasticsearch provides full text search capability like powerful query language.
Real Time Data
Data is available immediately after it is produces for search and analytics.
Reduce chances of data loss
The Transaction logs (History of action executed by a Database management system) are stored to multiple nodes in the cluster to reduce the changes of data losses.
Indexing
Complex real world entitites are stored in Elasticsearch as Structured JSON (JavaScript Object Notation) documents. All fields of the document are indexed by default and can be used as a single query. “Elasticseach indices are the collection of JSON Documents.”
Install Elasticsearch
My testing machine:
- OS: Ubuntu 14.04
- RAM: 4 GB
Software dependencies:
- Oracle Java 8 or above.
Add java repo to ubuntu
root@user:~# add-apt-repository -y ppa:webupd8team/java
Update OS
root@user:~# apt-get update
Install Oracle-Java
root@user:~# apt-get install oracle-java8-installer
Check Java version after installation is complete
root@user:~# java -version
Sample Output
java version "1.8.0_51" Java(TM) SE Runtime Environment (build 1.8.0_51-b16) Java HotSpot(TM) 64-Bit Server VM (build 25.51-b03, mixed mode)
Add Elasticsearch repository
Download and Install Elasticsearch Public Signing Key
root@user:~# wget -qO - https://packages.elastic.co/GPG-KEY-elasticsearch | sudo apt-key add -
Create the repolist for Elasticsearch
root@user:~# echo "deb http://packages.elastic.co/elasticsearch/1.7/debian stable main" | sudo tee -a /etc/apt/sources.list.d/elasticsearch-1.7.list
Update Package
root@user:~# apt-get update
Install Elastic Search
root@user:~# apt-get install elasticsearch
Enable Elasticsearch to start automatically at bootup
root@user:~# update-rc.d elasticsearch defaults 95 10
Sample output
Adding system startup for /etc/init.d/elasticsearch ...
 /etc/rc0.d/K10elasticsearch -> ../init.d/elasticsearch
 /etc/rc1.d/K10elasticsearch -> ../init.d/elasticsearch
 /etc/rc6.d/K10elasticsearch -> ../init.d/elasticsearch
 /etc/rc2.d/S95elasticsearch -> ../init.d/elasticsearch
 /etc/rc3.d/S95elasticsearch -> ../init.d/elasticsearch
 /etc/rc4.d/S95elasticsearch -> ../init.d/elasticsearch
 /etc/rc5.d/S95elasticsearch -> ../init.d/elasticsearch
Open Elasticsearch Configuration file and edit as per requirement
root@user:~# vim /etc/elasticsearch/elasticsearch.yml
Search for network.host and replace to network.host: localhost
Sample output
# Set the bind address specifically (IPv4 or IPv6):
#network.bind_host: 192.168.0.1

# Set the address other nodes will use to communicate with this node. If not
# set, it is automatically derived. It must point to an actual IP address.
#network.publish_host: 192.168.0.1

# Set both 'bind_host' and 'publish_host':
#network.host: 192.168.0.1
network.host: localhost

# Set a custom port for the node to node communication (9300 by default):
#transport.tcp.port: 9300

# Enable compression for all communication between nodes (disabled by default):
#transport.tcp.compress: true

# Set a custom port to listen for HTTP traffic:
#http.port: 9200
Restart elasticsearch services
root@user:~# /etc/init.d/elasticsearch restart
Finally, test your Elastcsearch is working properly or not!
root@user:~# curl -X GET 'http://localhost:9200'
Sample output message
{
 "status" : 200,
 "name" : "Fury",
 "cluster_name" : "elasticsearch",
 "version" : {
 "number" : "1.7.1",
 "build_hash" : "b88f43fc40b0bcd7f173a1f9ee2e97816de80b19",
 "build_timestamp" : "2015-07-29T09:54:16Z",
 "build_snapshot" : false,
 "lucene_version" : "4.10.4"
 },
 "tagline" : "You Know, for Search"
}
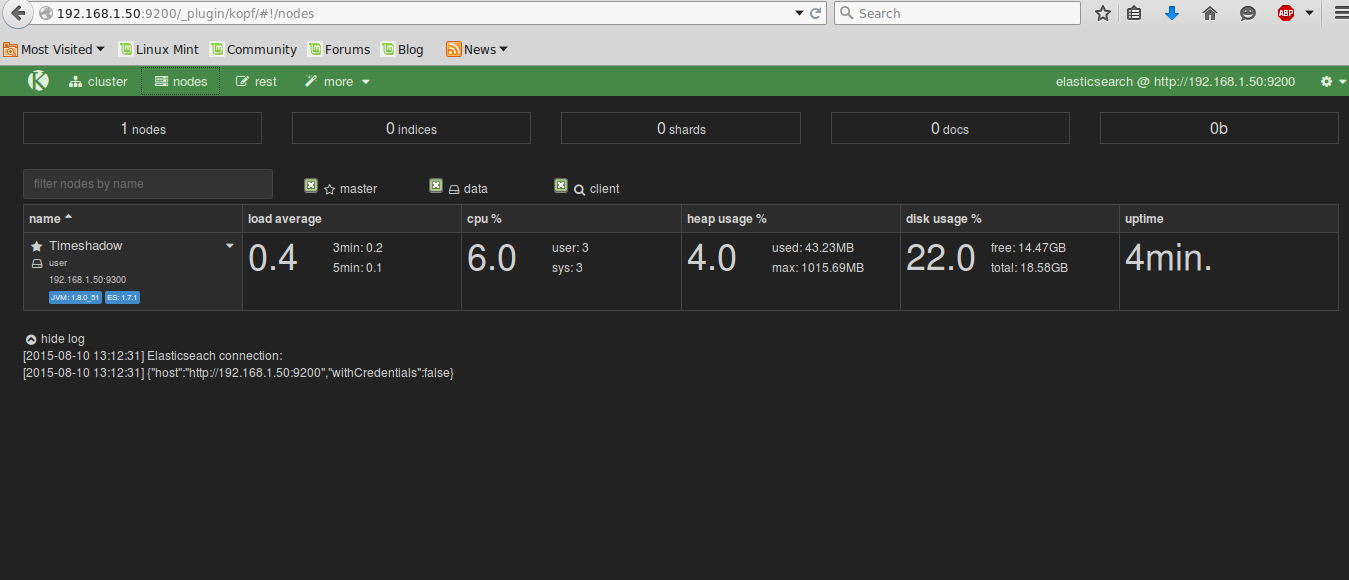
Install Elasticsearch kopf (A gui Admin panel for Elastcisearch)
root@user:~# /usr/share/elasticsearch/bin/plugin -install lmenezes/elasticsearch-kopf
Sample Output:
To get health status of Cluster.
root@user:/etc/logstash/conf.d# curl -XGET 'http://localhost:9200/_cluster/health?pretty=true'
Sample Output:
{
 "cluster_name" : "elasticsearch",
 "status" : "yellow",
 "timed_out" : false,
 "number_of_nodes" : 1,
 "number_of_data_nodes" : 1,
 "active_primary_shards" : 1,
 "active_shards" : 1,
 "relocating_shards" : 0,
 "initializing_shards" : 0,
 "unassigned_shards" : 1,
 "delayed_unassigned_shards" : 0,
 "number_of_pending_tasks" : 0,
 "number_of_in_flight_fetch" : 0
}
Application of Elasticsearch
With Elasticsearch you determine what kind of operation to be performed on data. CRUD method is used to perform operations. Create, Read, Update and Delete, which are performed by HTTP method POST, GET and DELETE respectively.
e.g. Let’s create some indext for Unixmen example:
root@user:/etc/logstash/conf.d# curl -PUT "http://localhost:9200/unixmen/example/1" -d ' { "type": "slide", "quantity": 2 }'
Output will be like:
{"_index":"unixmen","_type":"example","_id":"1","_version":1,"created":true}root@user:/etc/logstash/conf.d#
Let’s Retrieve this information:
root@user:/etc/logstash/conf.d# curl -XGET "http://localhost:9200/unixmen/example/1"
Sample output:
{"_index":"unixmen","_type":"example","_id":"1","_version":1,"found":true,"_source": { "type": "slide", "quantity": 2 }}
To delete certain information.
root@user:/etc/logstash/conf.d# curl -XDELETE "http://localhost:9200/unixmen/example/1"
Sample Output:
{"found":true,"_index":"unixmen","_type":"example","_id":"1","_version":1}
We will cover the rest in our upcoming articles. Stay tuned.


