Chrome OS+Ubuntu = Chromixium
Today, We have come up with an interesting news for both Ubuntu and Chrome OS users. Meet Chromixium – the new modern desktop operating system based on Ubuntu that has the functionality, look and feel of Google’s “Chrome OS”. Chromixium has brought the elegant simplicity of Chromebook and flexibility and stability of Ubuntu together. Chromixium puts the web front and center of the user experience. Web and Chrome apps work straight out of the browser to connect you to all your personal, work and education networks. Sign into Chromium to sync all your apps and bookmarks. When you are offline or when you need more power, you can install any number of applications for work or play, including LibreOffice, Skype, Steam and a whole lot more. Security updates are installed seamlessly and effortlessly in the background and will be supplied until 2019. You can install Chromixium in place of any existing operating system, or alongside Windows or Linux.
Chromixium is based on a custom 32 bit Ubuntu 14.04 LTS and it supports wide range of laptops, desktops, network, video and sound cards. At present, there is no 64bit version available, however we can install and use Chromixium on both 32 and 64bit systems. Chromixium is very new to the Linux distro world, and the final stable Chromixium 1.0 version has just arrived few days ago.
Features
The current version includes the following specifications:
- LTS (Long Term Support) Linux Kernel 3.13 ;
- Chromium Web Browser ;
- Pepperflash Plugin ;
- Openbox window manager ;
- Compton desktop compositor ;
- Plank dock ;
- LXPanel ;
- Nautilus (Files) ;
- GTK+3 applications.
Hardware Requirements
Chromixium is very light weight distro similar to Lubuntu.
The minimum hardware requirements are:
- 1GHZ Processor, Intel/AMD (dual core preferred) ;
- 512MB RAM (1GB preferred) ;
- 4GB hard disk space (8GB prefered) ;
- 1GB USB device or DVD-R/RW ;
- Video graphics capable of 800×600 resolution (1024×600 or better preferred) ;
- Wired (ethernet) or wireless (WiFi) Internet access ;
- A computer that is capable of booting from a DVD or USB ;
- Intel hardware is generally better supported ‘out-of-the-box’ on Linux-based operating systems.
Why Chromixium?
The answer is very simple. We can have both Chrome OS and Ubuntu’s experience together.
As you may know, Chromebooks are the easy to use, cheap laptop PC’s specially designed for the Web. They are running with Chrome OS, a customized Linux distribution. Chromebooks are one of the fastest growing segment of PC sales since 2013.
Chrome OS comes pre-installed with Chromebooks, and you can’t download or buy Chrome OS to use it on other devices. This is why Chromixium has born. The Chromixium desktop is built on top of the Ubuntu and imitates the look, functionality, and feel of the Chrome OS. Unlike Chrome OS, Chromixium will run on any computer. So anybody can turn an ordinary desktop in to Chromebook in a couple of minutes using Chromixium.
Since, it is based on Ubuntu, you can also install all conventional applications from Ubuntu or third party repositories, and also other web apps from chrome store. Additionally, you can even run Windows related applications using Wine in Chromixium.
Install Chromixium
Download the latest stable version from here. Chromixium is available as installable live ISO. You can create either a bootable DVD or USB drive.
Start the live session.
The live user account is “user” with the password “user”. This account has sudo privileges and is needed to launch the installer.
I am quite surprised while playing in live session. Chromixium is really fast. And, the desktop is clean, minimal, elegant, and exactly looks like Chrome OS.
Click on the installer icon on the dock (green-arrows) or right-click on the desktop and go to Applications–>System–>Chromixium Installer.
Enter the password “user” and the installer will open.
Accept the License agreement.
Next, you’ll be asked to select the list of available partitioning method. Here, I will go with Automatic partition method.
Click Forward.
Make sure your hard drive doesn’t has any important files. And click Yes to continue.
Click Forward.
Enter the new user details.
Choose the last partition with ext4 an ext4 installation.
Click in the Mount Point box and select “/” from the drop-down list.
Then, Click on the green arrow to save the partition settings. If the partition is not empty then tick the Format box.
Finally click Next to continue the installation.
Finally, click Start to install the live system.
This will take few minutes. Make sure you have connected to the internet.
Installation is completed. Click Ok to continue.
Next, the installer will ask you to set the Timezone. Click Yes to change the Timezone, or else click No to keep the defaults.
Select the Geographical area, for example Asia in my case.
Select the correct Timezone (Kolkata in my case).
Next we have to configure keymap. I go with default kepmap settings which is US, so selected Don’t touch keymap option. If you want to configure different keymap, ‘select Keymap from full list’ option and choose the required keymap.
Select Keyboard model.
Select ‘Country of Origin for the keyboard’ option.
Select Keyboard layout.
Click Forward.
If you want to install additional language packs, select them from the list. Here, I want to install Indian language pack.
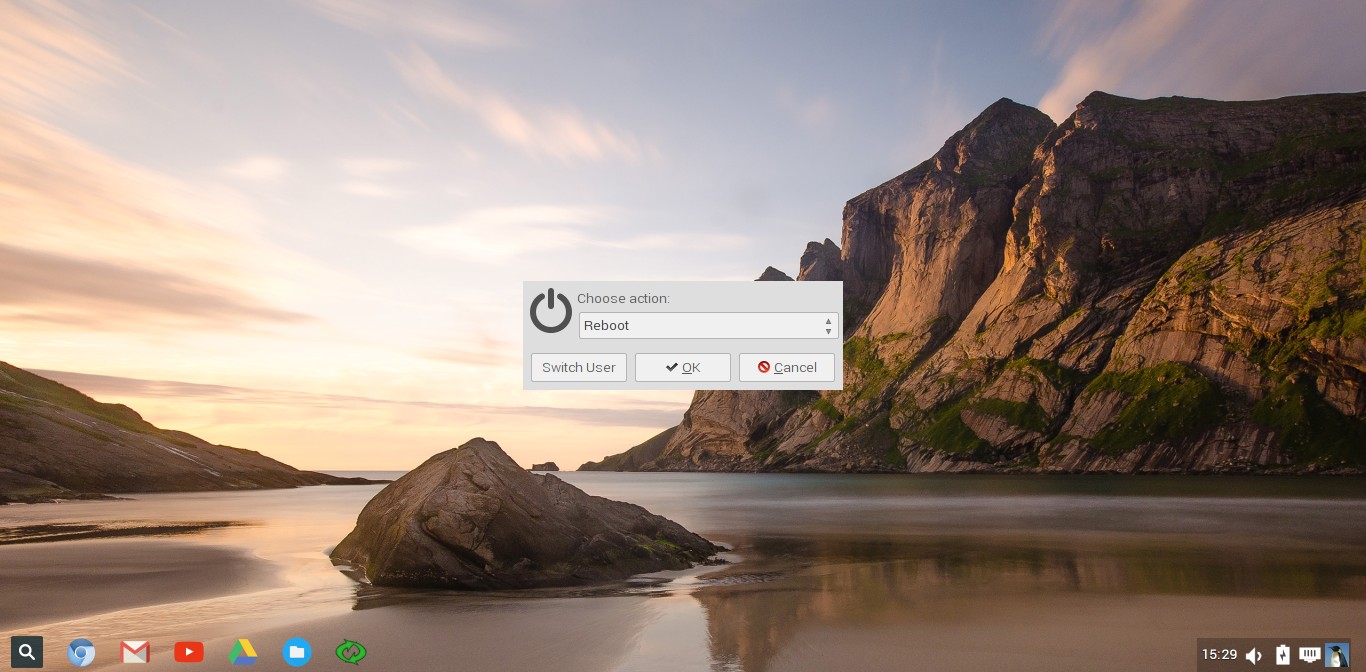
Finally, remove the installation medium, and click Reboot.
Now, log in with your new user.
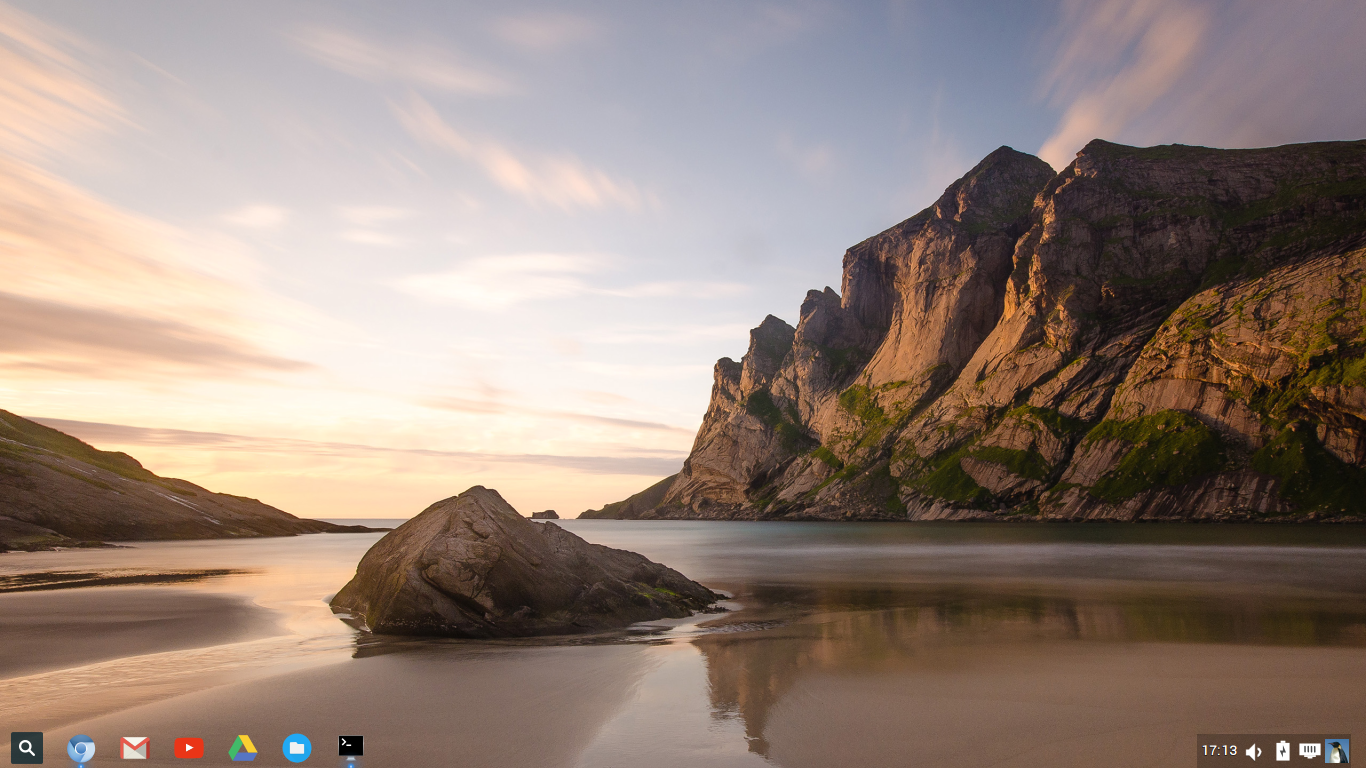
Here is the Chromixium’s default desktop.
Post Installation
First, update your system.
Open Terminal, and run the following command:
(To open Terminal, right click anywhere on the Desktop and go to Applications -> Accessories -> Terminal).
sudo apt-get update && sudo apt-get upgrade
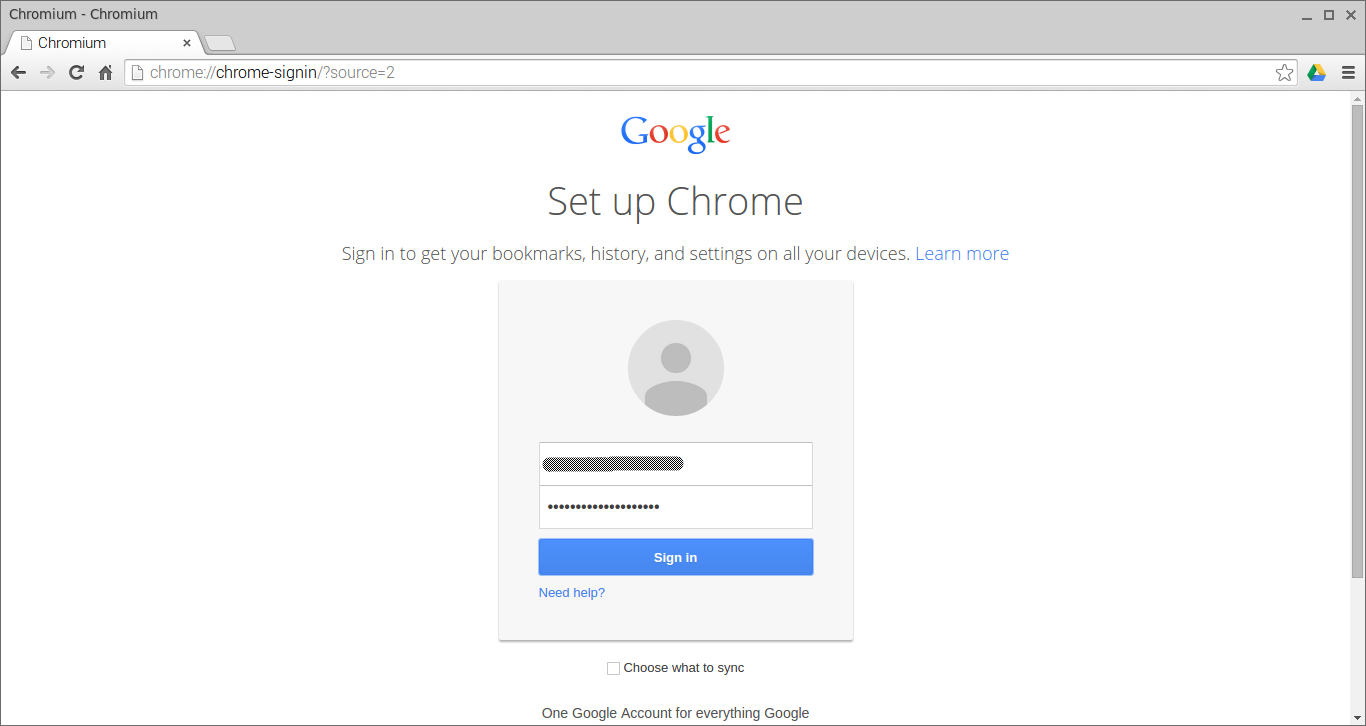
Then, sign into your Google account to keep your bookmarks, extensions, chrome applications synced across devices, such as Android mobiles, tablets, Linux, Windows, and Mac computers.
To log in to Google account, click on the Chromium browser icon in the Plank Dock.
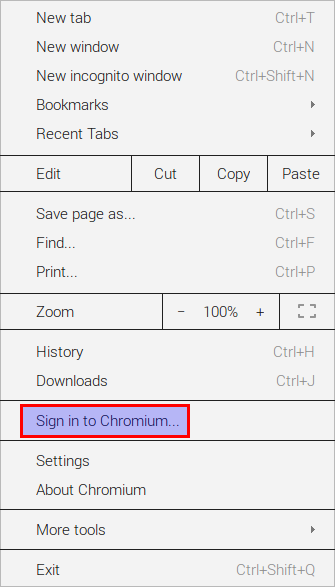
Then, click on the ‘Customize and Control’ icon(the 3 bars icon near Bookmarks button) on the top right corner of Chromium browser.
Click on the ‘Sign in to Chromium’.
Enter your Gmail user name and password.
Now, the bookmarks will appear in the browser and chrome apps will appear in the launcher.
Chromixium First look
As I said before, Chromixium is an elegant, light weight, and fast operating system. It quite resembles the Chrome OS in look, functionality and feel.
To access the list of available applications, just right click on the Desktop. There you go. The applications are grouped and arranged in different categories, such as Settings, Accessories, Graphics, Internet, Multimedia, System. Each category has plenty of basic applications.
Also, the Chromixium has a plank dock in the bottom that contains the shortcuts to launch various applications like Chromixium App launcher, Chromium web browser, Gmail, Youtube, Google Drive, File manager etc.
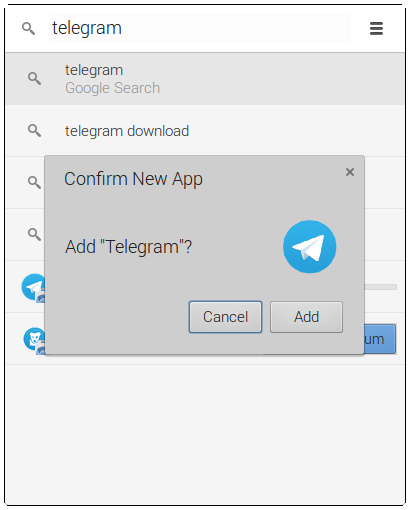
From the Chromixium App launcher, you can access various Google cloud applications, such as Google Docs, Chrome web store etc. If you want to install a web app, just enter the name in search box.
If you want to install a web app, for example Telegram, just enter the app name in the Chromixium App launcher’s search box and select Add to Chromium.
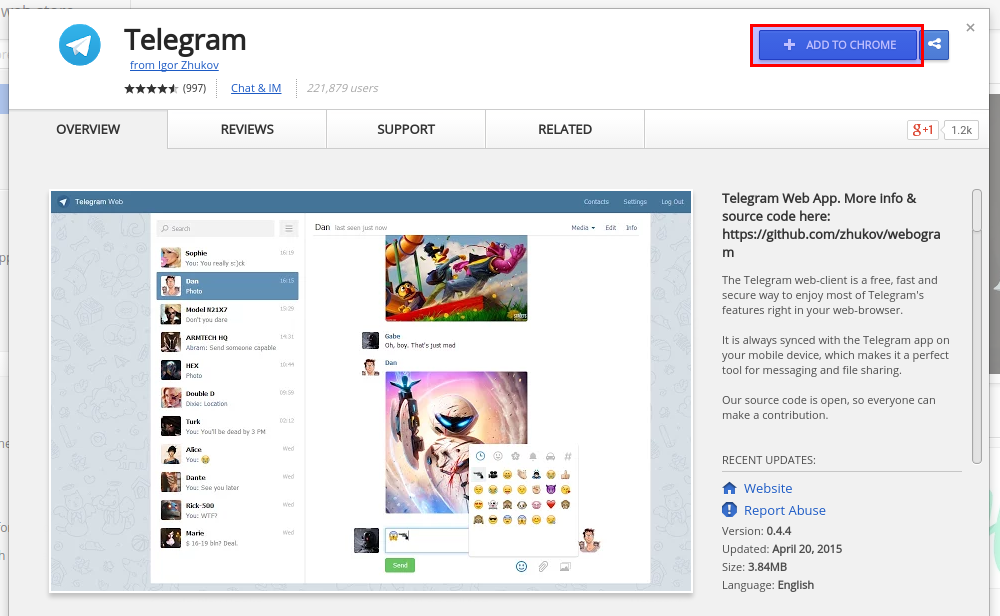
The Chrome web store will automatically open. Just click the ‘Add to Chrome’ button to install the web app.
After installing the new web app(Ex.Telegram), start using it from Chromixium App Launcher.
To install normal Ubuntu conventional applications, open Terminal, and run:
sudo apt-get install <package-name>
If you are dual booting along side Windows or other OS, you will probably find that Chromium has over written their bootloaders. So, you may not see the list of boot choices from the Boot menu.
To fix this issue, run:
sudo update-grub2
That’s it. Next you reboot, you should now see the list of installed operating system’s entries will be found in the boot menu.
Chromixium Control Panel
The Chromixium Control Panel is the place where we’re doing all kind of administration tasks, customization, software installation and removal etc.
Another notable feature (an important one) is Systemback. Chromixium comes with Systemback preinstalled. Systemback is an open source, system backup and restore application. Using Systemback, we can easily create backups of system and users configuration files. In case of problems, we can easily restore the previous state of the system. There are extra features like system copying, system installation and Live system creation.
To know more about Systemback, refer the following link.
Conclusion
Chromixium is the quite surprising new comer to the Linux world. It is more attractive, modern and functional operating system with plenty of good features. Chromixium combines the power of the web, with the power of the Ubuntu and GNU/Linux desktop ecosystem. If you want to taste the Chrome OS and Ubuntu experience together, then this is going to be a best choice. Give it a try, you won’t be disappointed.
Cheers!
Source and reference: Chromixium website



![Chromixium 1.0 [Running] - Oracle VM VirtualBox_001](http://unixmen.com/wp-content/uploads/2015/05/Chromixium-1.0-Running-Oracle-VM-VirtualBox_001.jpg)
![Chromixium 1.0 [Running] - Oracle VM VirtualBox_002](http://unixmen.com/wp-content/uploads/2015/05/Chromixium-1.0-Running-Oracle-VM-VirtualBox_002.jpg)
![Chromixium 1.0 [Running] - Oracle VM VirtualBox_003](http://unixmen.com/wp-content/uploads/2015/05/Chromixium-1.0-Running-Oracle-VM-VirtualBox_003.jpg)
![Chromixium 1.0 [Running] - Oracle VM VirtualBox_007](http://unixmen.com/wp-content/uploads/2015/05/Chromixium-1.0-Running-Oracle-VM-VirtualBox_007.jpg)
![Chromixium 1.0 [Running] - Oracle VM VirtualBox_001](http://unixmen.com/wp-content/uploads/2015/05/Chromixium-1.0-Running-Oracle-VM-VirtualBox_0011.jpg)
![Chromixium 1.0 [Running] - Oracle VM VirtualBox_002](http://unixmen.com/wp-content/uploads/2015/05/Chromixium-1.0-Running-Oracle-VM-VirtualBox_0021.jpg)
![Chromixium 1.0 [Running] - Oracle VM VirtualBox_003](http://unixmen.com/wp-content/uploads/2015/05/Chromixium-1.0-Running-Oracle-VM-VirtualBox_0031.jpg)
![Chromixium 1.0 [Running] - Oracle VM VirtualBox_004](http://unixmen.com/wp-content/uploads/2015/05/Chromixium-1.0-Running-Oracle-VM-VirtualBox_0041.jpg)
![Chromixium 1.0 [Running] - Oracle VM VirtualBox_005](http://unixmen.com/wp-content/uploads/2015/05/Chromixium-1.0-Running-Oracle-VM-VirtualBox_0051.jpg)
![Chromixium 1.0 [Running] - Oracle VM VirtualBox_006](http://unixmen.com/wp-content/uploads/2015/05/Chromixium-1.0-Running-Oracle-VM-VirtualBox_0061.jpg)
![Chromixium 1.0 [Running] - Oracle VM VirtualBox_007](http://unixmen.com/wp-content/uploads/2015/05/Chromixium-1.0-Running-Oracle-VM-VirtualBox_0071.jpg)
![Chromixium 1.0 [Running] - Oracle VM VirtualBox_008](http://unixmen.com/wp-content/uploads/2015/05/Chromixium-1.0-Running-Oracle-VM-VirtualBox_0081.jpg)
![Chromixium 1.0 [Running] - Oracle VM VirtualBox_009](http://unixmen.com/wp-content/uploads/2015/05/Chromixium-1.0-Running-Oracle-VM-VirtualBox_009.jpg)
![Chromixium 1.0 [Running] - Oracle VM VirtualBox_010](http://unixmen.com/wp-content/uploads/2015/05/Chromixium-1.0-Running-Oracle-VM-VirtualBox_010.jpg)
![Chromixium 1.0 [Running] - Oracle VM VirtualBox_011](http://unixmen.com/wp-content/uploads/2015/05/Chromixium-1.0-Running-Oracle-VM-VirtualBox_011.jpg)
![Chromixium 1.0 [Running] - Oracle VM VirtualBox_012](http://unixmen.com/wp-content/uploads/2015/05/Chromixium-1.0-Running-Oracle-VM-VirtualBox_012.jpg)
![Chromixium 1.0 [Running] - Oracle VM VirtualBox_013](http://unixmen.com/wp-content/uploads/2015/05/Chromixium-1.0-Running-Oracle-VM-VirtualBox_013.jpg)
![Chromixium 1.0 [Running] - Oracle VM VirtualBox_016](http://unixmen.com/wp-content/uploads/2015/05/Chromixium-1.0-Running-Oracle-VM-VirtualBox_016.jpg)
![Chromixium 1.0 [Running] - Oracle VM VirtualBox_018](http://unixmen.com/wp-content/uploads/2015/05/Chromixium-1.0-Running-Oracle-VM-VirtualBox_018.jpg)
![Chromixium 1.0 [Running] - Oracle VM VirtualBox_019](http://unixmen.com/wp-content/uploads/2015/05/Chromixium-1.0-Running-Oracle-VM-VirtualBox_019.jpg)
![Chromixium 1.0 [Running] - Oracle VM VirtualBox_020](http://unixmen.com/wp-content/uploads/2015/05/Chromixium-1.0-Running-Oracle-VM-VirtualBox_020.jpg)
![Chromixium 1.0 [Running] - Oracle VM VirtualBox_021](http://unixmen.com/wp-content/uploads/2015/05/Chromixium-1.0-Running-Oracle-VM-VirtualBox_021.jpg)
![Chromixium 1.0 [Running] - Oracle VM VirtualBox_022](http://unixmen.com/wp-content/uploads/2015/05/Chromixium-1.0-Running-Oracle-VM-VirtualBox_022.jpg)
![Chromixium 1.0 [Running] - Oracle VM VirtualBox_024](http://unixmen.com/wp-content/uploads/2015/05/Chromixium-1.0-Running-Oracle-VM-VirtualBox_024.jpg)
![Chromixium 1.0 [Running] - Oracle VM VirtualBox_004](http://unixmen.com/wp-content/uploads/2015/05/Chromixium-1.0-Running-Oracle-VM-VirtualBox_004.jpg)
![Chromixium 1.0 [Running] - Oracle VM VirtualBox_005](http://unixmen.com/wp-content/uploads/2015/05/Chromixium-1.0-Running-Oracle-VM-VirtualBox_005.jpg)
![Chromixium 1.0 [Running] - Oracle VM VirtualBox_006](http://unixmen.com/wp-content/uploads/2015/05/Chromixium-1.0-Running-Oracle-VM-VirtualBox_006.jpg)


