About Citadel
Citadel is a free, open source Collaboration suite that can be used to setup and manage Email server, Calendars, address books, Instant messenger, mailing lists and much more. It is written mostly using “C” language and is a highly integrated Groupware Platform with a AJAX-powered “Web 2.0” interface, but also providing SMTP, IMAP, POP3, and GroupDAV access to its content.
Citadel offers versatile email services with very low administration needed. It provides its own implementations of these server protocols:
- IMAP
- POP3
- SMTP
- ManageSieve
- XMPP
- Citadel
It works well on most Linux operating systems, Solaris, and *BSD systems.
Prominent Features
Citadel has lot of useful features. Here, I list some important features.
- Calendar/scheduling
- Address books
- Bulletin boards (forums)
- Mailing list server
- Instant messaging
- Wiki and blog engines
- Multiple domain support
- A powerful web interface
- RSS aggregation
- and more…
Installation
1. Install required prerequisites
Log on to your system as root user and install the following prerequisites.
In DEB based systems:
apt-get update
apt-get upgrade
apt-get install build-essential curl g++ gettext shared-mime-info libssl-dev
In RPM based systems:
yum update
yum groupinstall "Development Tools"
The following additional packages are also recommended:
yum install gettext shared-mime-info openssl-devel
If you want to use system icons such as the GNOME File Icons in WebCit, install:
yum install gnome-icon-theme
Then, create proper symlinks as shown below in RPM based systems such as RHEL, CentOS.
cd /usr/local/webcit/static
ln -s /usr/share/icons/gnome/24x24/mimetypes icons
In Arch Linux:
pacman -S curl expat libical libsieve perl-berkeleydb
2. Install Citadel using Easy install script
After installing the required prerequisites, run the following command to install Citadel.
wget -q -O - http://easyinstall.citadel.org/install | sh
Press Enter to start:
Welcome to Citadel Easy Install
Running on: Linux Debian jessie/sid ( 3.19.0-15-generic x86_64)
We will perform the following actions:

Installation:
* Download/install supporting libraries (if needed)
* Download/install Citadel (if needed)
* Download/install WebCit (if needed)

Configuration:
* Configure Citadel
* Configure WebCit

Perform the above installation steps now? ## Press Enter ##
Accept License terms:
[...]

Do you accept the terms of this license?
If you do not accept the General Public License, Easy Install will exit.
Enter Y or Yes to accept: Y ## Type Y and Press Enter key ##
Be mindful that it will take lot of time, because this command will compile a lot of code.
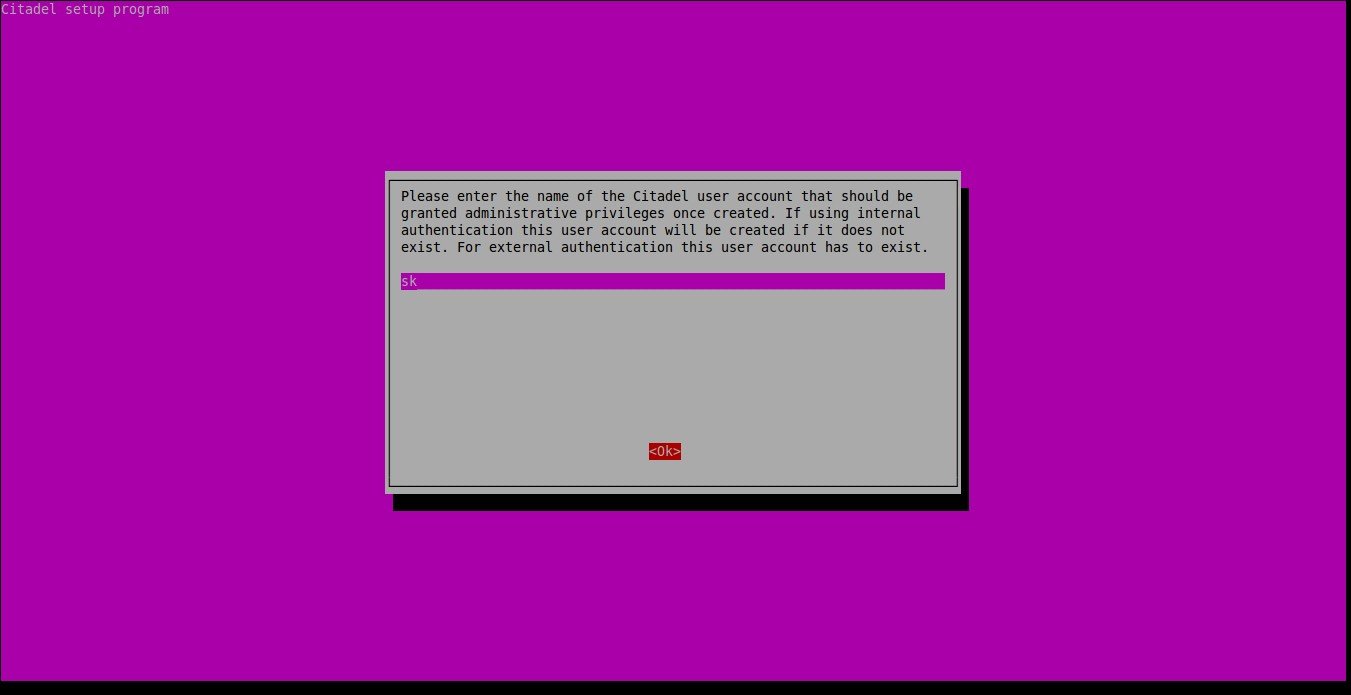
Please enter the name of the Citadel user account that should be granted administrative privileges once created.
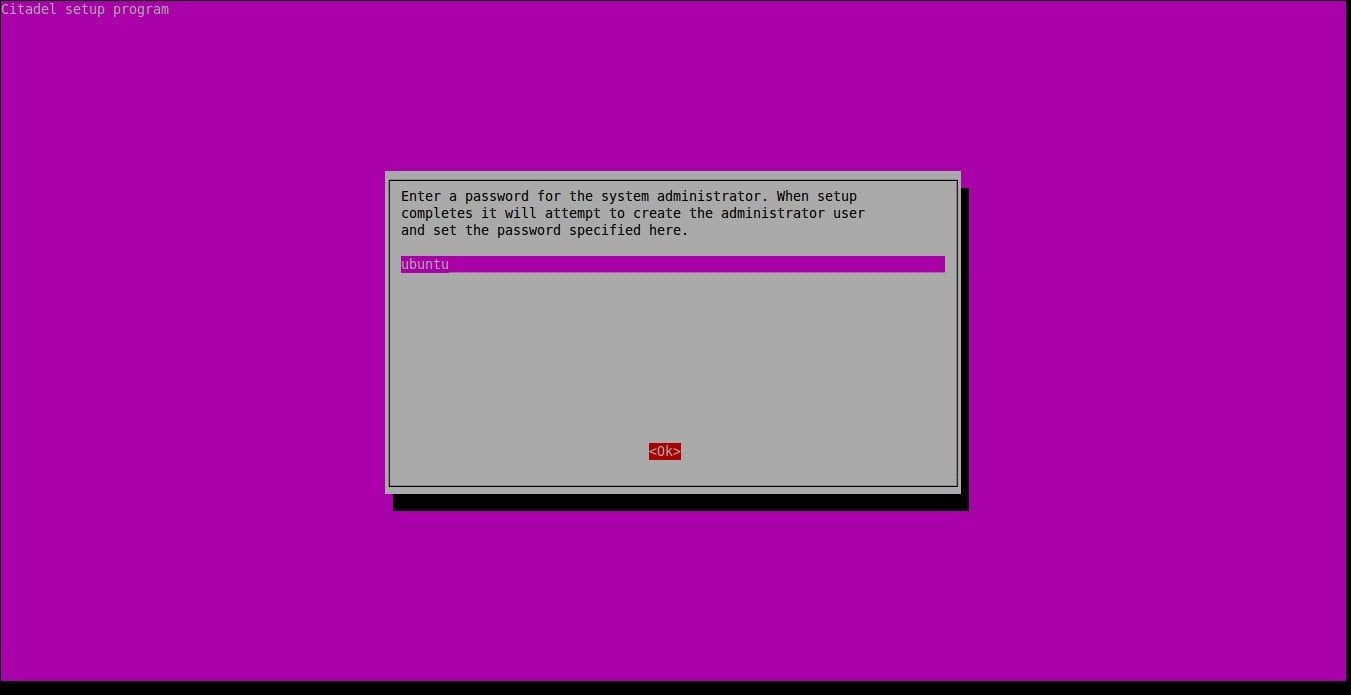
Enter a password for the system administrator.
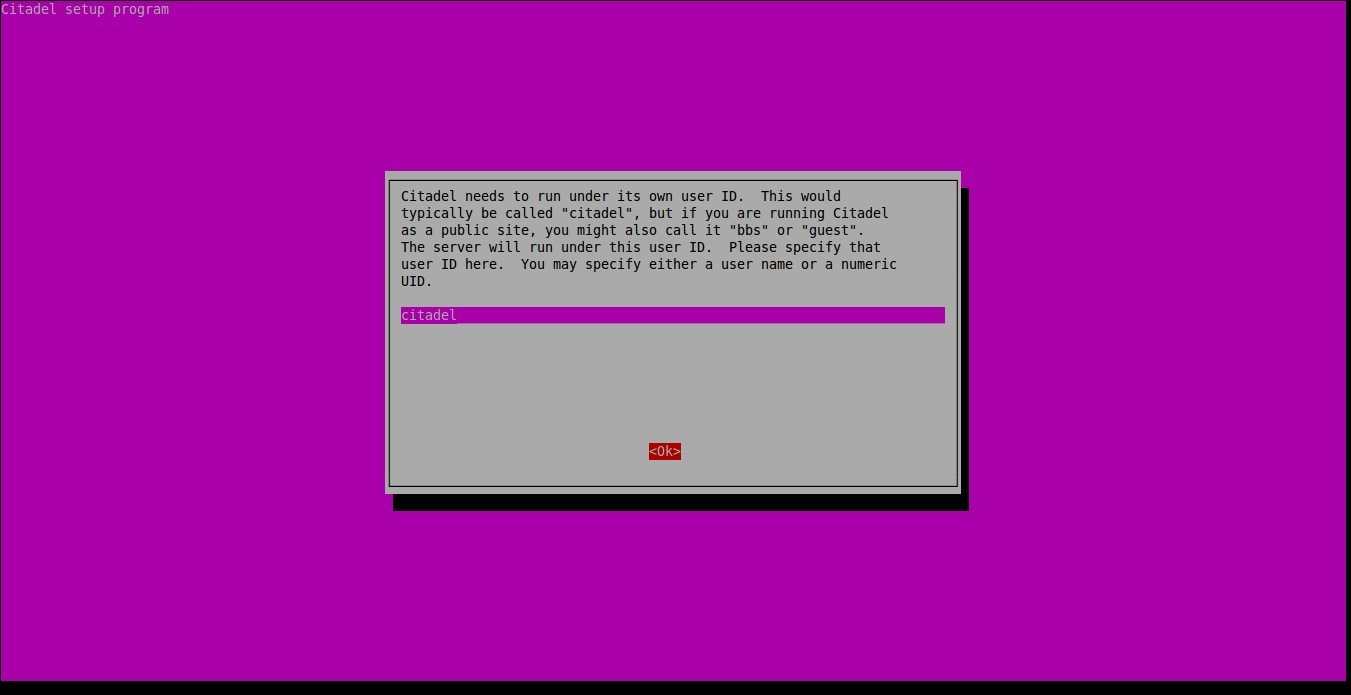
Citadel needs to run under its own user ID. This would typically be called “citadel”, but if you are running Citadel as a public site, you might also call it “bbs” or “guest”. The server will run under this user ID. Please specify that user ID here. You may specify either a user name or a numeric UID.
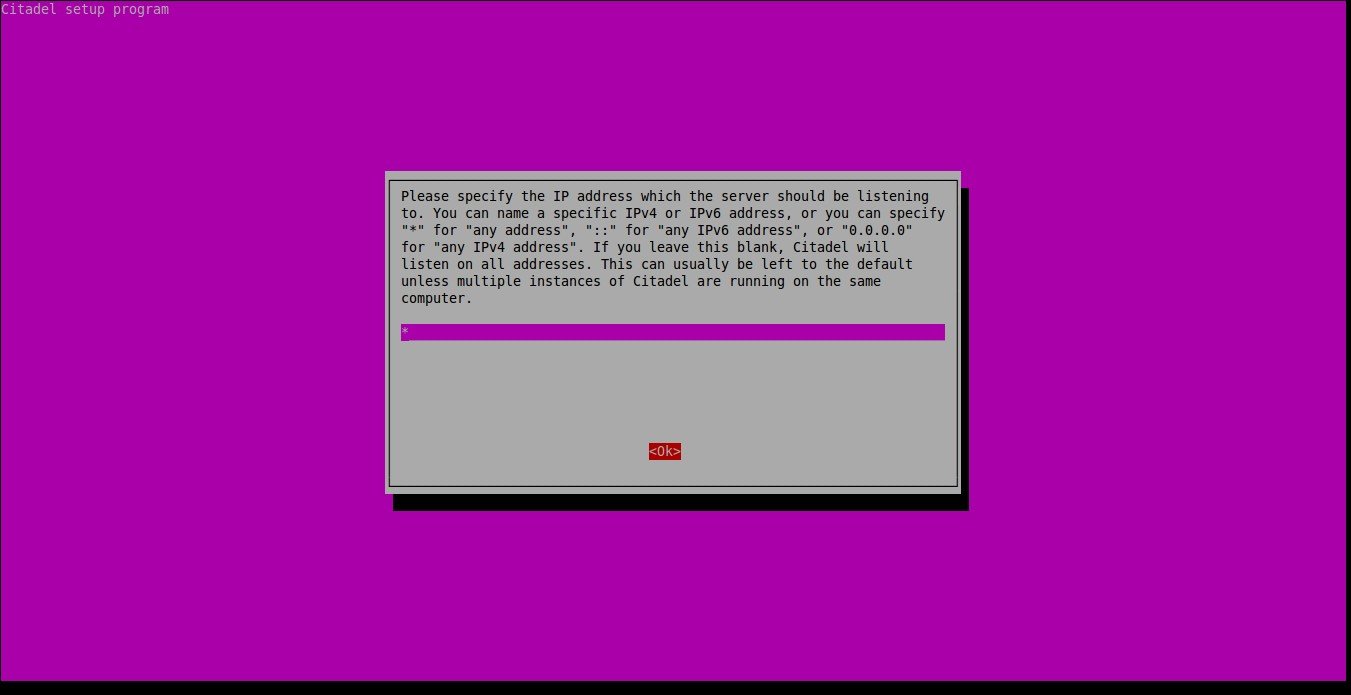
Please specify the IP address which the server should be listening to. You can name a specific IPv4 or IPv6 address, or you can specify “*” for “any address”, “::” for “any IPv6 address”, or simply “0.0.0.0” for “any IPv4 address”.
If you leave this blank, Citadel will listen on all addresses. This can usually be left to the default unless multiple instances of Citadel are running on the same computer.
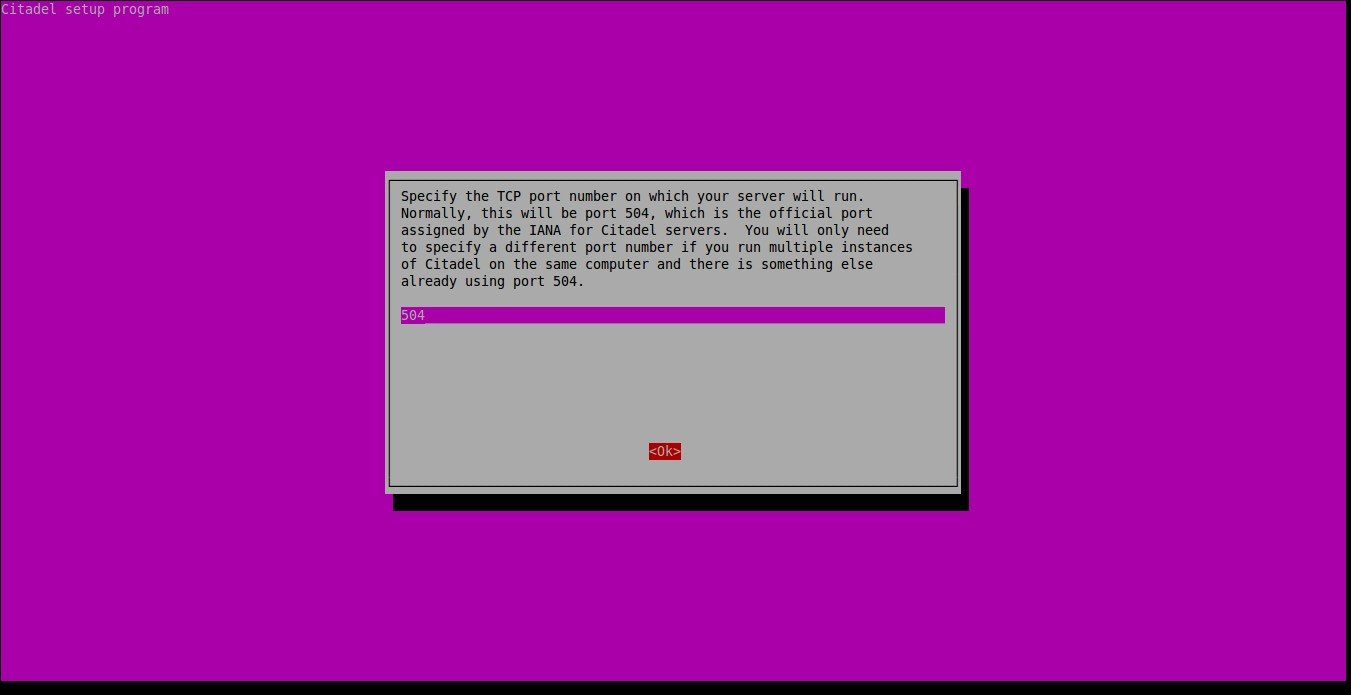
Specify the TCP port number on which your server will run. Normally, this will be port 504, which is the official port assigned by the IANA for Citadel servers. You will only need to specify a different port number if you run multiple instances of Citadel on the same computer and there is something else already using port 504.
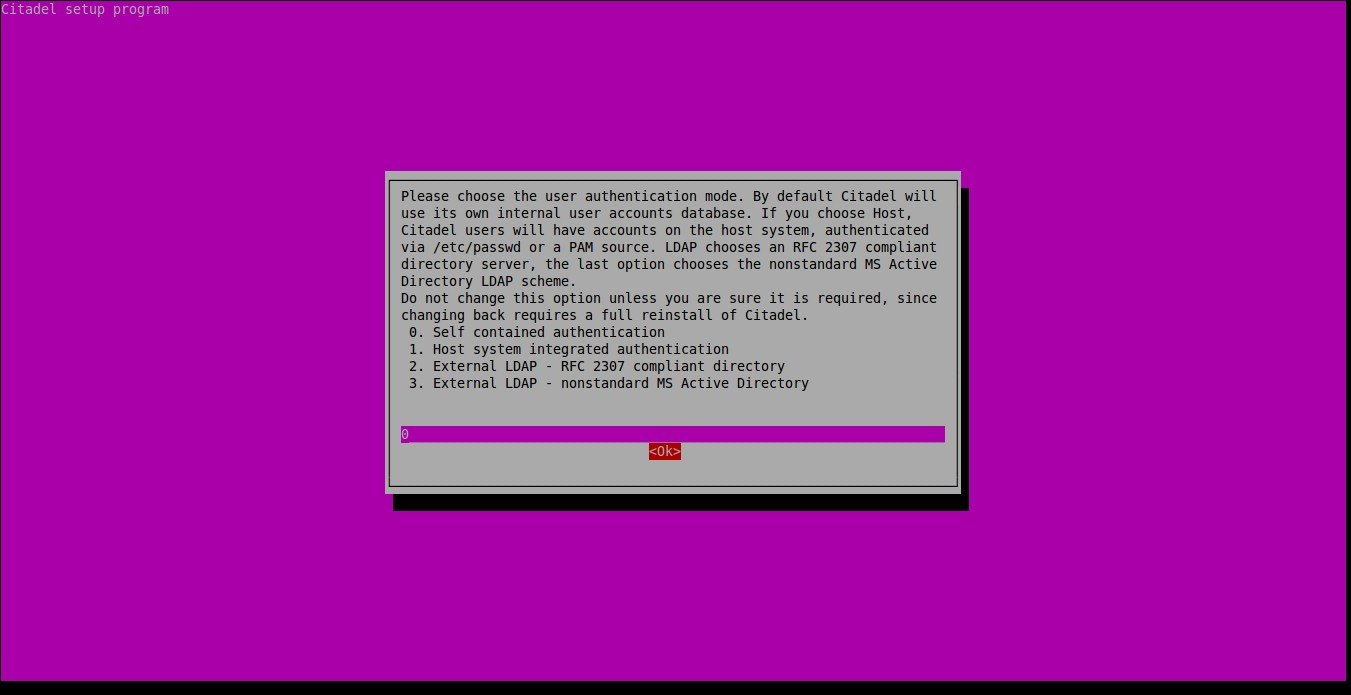
Please choose the user authentication mode. By default Citadel will use its own internal user accounts database. If you choose Host, Citadel users will have accounts on the host system, authenticated via /etc/passwd or a PAM source.
LDAP chooses an RFC 2307 compliant directory server, the last option chooses the nonstandard MS Active Directory LDAP scheme. Do not change this option unless you are sure it is required, since changing back requires a full reinstall of Citadel.
- 0 – Self contained authentication
- 1 – Host system integrated authentication
- 2 – External LDAP – RFC 2307 compliant directory
- 3 – External LDAP – nonstandard MS Active Directory
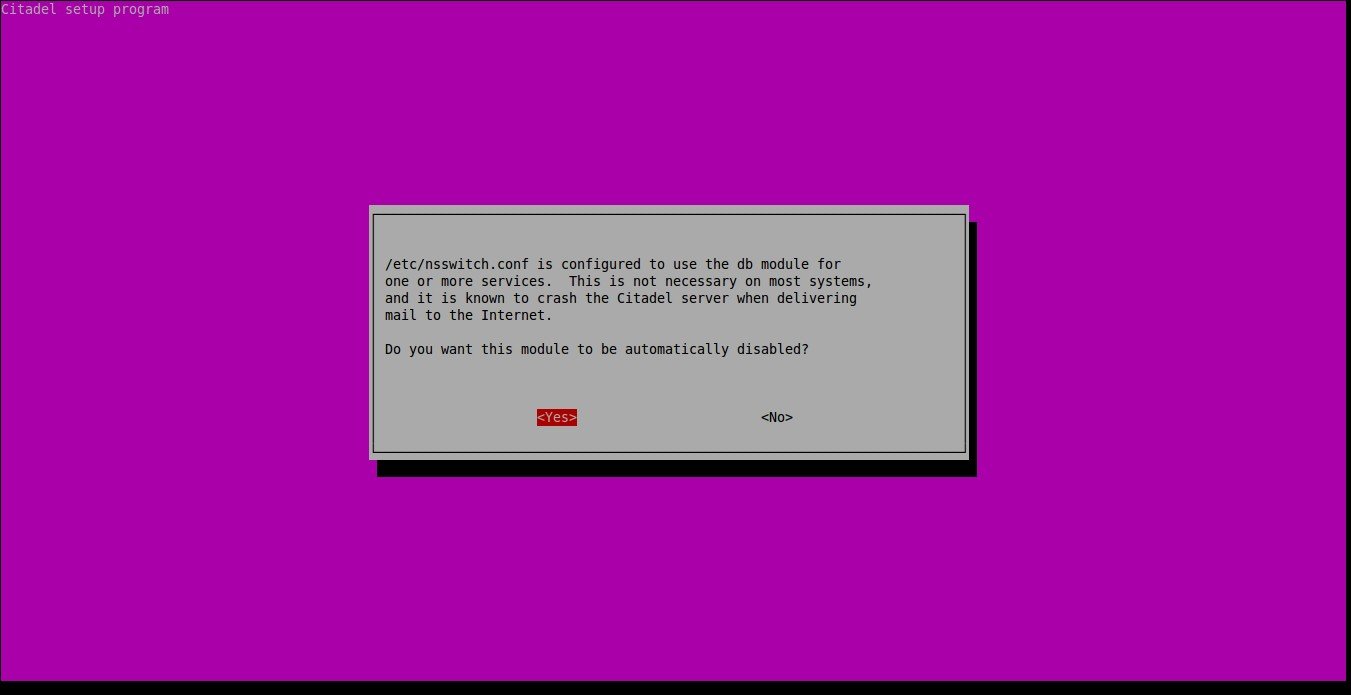
Select Yes and press enter.
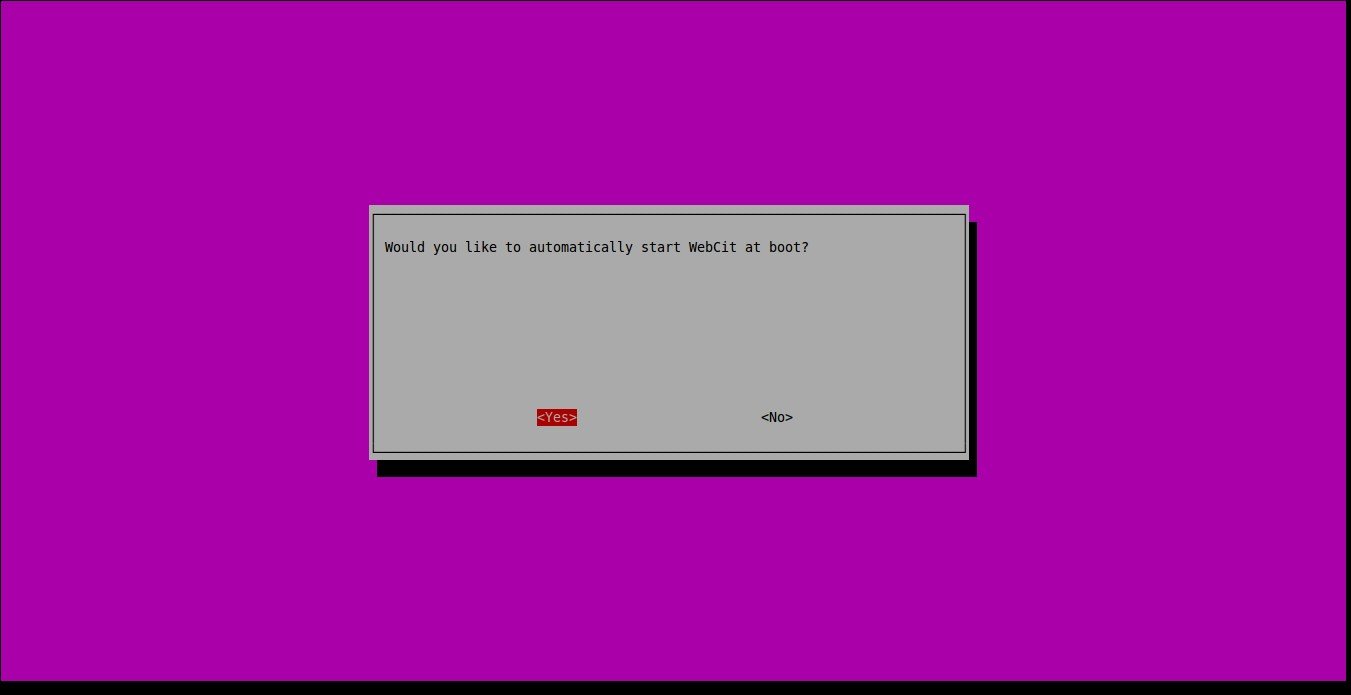
Select Yes and press enter to automatically start Webkit (Web console for Citadel) at every reboot.
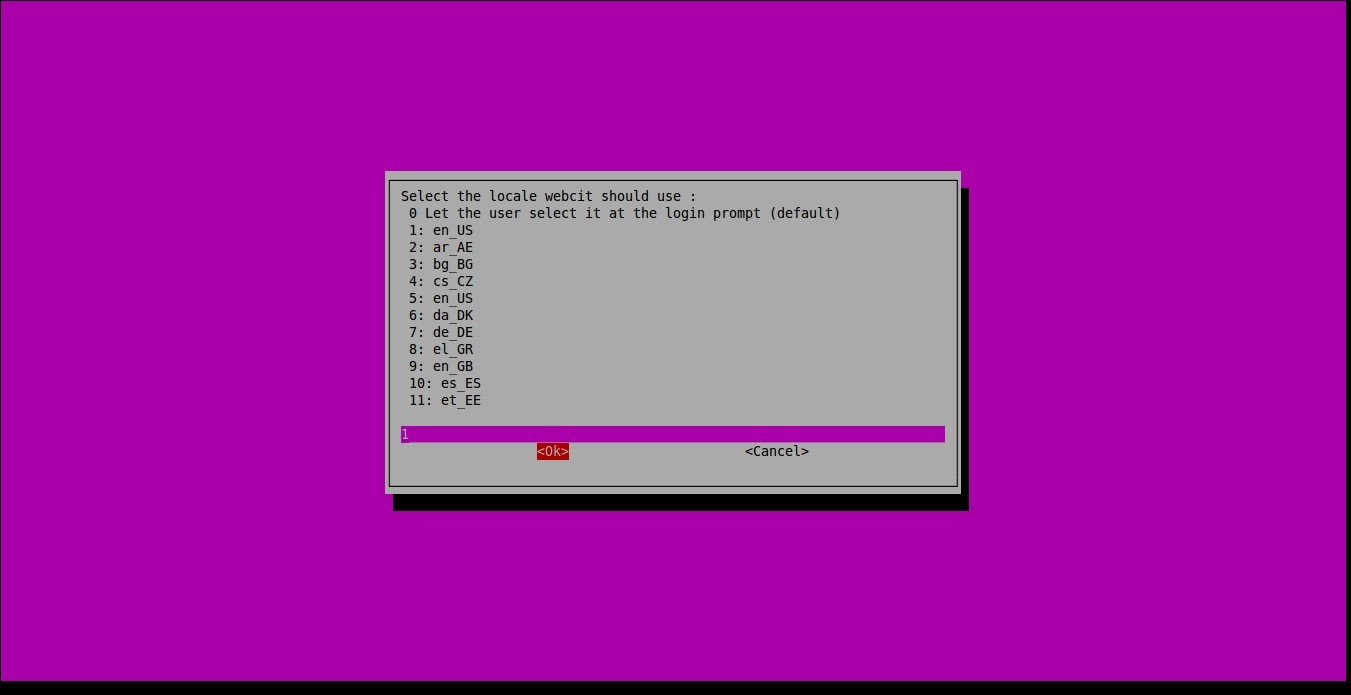
Select the locale webcit should use. In my case, I selected “en_US”.
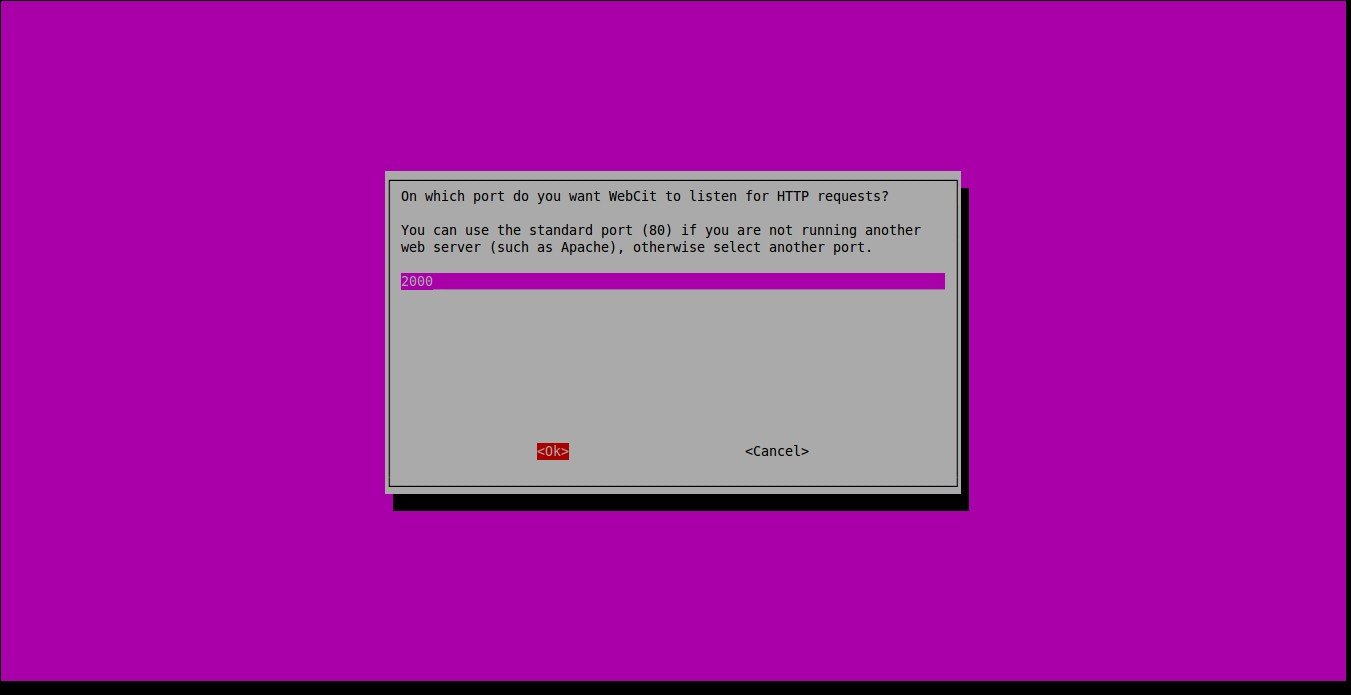
Select on which port do you want WebCit to listen for HTTP requests. You can use the standard port (80) if you are not running another web server (such as Apache), otherwise select another port.
I go with defaults, because I don’t have any existing web server.
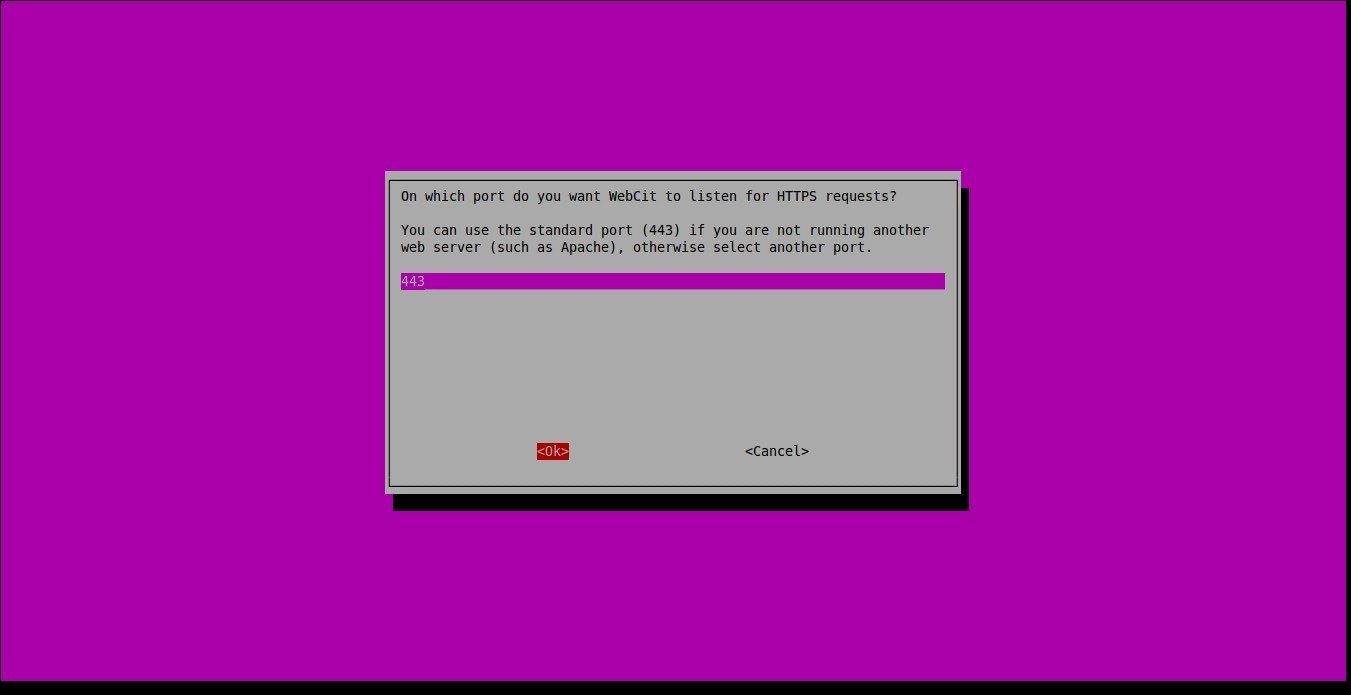
Select On which port do you want WebCit to listen for HTTPS requests.
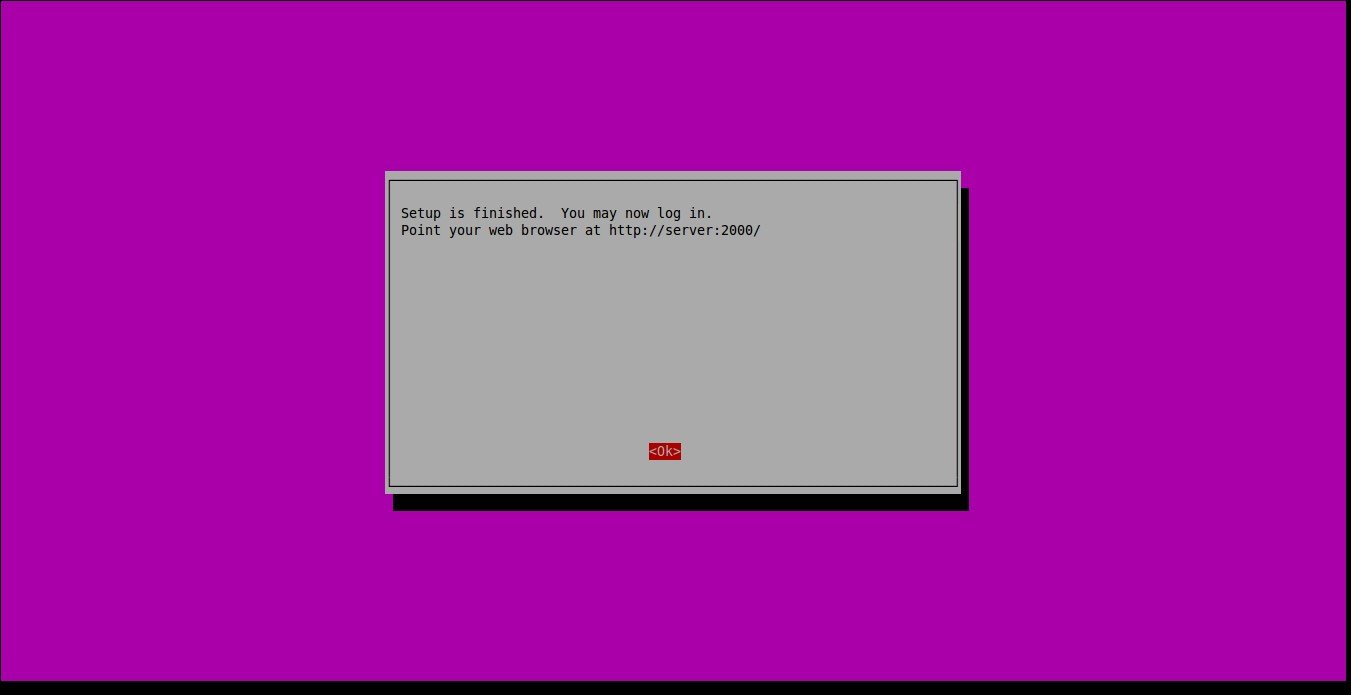
Congratulations! Citadel has been installed.
Please note that Citadel will be installed to ”/usr/local/citadel” directory, WebCit will be installed to ”/usr/local/webcit”, and the supporting libraries will be installed to ”/usr/local/ctdlsupport”.
Now, let us go further and configure Citadel for daily usage.
Accessing Citadel Web console
Open your web browser and navigate to http://ip-address:2000/ or http://domain:2000.
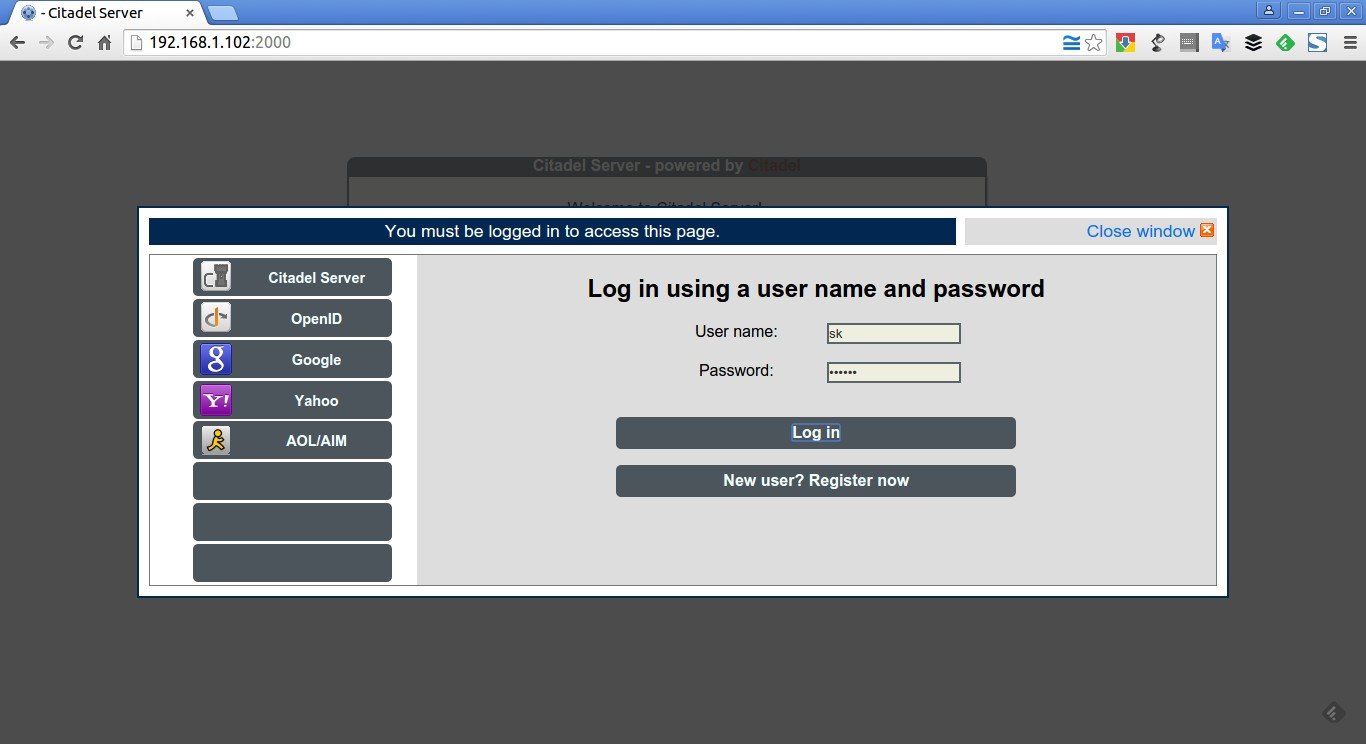
The following page should appear. Enter your administrative account name and it’s password which we have created during the installation process. In my case, my administrative account is “sk”, and it’s password is “ubuntu”. I recommend you to set any strong password to tighten your security.
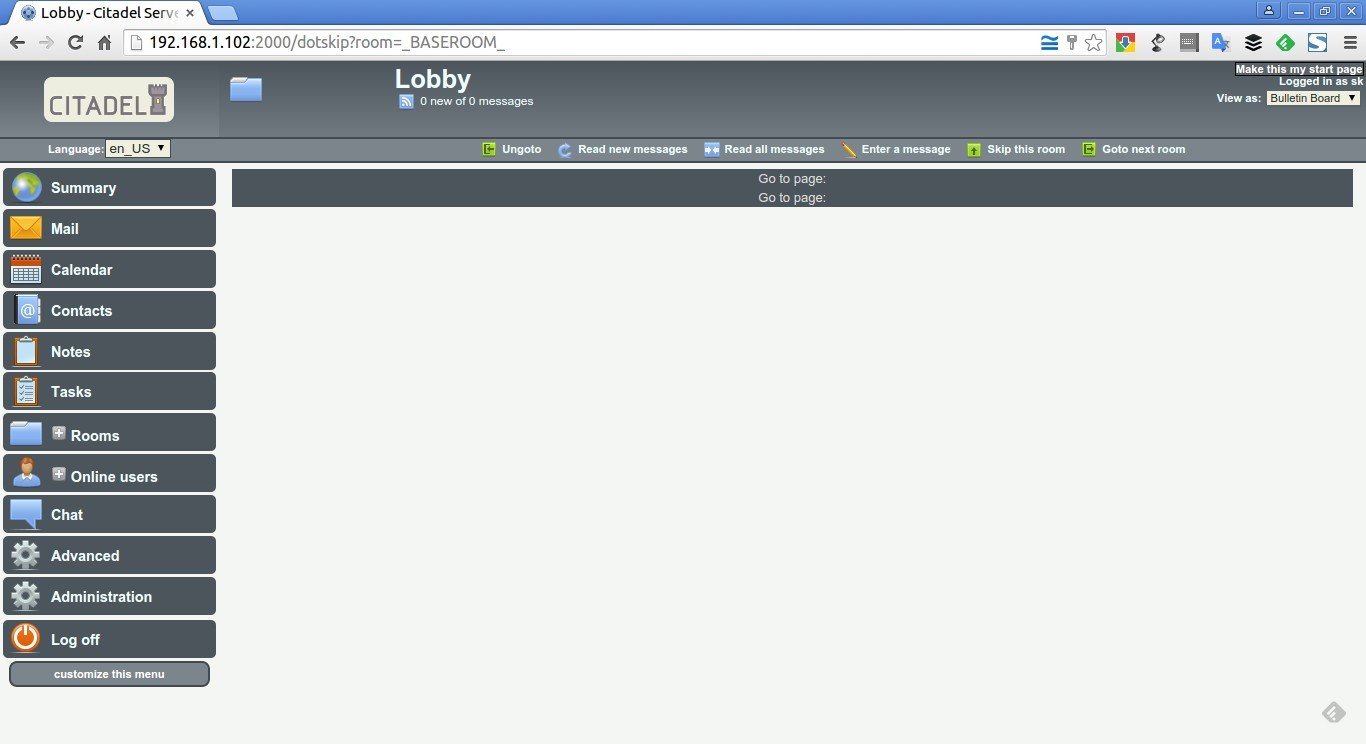
This is how my Citadel Dashboard looks.
From here, you can create multiple domains if you want, create users, create blog posts and so on.
First, let us create some domains and users.
Creating new domains
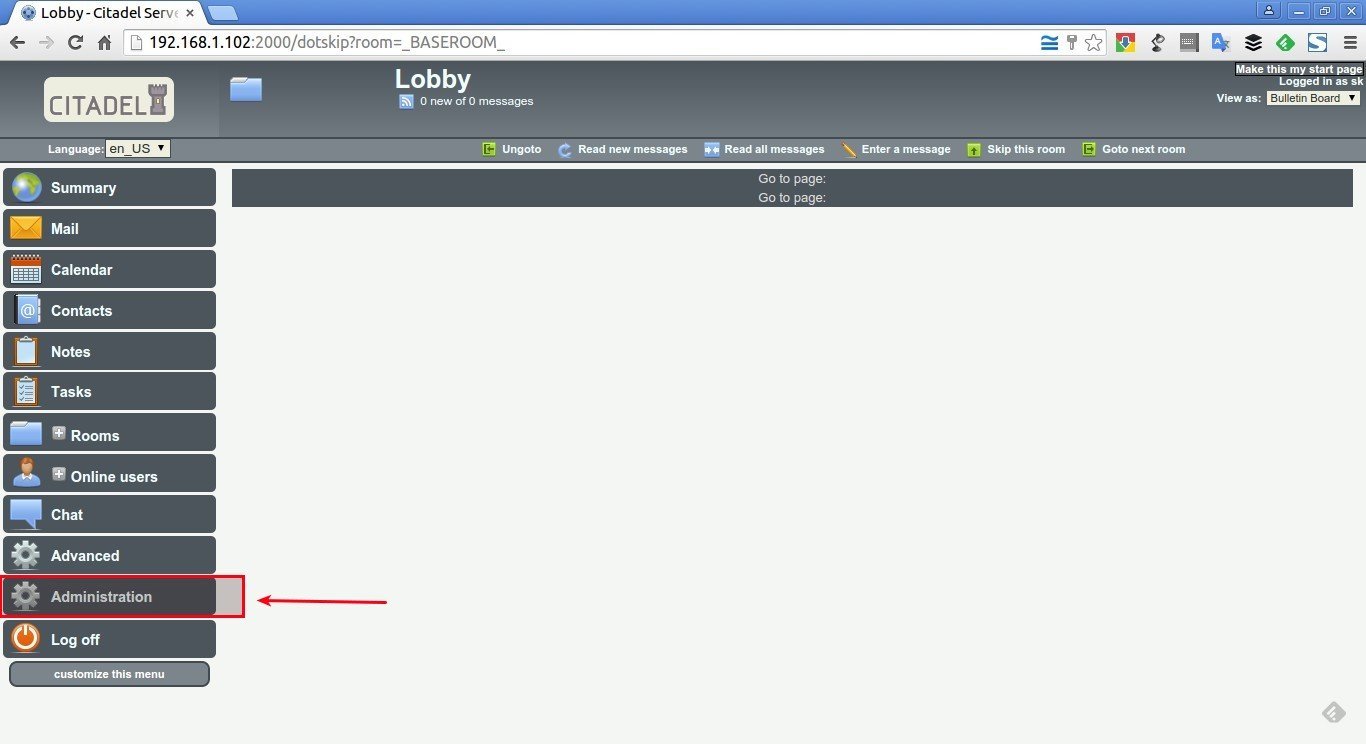
To create a domain, click on the Administration button on the bottom of the left column menu.
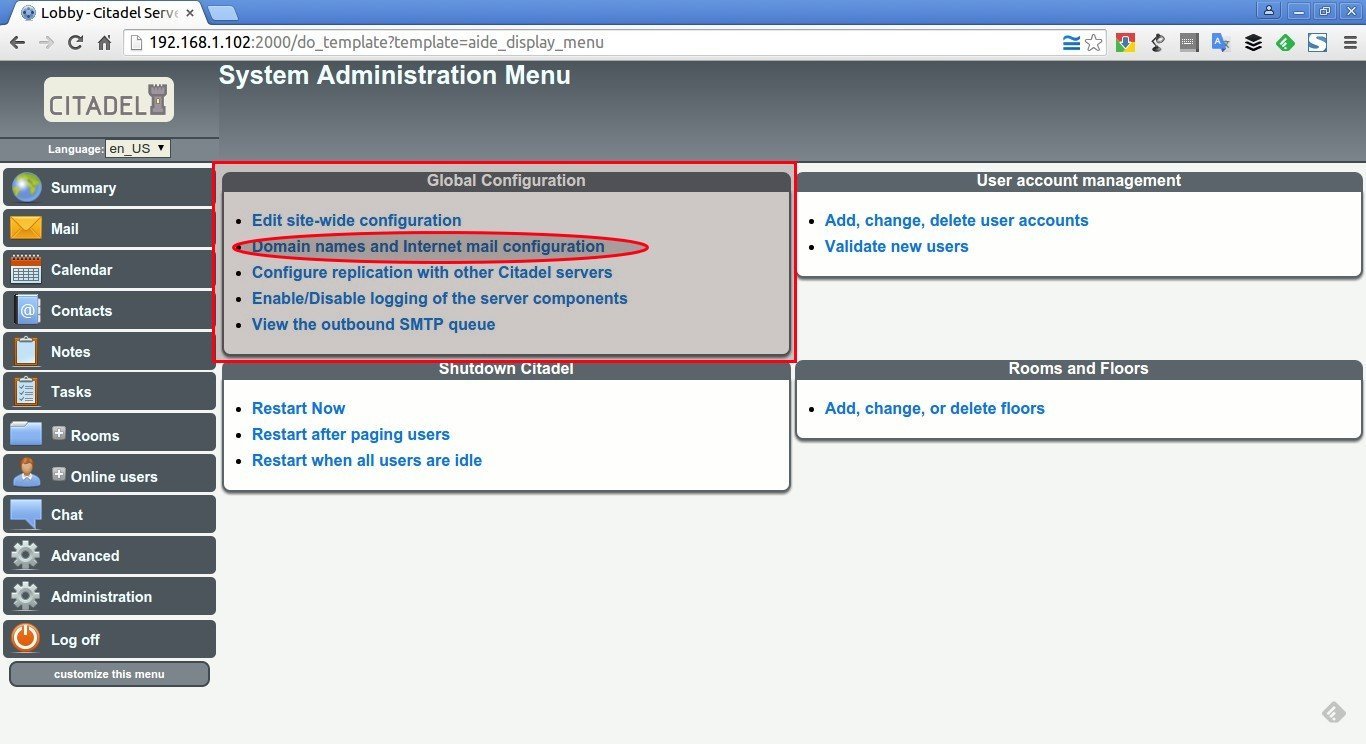
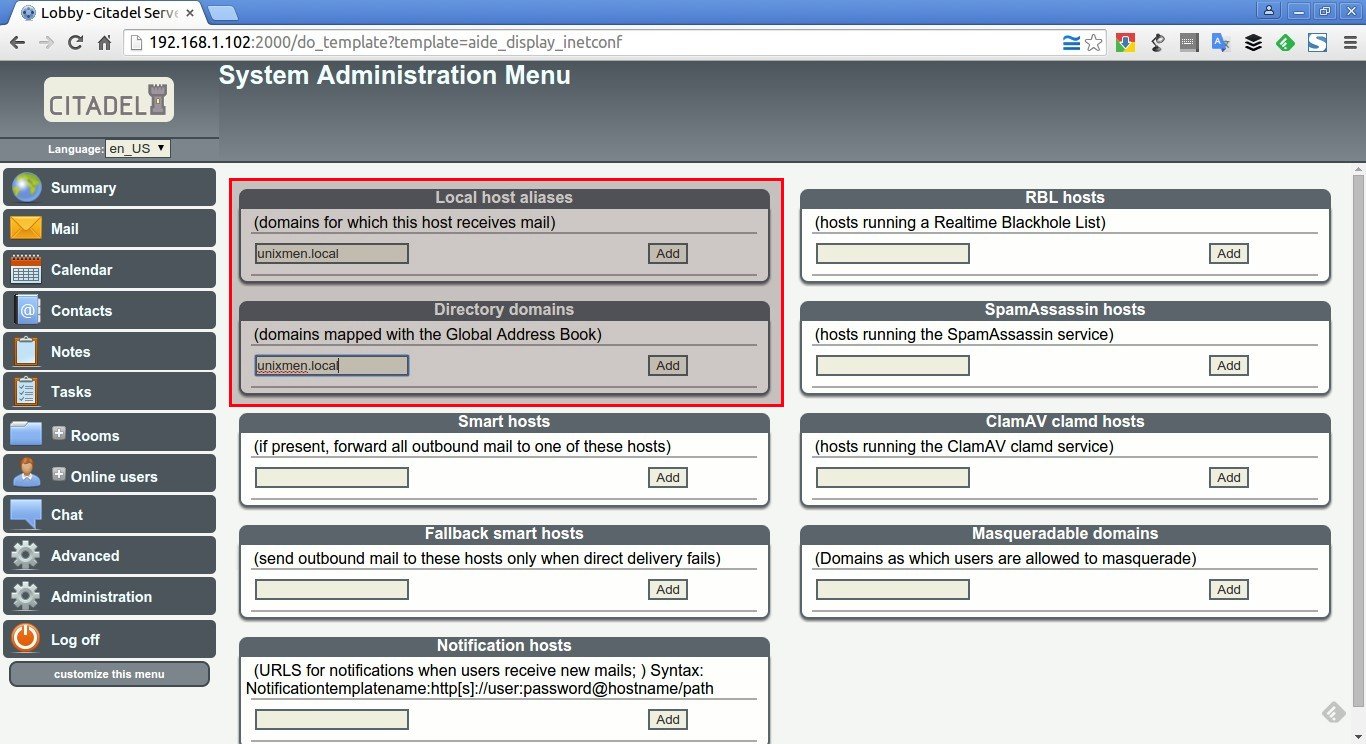
In the next window, click “Domain names and Internet mail configuration” link in the Global Configuration section.
In the Local host aliases and Directory domains sections, enter your domain name without prefix www and click Add button.. For example, in my case I entered unixmen.local.
You can add as many domains as you want.
Next, we need to create some users.
Creating new users
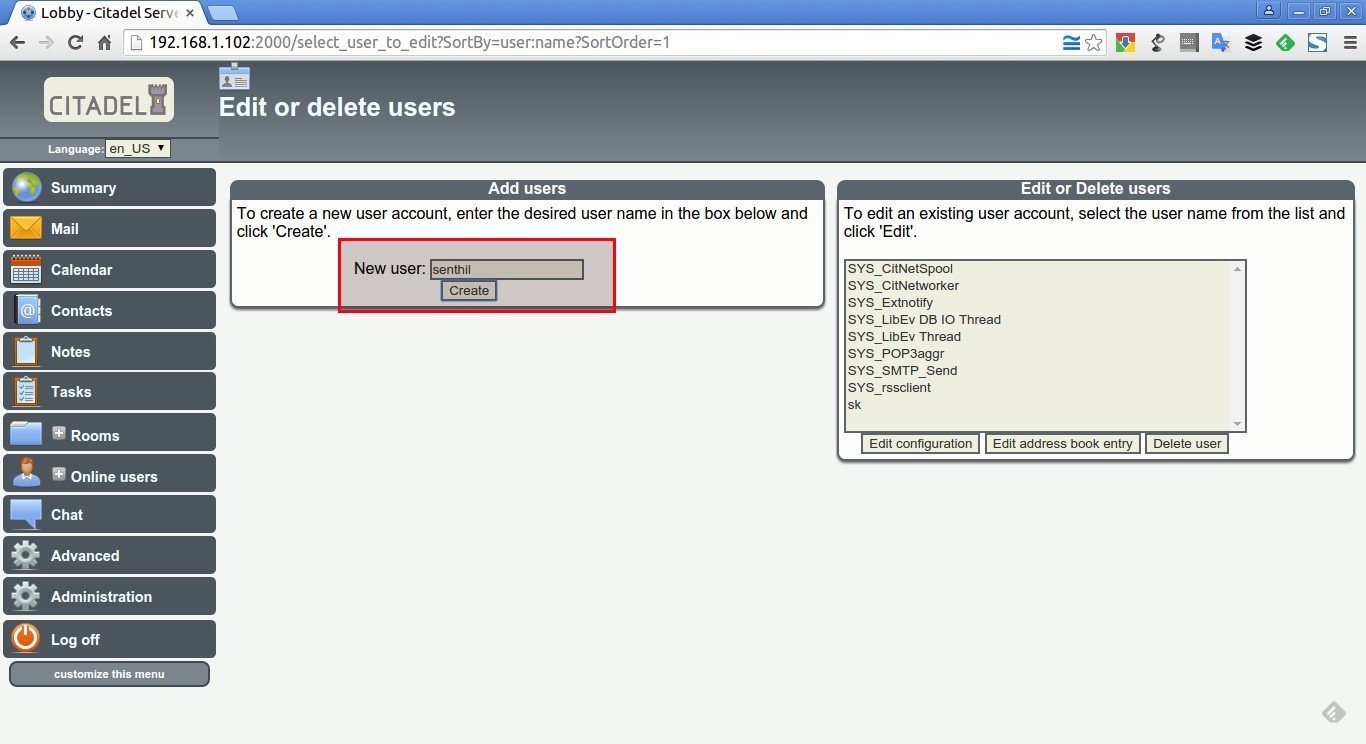
Go back to Administration page and click on the link that says “Add, change, delete user accounts” in the User account management section.
Enter your desired username and click Create button.
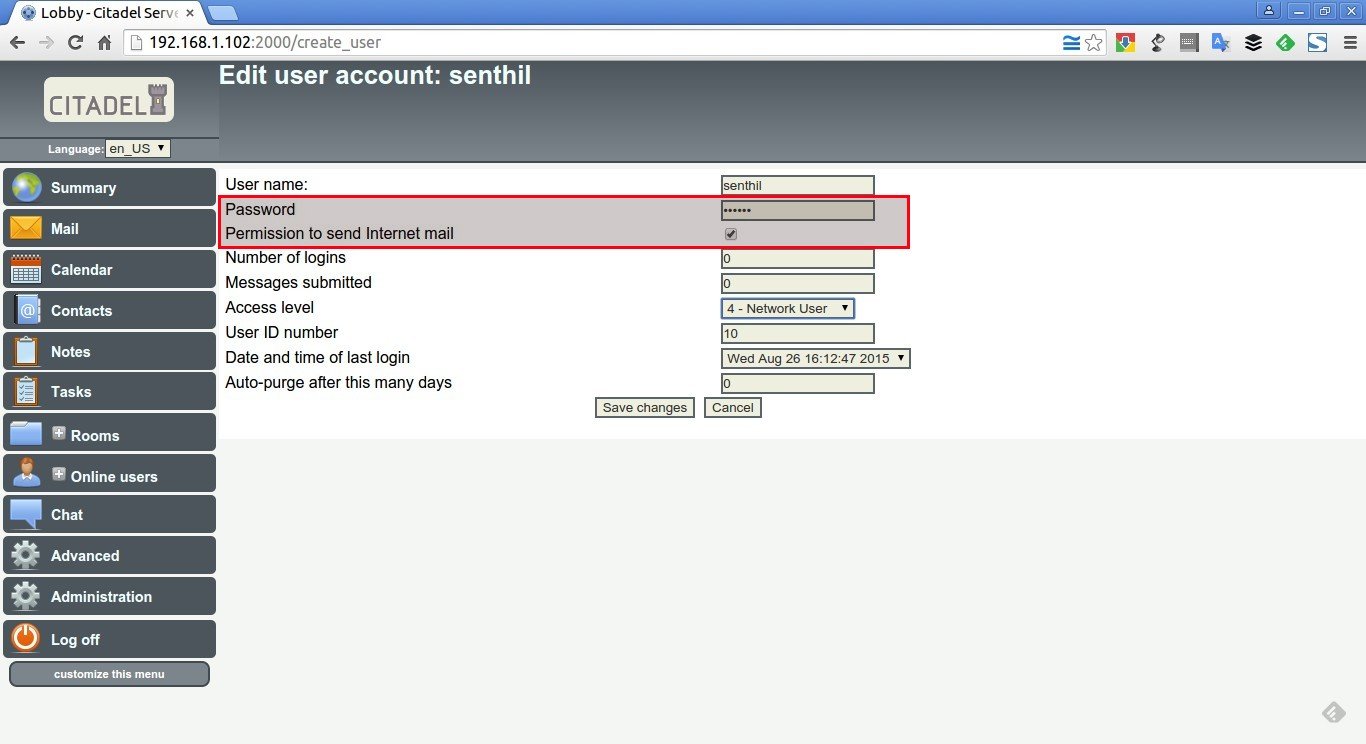
In the next window, set password for the newly created user account. Also, make sure the Permission to send internet mail option is checked. Click the Save changes button.
Similarly, you can create as many users as you want.
Now, let us check whether the newly created user is able to send and receive mail.
Composing a Test mail
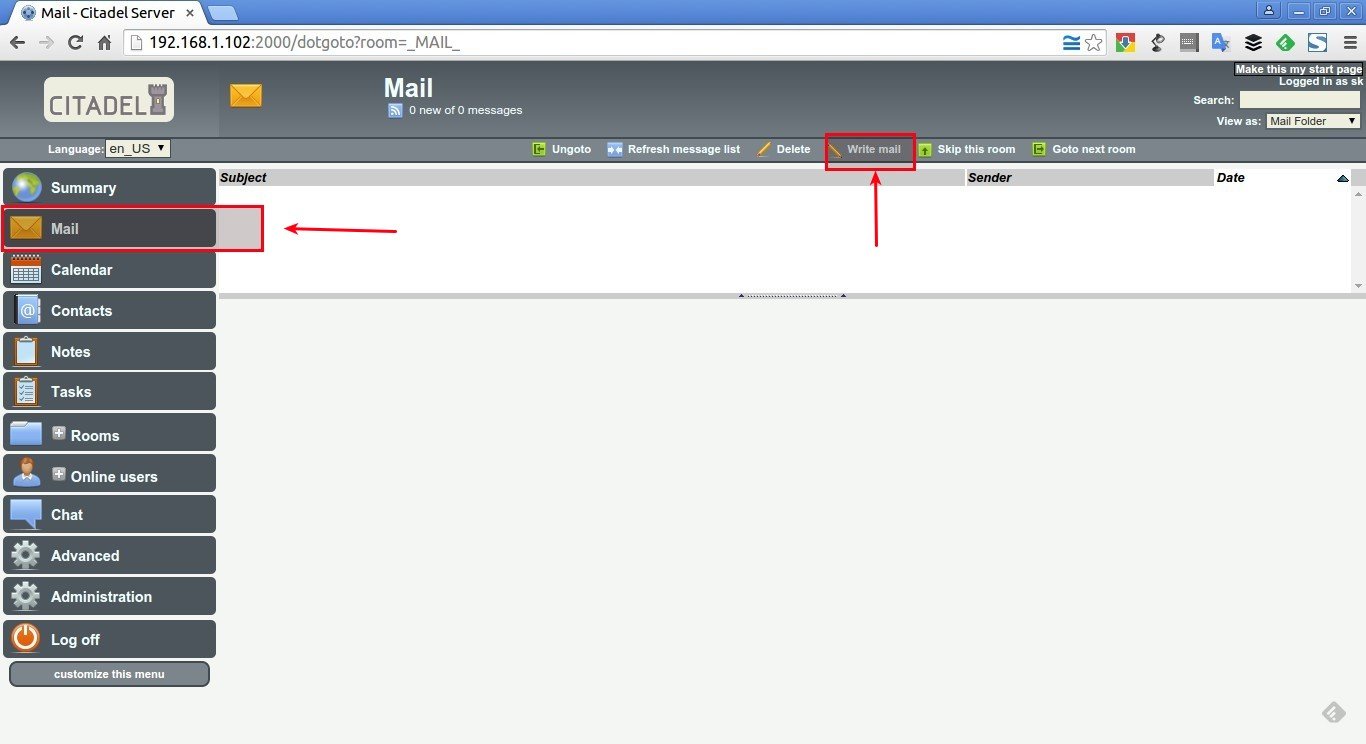
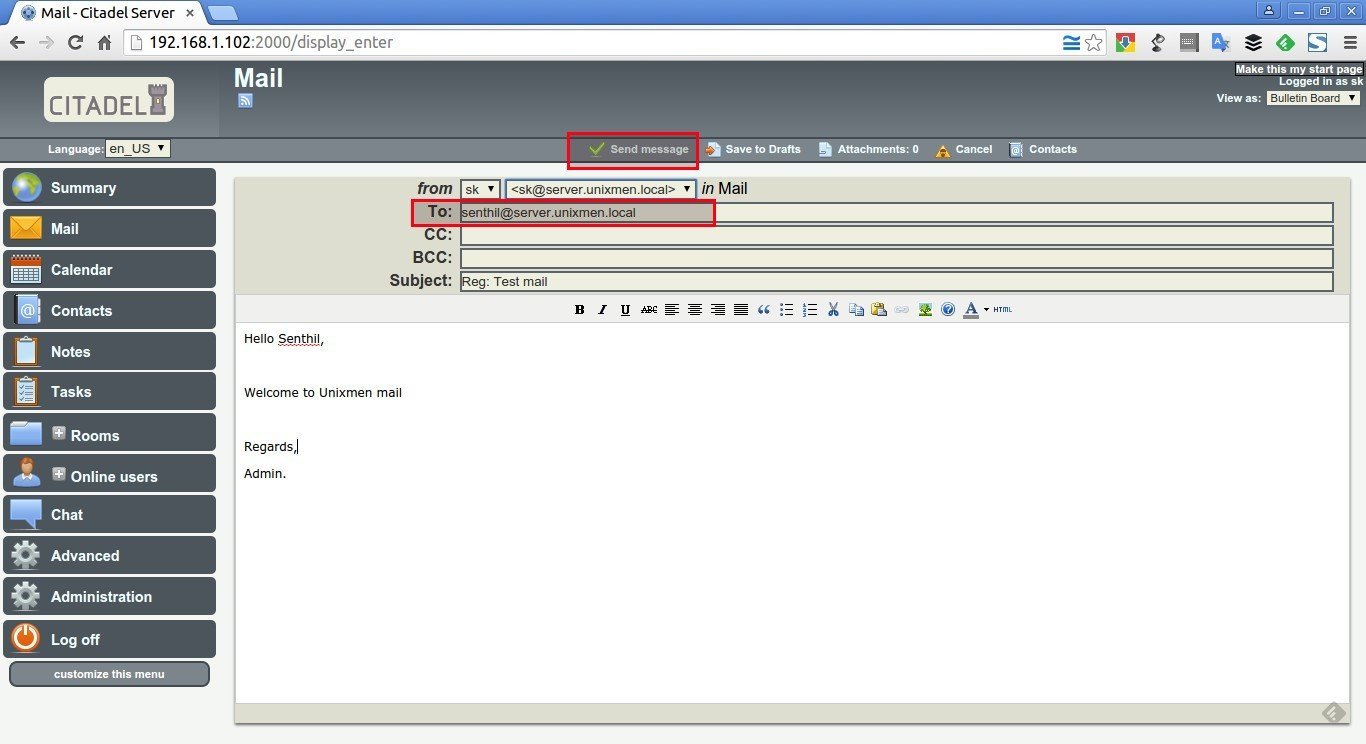
Click on Mail button in the left column box of Citadel dashboard. Click Writemail to compose a mail.
Enter the recipient’s mail id (Ex. senthil@server.unixmen.local) and compose your message and finally click Send message.
Now, log off from the current user and log in again as a new user. In my case, my newly created user is “senthil”.
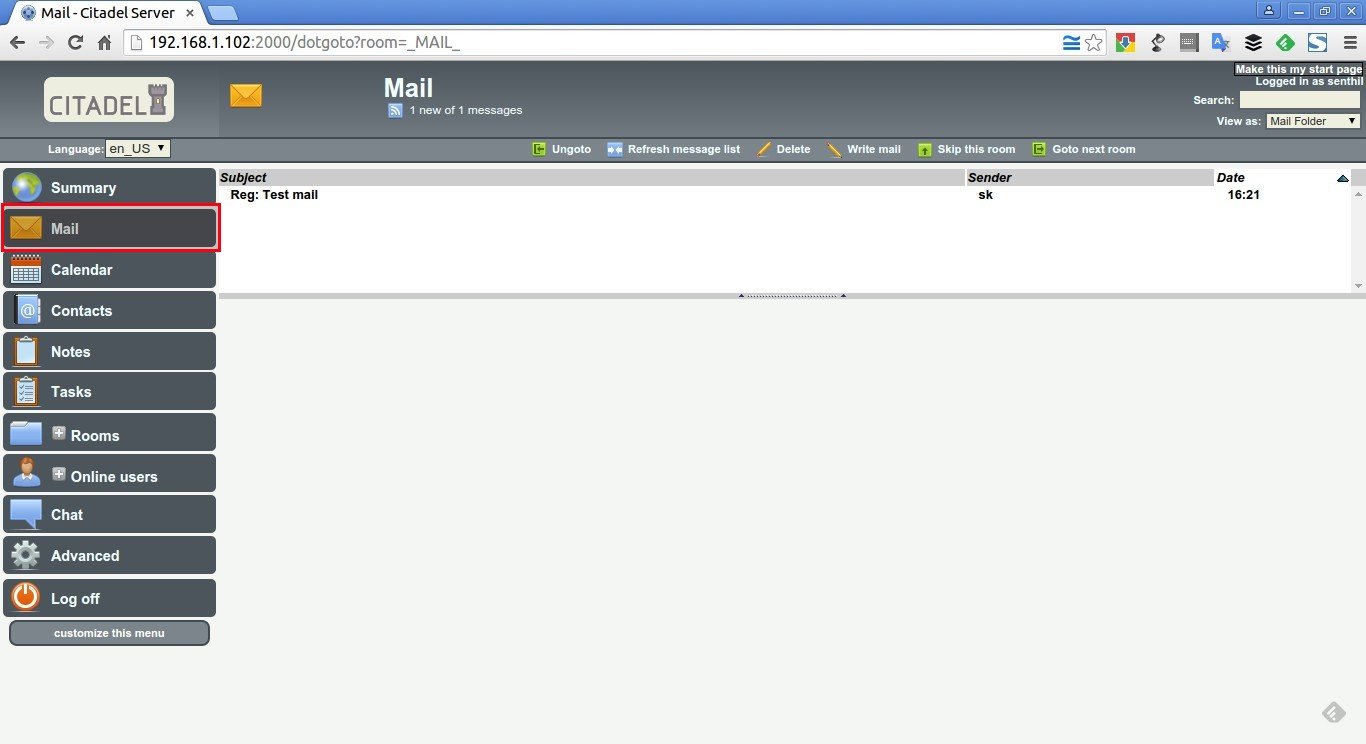
Go to the Mail section and check for the new mail.
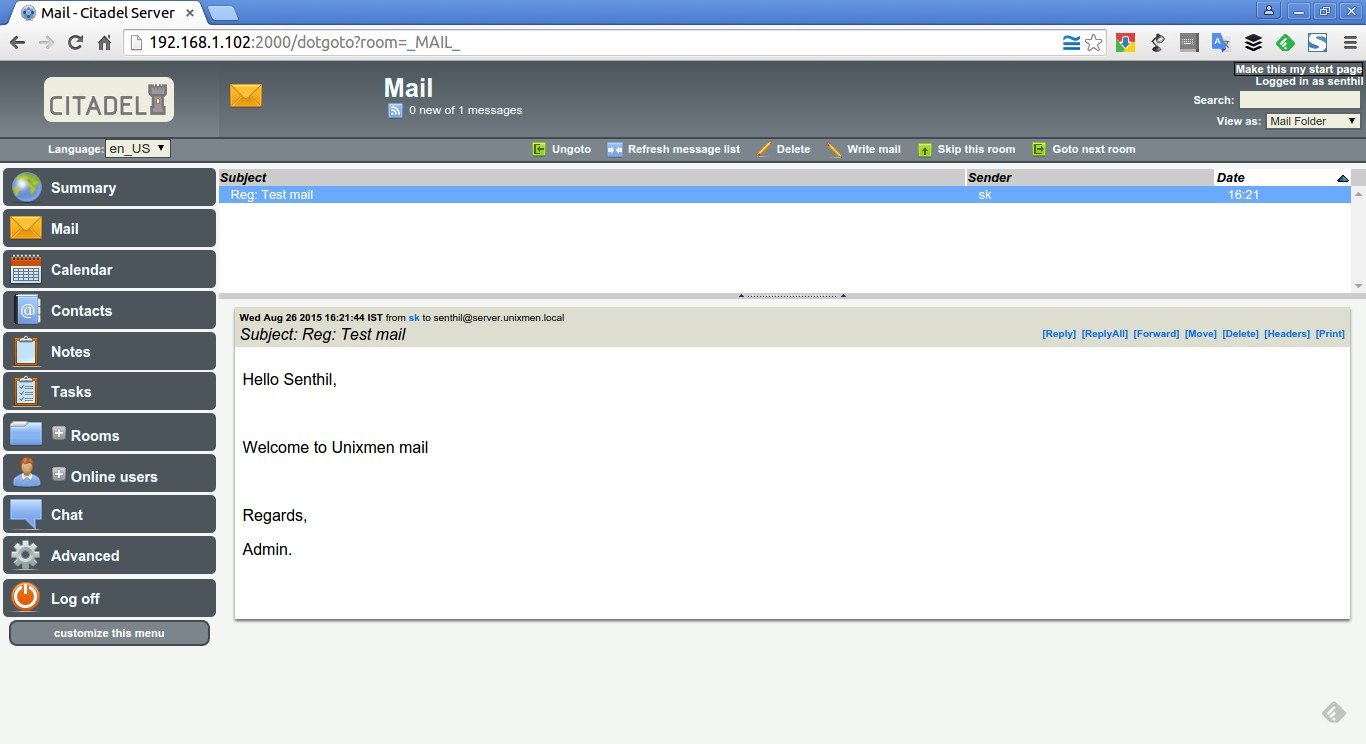
As you see in the above screenshot, I got a new mail. To read the mail, just click on it.
Congratulations! Our mail server is working!!
Citadel screenshots
Here is some sample screenshots that will give a basic ideas of it’s various features.
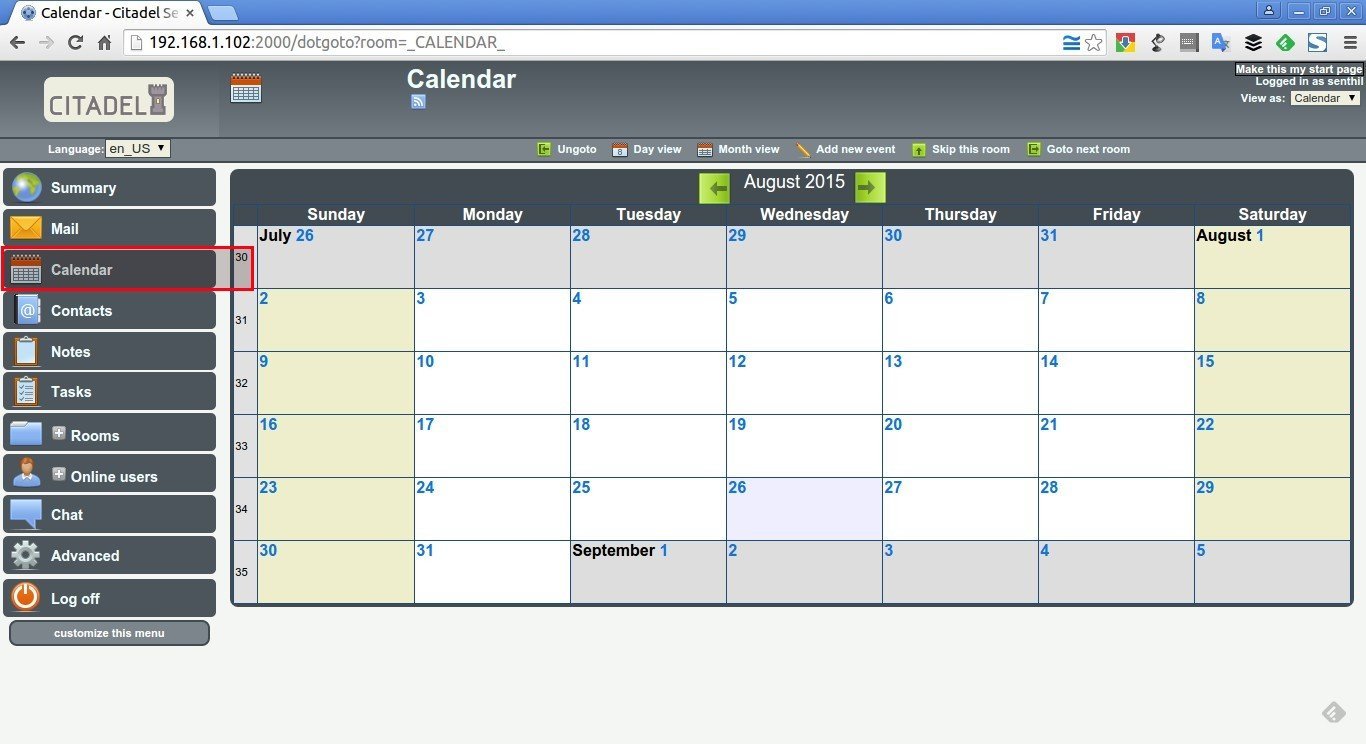
Citadel Calendar:
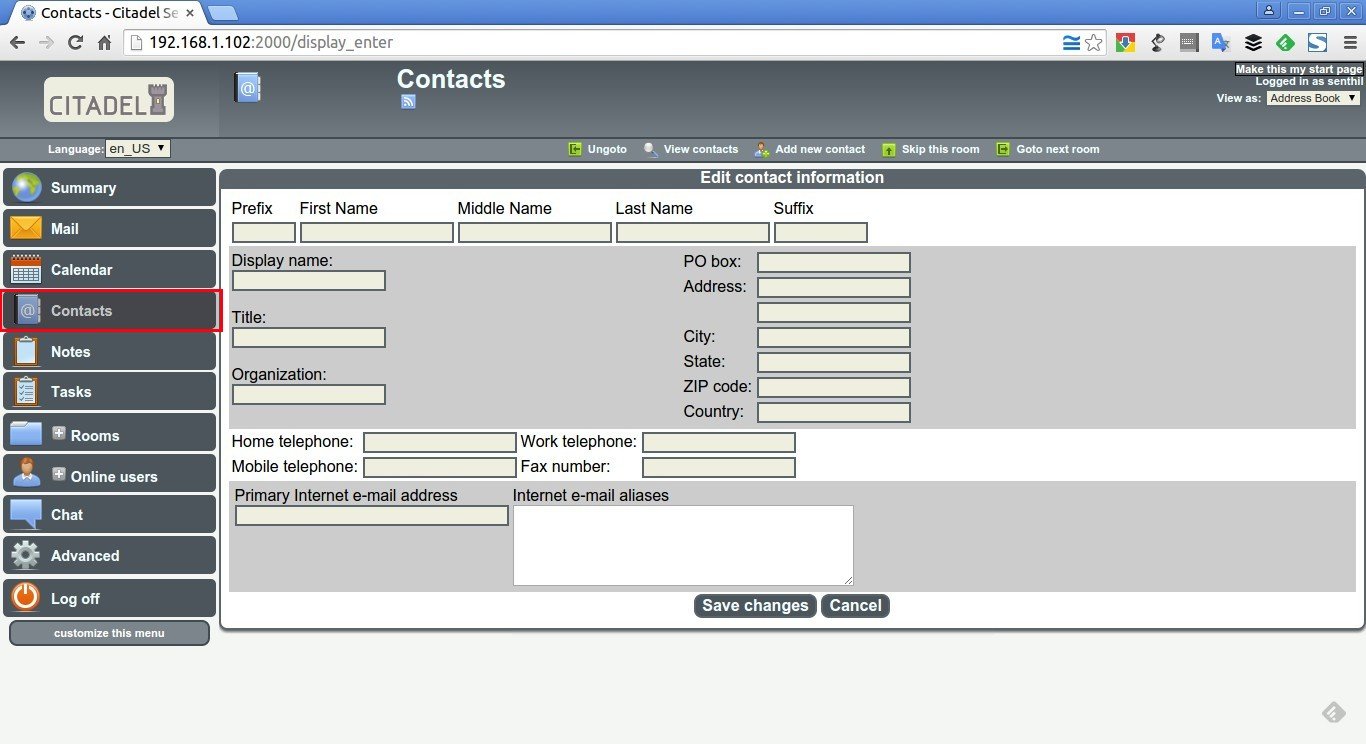
Citadel Contacts:
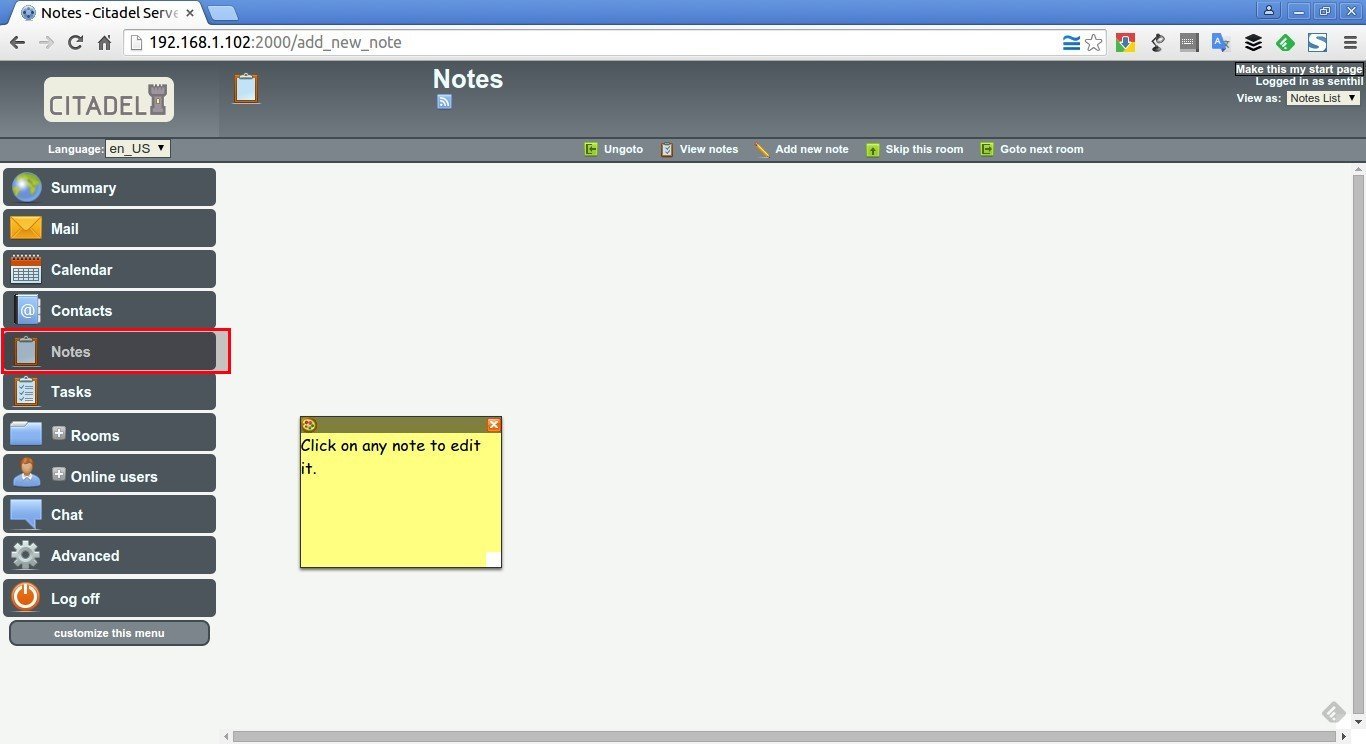
Citadel Notes:
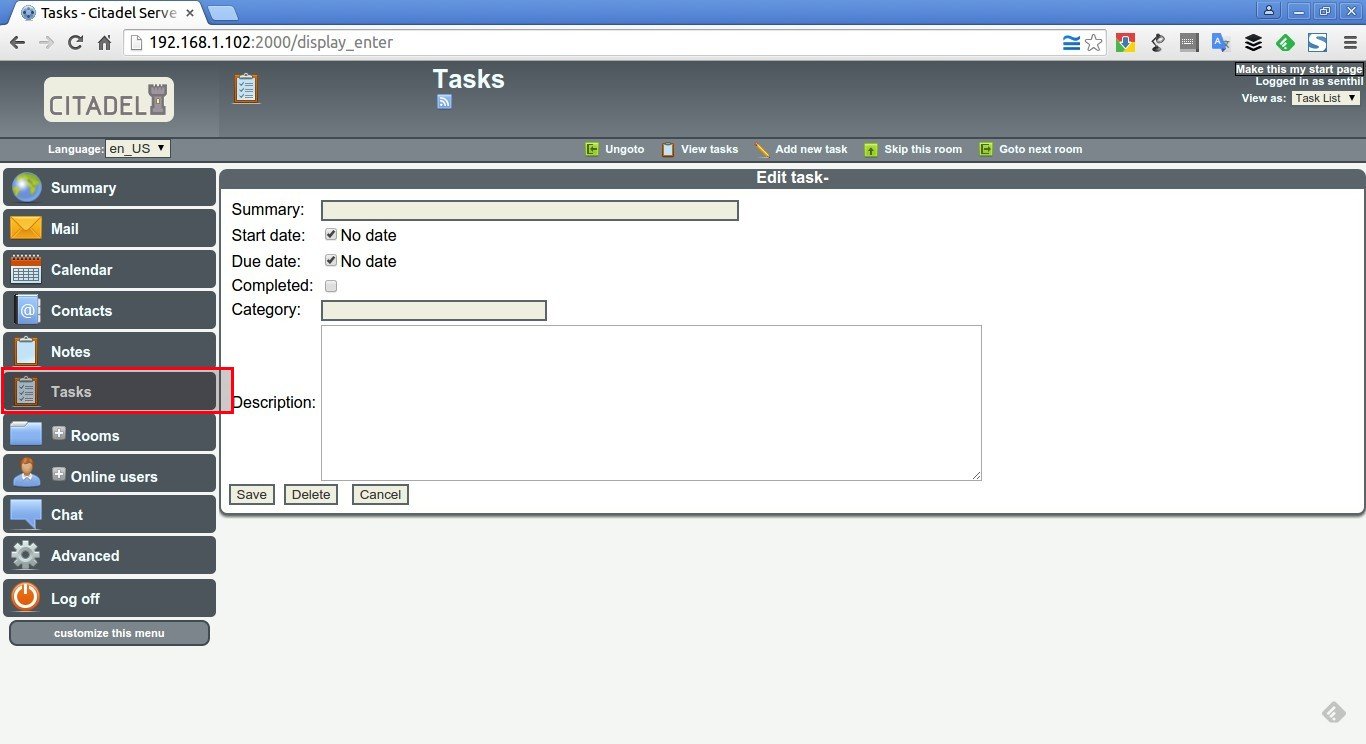
Citadel Tasks:
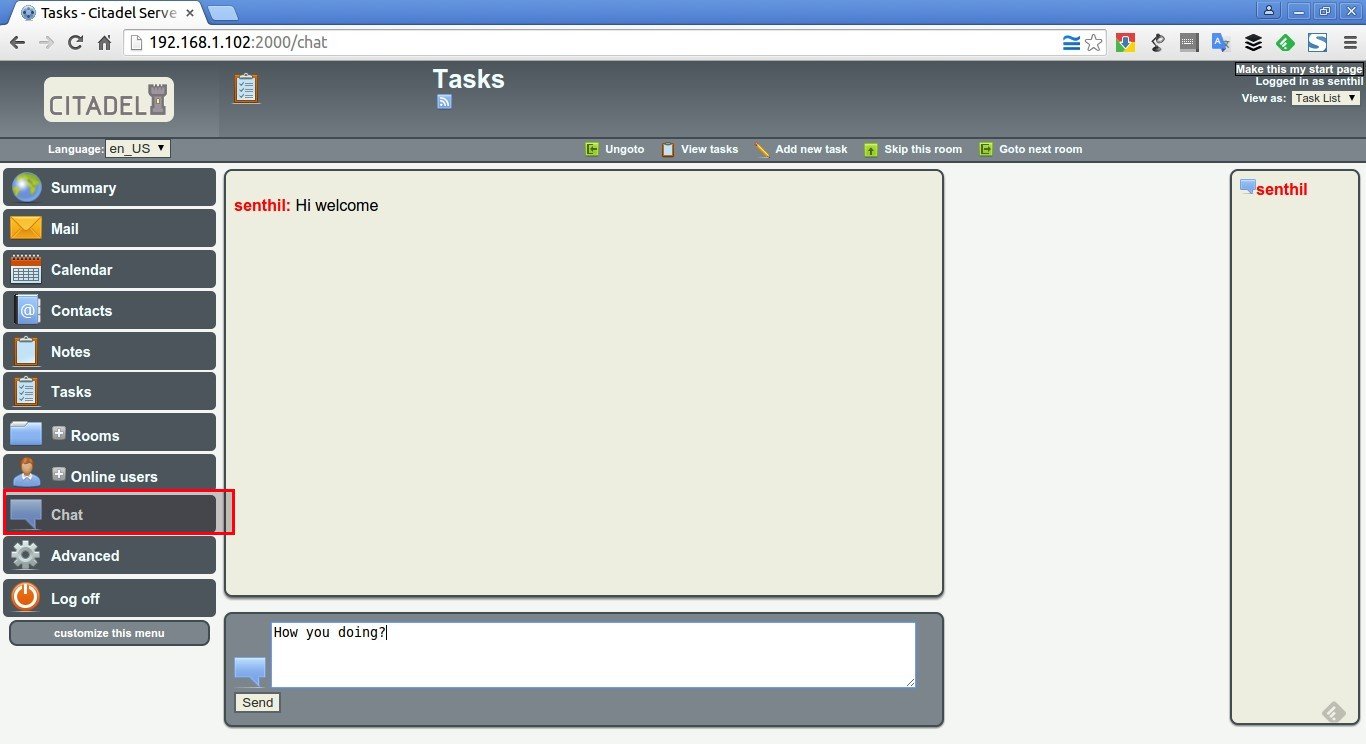
Citadel Chat room:
For more usage details, I recommend you to refer the official documentation page.
Also, refer Citadel FAQ/Knowledge base page for any kind of troubleshooting.
Uninstalling Citadel
I hope you won’t do it. In case, you don’t like Citadel, you can easily uninstall it simply by deleting the following directories.
-
/usr/local/citadel
-
/usr/local/webcit
-
/usr/local/ctdlsupport
Then, remove the entries for “citadel” and “webcit” in your init scripts (/etc/init.d) directory.
Conclusion
As far as I know, Citadel is an impeccable groupware solution and it just works out of the box. It is one of the most easiest suite ever I have tried. Even, a novice user can easily install and configure Citadel in few hours. If you’re looking for a Groupware, Citadel might be suitable solution. Give it a try, you won’t be disappointed.
Cheers!
Reference links:


