Introduction
All of Linux users are already families with BIND service, already a lots of articles has been published with recent Ubuntu Linux versions , you can go through all of them, BIND is a dns service which assign a unique name to your IP Address which is termed a “domain name”, so that it becomes easy to resolve some ip address over the internet or even on a local area network. A network con possess only one specific domain name. When some IP Domain Name is resolved to its IP Address then it is know as forward zone and when a IP address is back to its name it is known as reverse zone. Only to purpose of dns is to simply network queries, imagine a world where all websites are knows with their ip addresses only, there will be a big chaos as human memory can no memories so many IP Address digits, but it is always easy to remember some name that is why we assign name to IP Address on any network.
How to install DNS on Ubuntu Server 16.04 ?
Installation
Requisites
Our domain name : www.rajneesh.com
IP Address: 192.51.12.250
forward zone configuration file name: /etc/bind/db.rajneesh.com
reverse zone configuration file name: /etc/bind/db.192
First of all download a fresh piece of Ubuntu 16.04, make a bootable device and install to server/desktop of your choice.
update system
# apt-get update
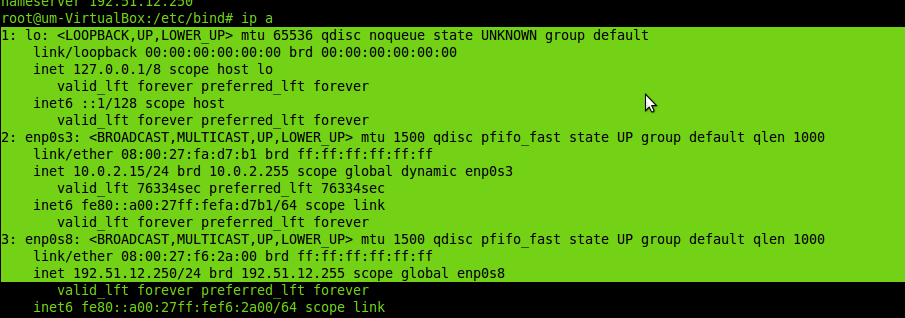
Check your IP addresses:
# ip a
Installed required packages
# apt-get install bind9 bind9utils
Have a look in installed directory
# cd /etc/bind && ls
Directory will look something like

Open /etc/bind/named.conf.options, find forwards and put dns address of your ISP
Sample output
forwarders {
 8.8.8.8;
 };
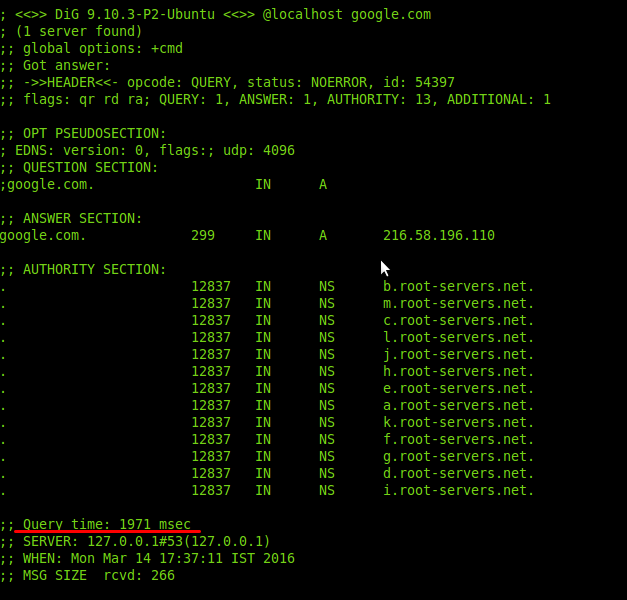
Now let us resolve google.com and see what difference this caching only server will make, note down time query time in first attempt.
# dig google.com
Output will be something like


Let us configure BIND master server now, first of all make some settings in /etc/resolv.conf. Open file and type:
# vim /etc/resolv.conf
Sample:
search rajneesh.com
nameserver 192.51.12.250
Replace your domain name and your IP address mentioned in demo.
Change directory to /etc/bind
# cd /etc/bind
Open named.conf.local
# vim named.conf.local
Our con configuration file is something like below
// Consider adding the 1918 zones here, if they are not used in your
// organization
//include "/etc/bind/zones.rfc1918";
zone "rajneesh.com" {
 type master;
 file "/etc/bind/db.rajneesh.com";
};
zone "12.51.192.in-addr.arpa" {
 type master;
 file "/etc/bind/db.192";
};
Now, our zone name is “rajneesh.com” which will be our dns name, server is master server, so we have defined server type as master. Configuration file will be db.rajneesh.com. Similarly for reverse lookup we have do define ip-addr.arpa for our ip address, type first three digits of yor ip address in reverse order before .in-arddr.arpa. File for reverse zone will be db.192. Make sure your have provided appropriate location for your zone configuration files.
Configure Forward zone
copy db.local sample file to db.rajneesh.com
# cp db.local db.rajneesh.conf
Open and edit db.rajneesh.com
# vim /etc/bind/db.rajneesh.com
Configure file
;
; BIND data file for local loopback interface
;
$TTL 604800
@ IN SOA www.rajneesh.com. admin.rajneesh.com. (
 2 ; Serial
 604800 ; Refresh
 86400 ; Retry
 2419200 ; Expire
 604800 ) ; Negative Cache TTL
;
@ IN NS www.rajneesh.com.
@ IN A 192.51.12.250
www IN A 192.51.12.250
www.rajneesh.com. is domain name which we are willing to resolve, make sure that you have put dot (.) after every domain name definition. admin.rajneesh.com. is email id for this domain. NS will be name server for this domain. Put A record for your host e.g. www.
Save and quit, restart bind service.
# /etc/init.d/bind9 restart
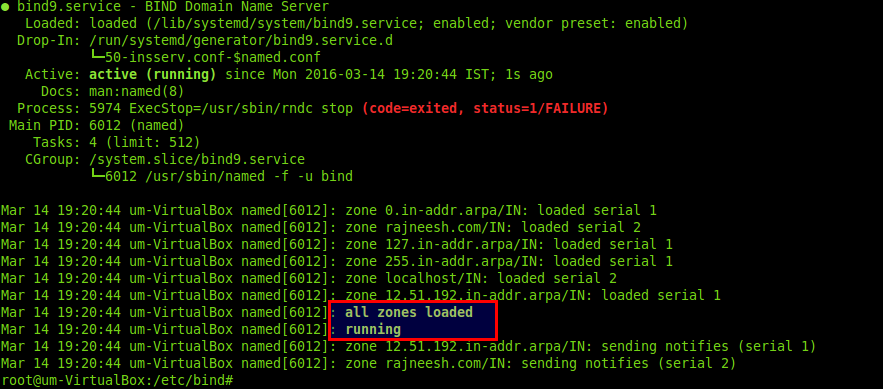
Let us check whether this are working proper or not.
# /etc/init.d/bind9 status

Resolve dns name.
# dig @127.0.0.1 rajneesh.com
Sample output
; <<>> DiG 9.10.3-P2-Ubuntu <<>> @127.0.0.1 rajneesh.com
; (1 server found)
;; global options: +cmd
;; Got answer:
;; ->>HEADER<<- opcode: QUERY, status: NOERROR, id: 37282
;; flags: qr aa rd ra; QUERY: 1, ANSWER: 1, AUTHORITY: 1, ADDITIONAL: 2

;; OPT PSEUDOSECTION:
; EDNS: version: 0, flags:; udp: 4096
;; QUESTION SECTION:
;rajneesh.com. IN A

;; ANSWER SECTION:
rajneesh.com. 604800 IN A 192.51.12.250

;; AUTHORITY SECTION:
rajneesh.com. 604800 IN NS www.rajneesh.com.

;; ADDITIONAL SECTION:
www.rajneesh.com. 604800 IN A 192.51.12.250

;; Query time: 0 msec
;; SERVER: 127.0.0.1#53(127.0.0.1)
;; WHEN: Mon Mar 14 20:34:43 IST 2016
;; MSG SIZE rcvd: 91
We have a green signal in ANSWER section. so let us move to configure reverse zone.
copy db.127 sample file to db.192 and edit
# cp db.127 db.192
Edit file
; BIND reverse data file for local loopback interface
;
$TTL 604800
@ IN SOA www.rajneesh.com. admin.rajneesh.com. (
1 ; Serial
604800 ; Refresh
86400 ; Retry
2419200 ; Expire
604800 ) ; Negative Cache TTL
;
@ IN NS www.rajneesh.com.
250 IN PTR rajneesh.com.
File is almost a replica of forward zone file, except PTR or pointer record, which we have to mention in reverse zone file. 250 is the last digit of our ip address. Save and exit.
Restart server
# /etc/init.d/bind9 restart
nslookup IP address of your domain server.
#nslookup 192.51.12.250
Sampe output
Server: 192.51.12.250
Address: 192.51.12.250#53
250.12.51.192.in-addr.arpa name = rajneesh.com.
Things are working good. This is all for now, Have fun!


