This is the continuation of our previous tutorial. In our previous tutorial we learned how to install and configure OpenLDAP server on Debian and Ubuntu systems. In this guide let us see how to a authenticate a Linux client using OpenLDAP server. This guide was tested on Debian 7 Desktop, although it will work on all Debian and Ubuntu derivatives. If you encounter any difficulties, do let me know. I will check and update this how-to.
Install LDAP client package on Debian 7
I assume that you’ve have a working LDAP server already. Now let us install the required packages in our LDAP client. All steps should be done by ‘root’ user or use ‘sudo’ in-front of every command.
# apt-get install libnss-ldap libpam-ldap nscd
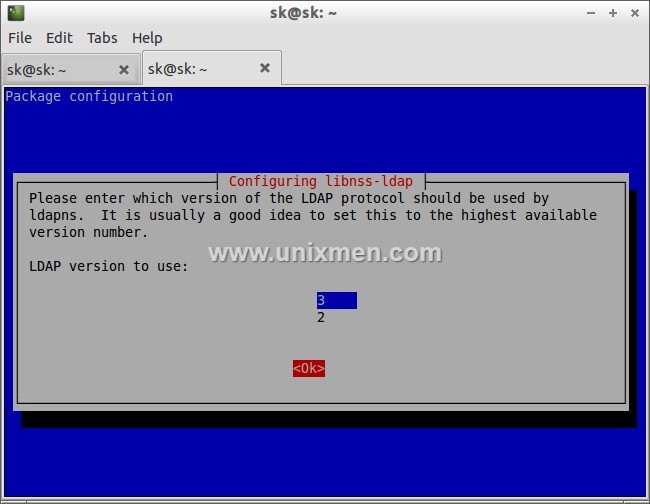
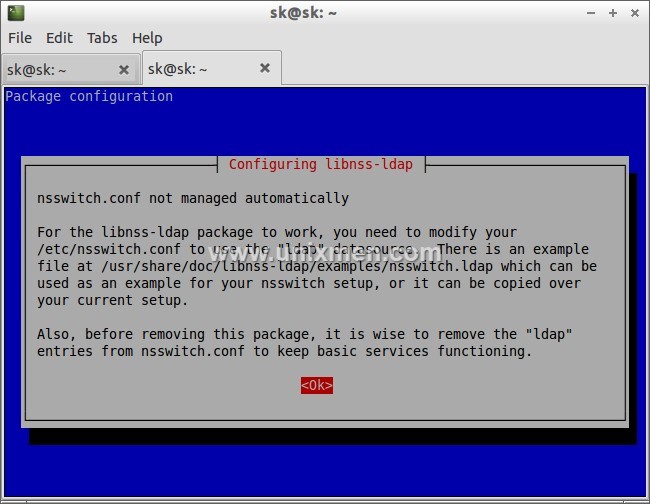
During installation, you will be asked a variety of questions. Read them carefully and enter the appropriate values.
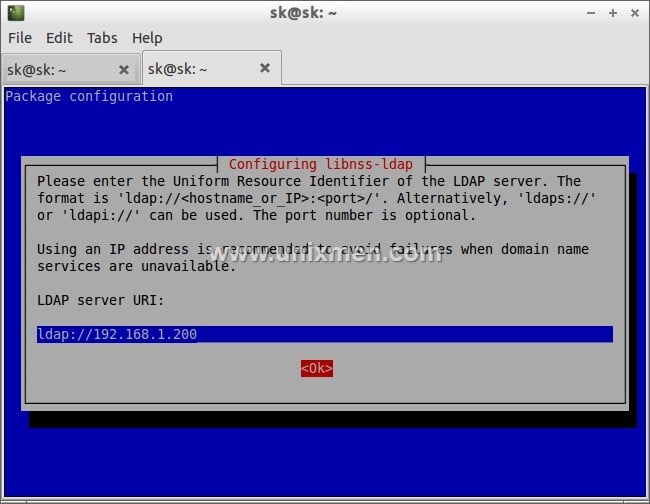
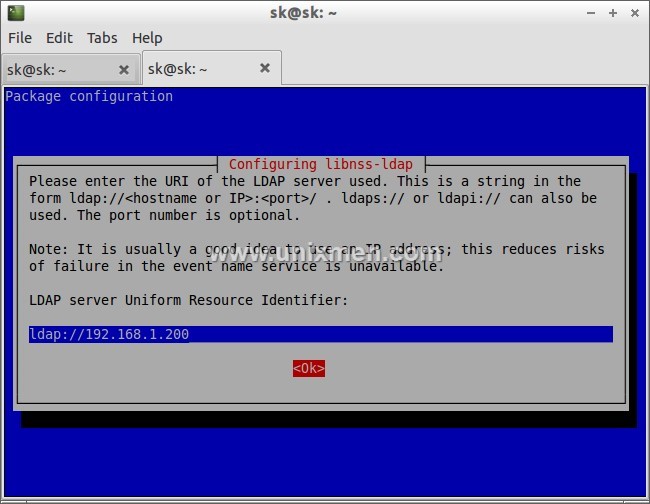
First enter the ldap server IP address as shown in the below screenshot.
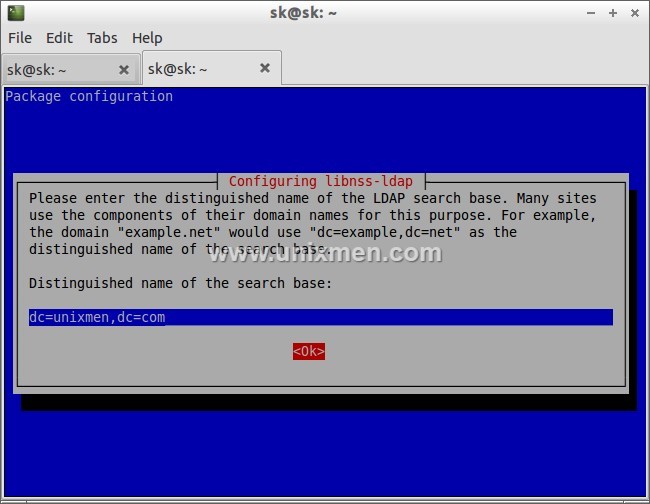
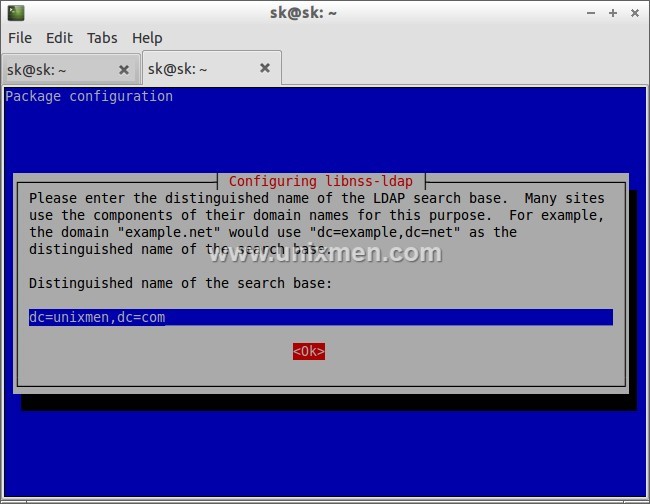
Then enter the distinguished name of the search base. This value should match as per your LDAP server /etc/phpldaadmin/config.php file values. In my case it’s dc=unixmen, dc=com.
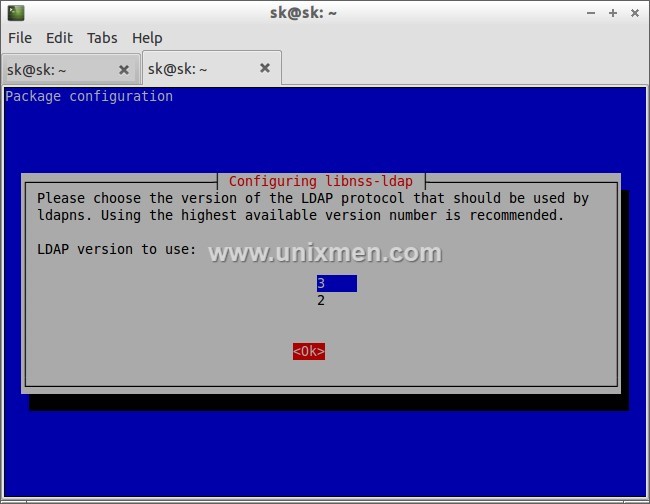
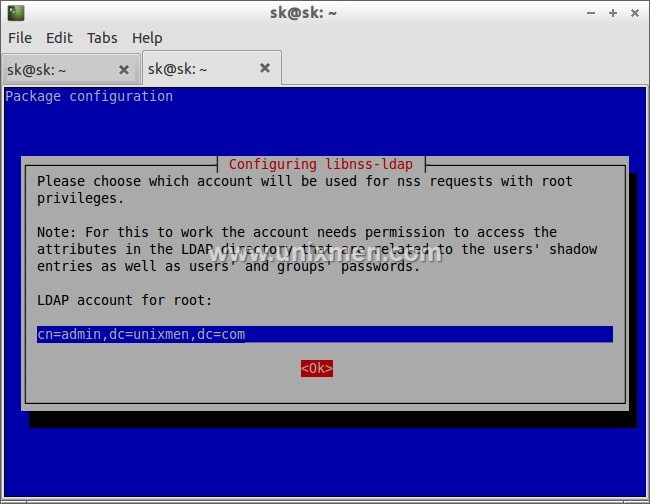
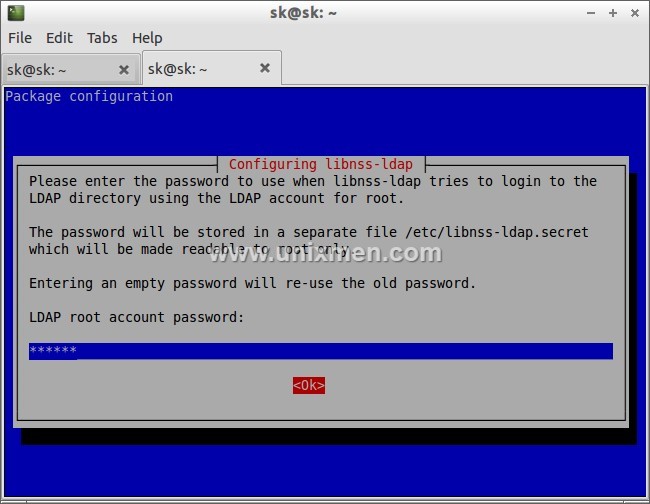
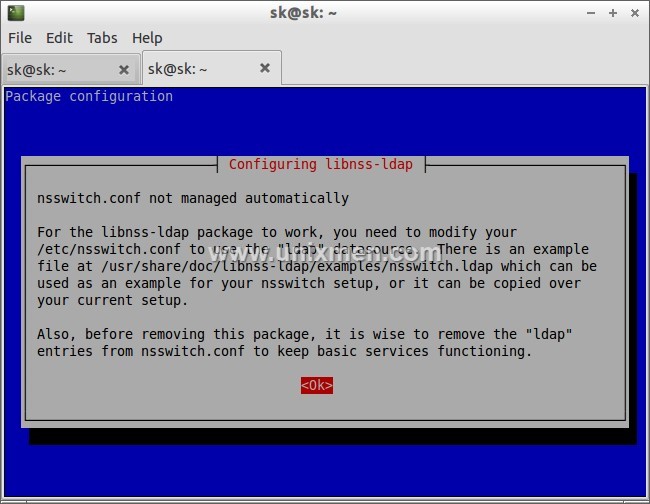
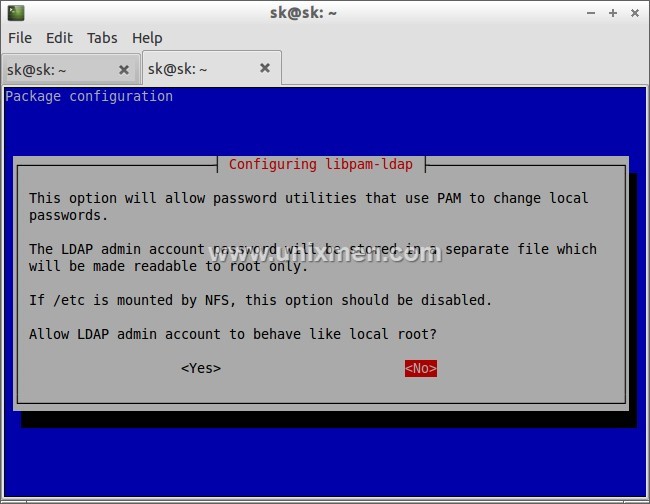
We don’t need to act the client LDAP admin account as local root, hence we will select No.
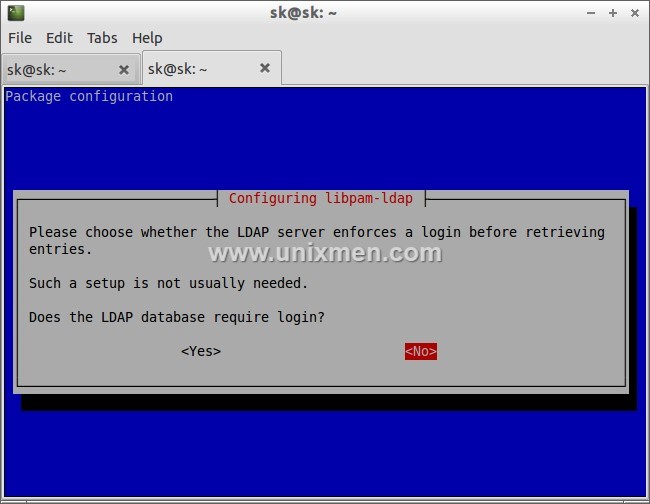
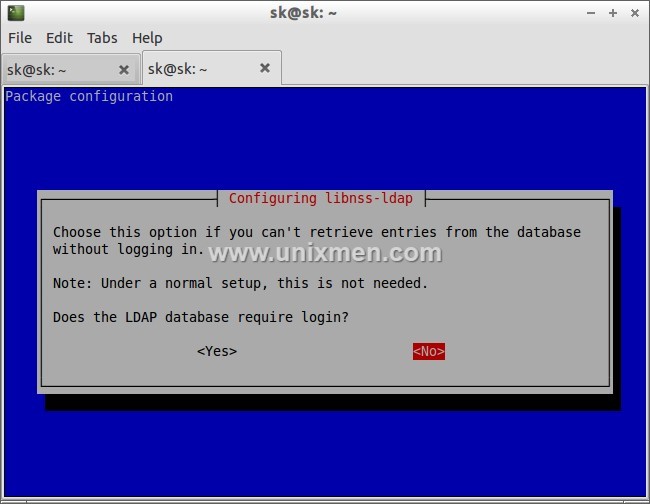
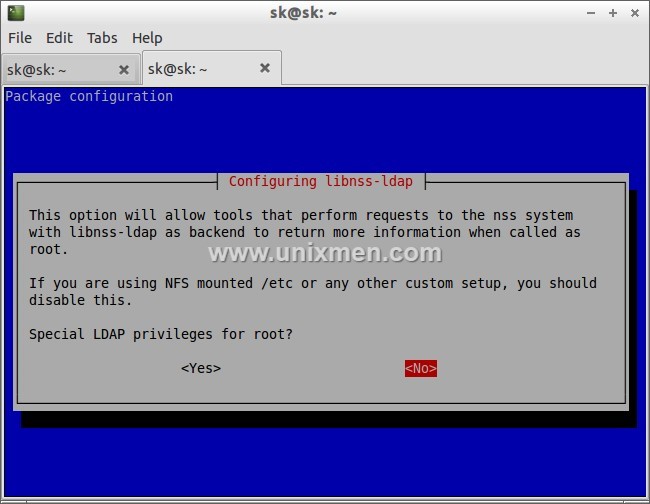
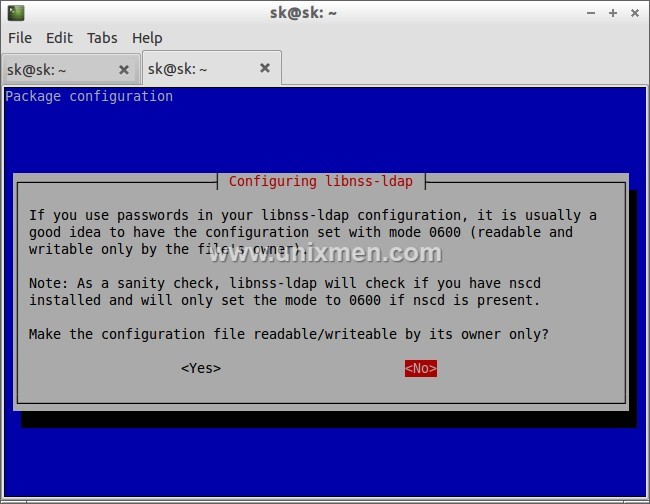
# dpkg-reconfigure libnss-ldap
Make sure that the LDAP server URI is correct.
Configure Client
We should tell our client system to look for LDAP server by adjusting their configuration files.
To do so, First edit file /etc/ldap/ldap.conf,
# nano /etc/ldap/ldap.conf
Uncomment the following lines and Enter your LDAP server search BASE and URI as shown below.
[...]
BASE    dc=unixmen,dc=com
URI     ldap://192.168.1.200
[...]
Edit file /etc/nsswitch.conf,
# nano /etc/nsswitch.conf
Find the following three lines and adjust them as shown below.
[...]
passwd:         compat ldap
group:          compat ldap
shadow:         compat ldap
[...]
netgroup:       ldap
[...]
Now restart nscd service:
# /etc/init.d/nscd restart
PAM Configuration
Now we should verify the PAM configuration. The PAM configuration is modified during libnss-ldap installation. But it is advisable to verify the PAM configuration files as look like below.
Edit file /etc/pam.d/common-auth,
# nano /etc/pam.d/common-auth
Make sure this file contains the following lines.
[...]
auth    [success=2 default=ignore]      pam_unix.so nullok_secure try_first_pass
auth    [success=1 default=ignore]      pam_ldap.so use_first_pass
[...]
auth    requisite                       pam_deny.so
[...]
auth    required                        pam_permit.so
[...]
Edit file /etc/pam.d/common-account,
# nano /etc/pam.d/common-account
[...]
account [success=2 new_authtok_reqd=done default=ignore]        pam_unix.so
account [success=1 default=ignore]      pam_ldap.so
[...]
account requisite                       pam_deny.so
[...]
account required                        pam_permit.so
[...]
Edit file nano /etc/pam.d/common-password,
# nano /etc/pam.d/common-password
[...]
password        [success=2 default=ignore]      pam_unix.so obscure sha512
password        [success=1 user_unknown=ignore default=die]     pam_ldap.so use_authtok try_first_pass
[...]
password        requisite                       pam_deny.so
[...]
password        required                        pam_permit.so
[...]
Edit file /etc/pam.d/common-session,
# nano /etc/pam.d/common-session
Add the following line at the bottom.
[...]

session  required                                         pam_mkhomedir.so
The above line will create a HOME directory for LDAP users who does not have home directory when login to LDAP server.
Edit file /etc/pam.d/common-session-noninteractive,
# nano /etc/pam.d/common-session-noninteractive
[...]
session [default=1]                     pam_permit.so
[...]
session requisite                       pam_deny.so
[...]
session required                        pam_permit.so
[...]
session required        pam_unix.so
session optional                        pam_ldap.so
Restart nscd service to save changes.
# /etc/init.d/nscd restart
Log In To LDAP Server
Now we have configured our client to be able to log in to our OpenLDAP server. Let us try to login using any ldap users created in the openldap server. Please note that this user doesn’t exist in the local client system. Don’t be confused.
I have already created a user called “kumar” in my OpenLDAP server. Refer the section Sample Configuration in my previous tutorial. So let us login with user “kumar”.
Reboot your client system and try to login with your LDAP user from client system.
Enter LDAP user name.
![Debian 7 Desktop, 1 nic, internet, bridge [Running] - Oracle VM VirtualBox_012](http://unixmen.com/wp-content/uploads/2013/12/Debian-7-Desktop-1-nic-internet-bridge-Running-Oracle-VM-VirtualBox_012.jpg)
![Debian 7 Desktop, 1 nic, internet, bridge [Running] - Oracle VM VirtualBox_013](http://unixmen.com/wp-content/uploads/2013/12/Debian-7-Desktop-1-nic-internet-bridge-Running-Oracle-VM-VirtualBox_013.jpg)
You should see that the home directory you selected for your user on the LDAP server is being used on this machine. It has been created on-demand to serve the LDAP user.
You should now be able to authenticate multiple computers using a centralized LDAP server. Your LDAP users will be allowed to use any of the machines you configure in this way, as long as they have the valid login credentials.
Initially this how-to will look bit difficult, but if you follow the steps carefully you will be able to setup the complete LDAP server/client.
Good Luck!
Reference: Setup OpenLDAP On Debian


![Debian 7 Desktop, 1 nic, internet, bridge [Running] - Oracle VM VirtualBox_010](http://unixmen.com/wp-content/uploads/2013/12/Debian-7-Desktop-1-nic-internet-bridge-Running-Oracle-VM-VirtualBox_010.jpg)
![Debian 7 Desktop, 1 nic, internet, bridge [Running] - Oracle VM VirtualBox_014](http://unixmen.com/wp-content/uploads/2013/12/Debian-7-Desktop-1-nic-internet-bridge-Running-Oracle-VM-VirtualBox_014.jpg)


