
About Gnome Boxes
As we all know, there are is no doubt that Linux has tremendous support for Virtualization. There are so many virtualization softwares available including VMWare, VirtualBox, OpenVZ, XEN, KVM, Docker and the list goes. These software are mainly for intermediate and advanced Linux users. If you’re a beginner and having very little knowledge in Virtualization, then it is bit difficult to use the above mentioned tools. You may, probably, need an Intermediate or an expert user’s help. I bet you what? you don’t need anyone help. Yes. Meet Gnome Boxes, a beginner friendly, lightweight, graphical tool that makes virtualization lot easier.
Gnome Boxes is a graphical front-end tool similar to Virt-manager that can be used to create, view, access and manage Virtual machines based on QEMU and KVM. KVM, aka Kernel-based virtual machines, is an open source virtualization technology built into the Linux kernel. KVM is the fork of QEMU and Virt-manager is a graphical front-end of KVM and QEMU.
For more details about KVM and QEMU refer the following links.
Using Boxes, any Linux user, even a novice, can easily try and test different operating systems in their Linux box without having any help from a system administrator. And the good news is you can run Gnome Boxes almost on all Linux operating systems. Be mindful that Gnome Boxes requires either the Intel VT-x or AMD-V hardware virtualization extensions in your Computer.
Why Gnome Boxes?
You might wonder why should we use Boxes, while Virt-manager has many advantages. The answer is simple. Gnome Boxes is light weight, and comes with selective options only for beginners who just want an easy way to create VMs or access remote machines. Gnome Boxes will not provide many of the advanced options to tweak virtual machines provided by virt-manager, but It will focus on getting things working out of the box with very little input from user. This is where Boxes comes in handy.
Features
Concerning about features, we can list the following:
- View, access, and use:
- remote machines
- remote virtual machines
- local virtual machines
- When technology permits, set up access for applications on local virtual machines
- View, access, and use virtual machines on removable media
- View, access, and use shared connection / machines
- Upload / publish virtual machines
- and many.
Install Gnome Boxes
We can install Gnome Boxes either using distribution’s package manager or directly compile from the source.
1. Install using package manager
Gnome Boxes is available in the default repositories of all modern Linux distributions.
To install it on Debian/Ubuntu and derivatives, run:
sudo apt-get install gnome-boxes
On RHEL/CentOS/Fedora:
sudo yum install gnome-boxes
Or,
sudo dnf install gnome-boxes
On SUSE/openSUSE:
sudo zypper in gnome-boxes
On Mageia:
sudo urpmi gnome-boxes
2. Compile the latest version from Source
Gnome Boxes might be out-dated in the distribution’s repositories. If you want most recent version, it is good idea to compile it from the Source.
Download the latest version from here.
wget https://git.gnome.org/browse/gnome-boxes/snapshot/gnome-boxes-3.17.90.tar.xz
Once the download process is complete, launch your terminal and run following command to extract the downloaded file.
tar xvf gnome-boxes-3.17.90.tar.xz
Go to the extracted directory:
cd gnome-boxes
Then, run the following command to start the installation process.
./configure
Once “configure” is completed successfully, run following command:
make
Finally, run the following command to complete the installation of Gnome Boxes.
make install
Usage
After installing Gnome Boxes, launch it either from Menu or Dash. Probably it will be found in Applications > System Tools.
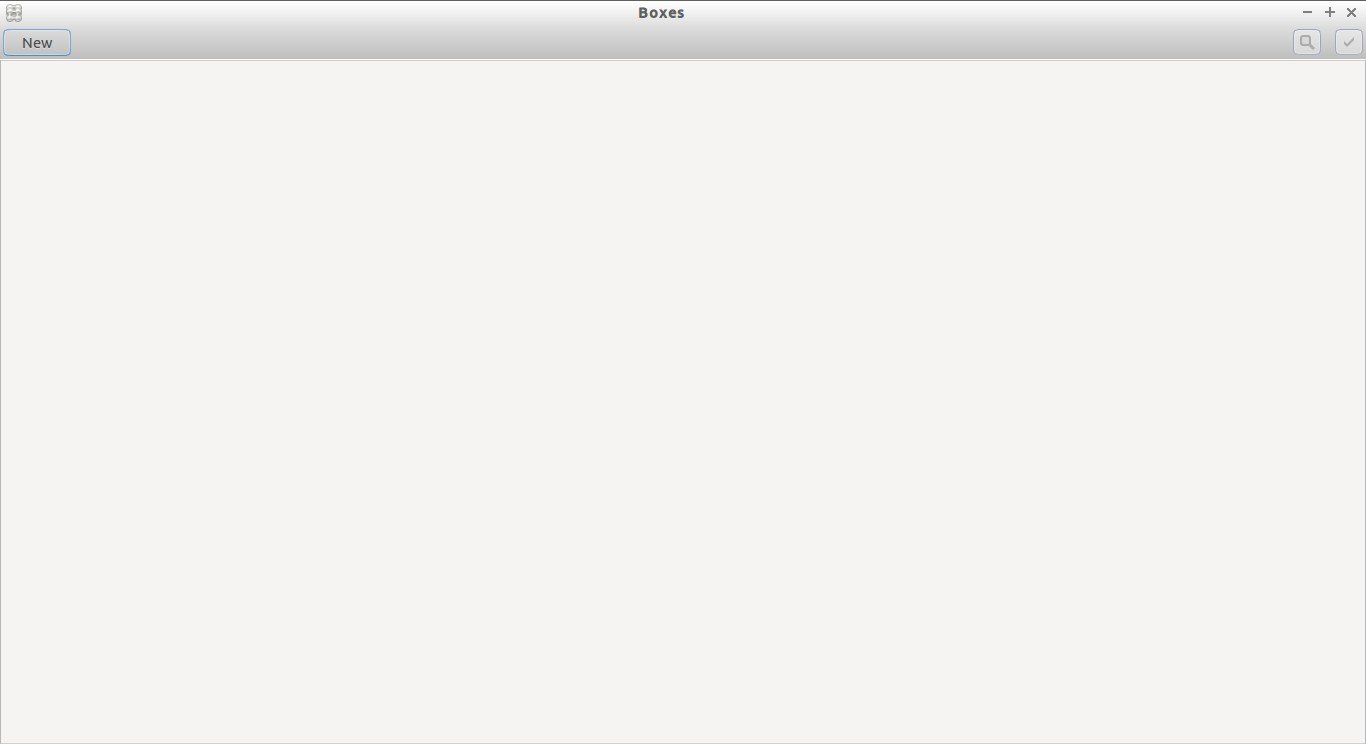
The default interface of Boxes look like below.
This interface shows the list of available guest virtual machines.
The right-hand side of the screen has two buttons:
-
The search button, to search for guest virtual machines by name.
-
The selection button.
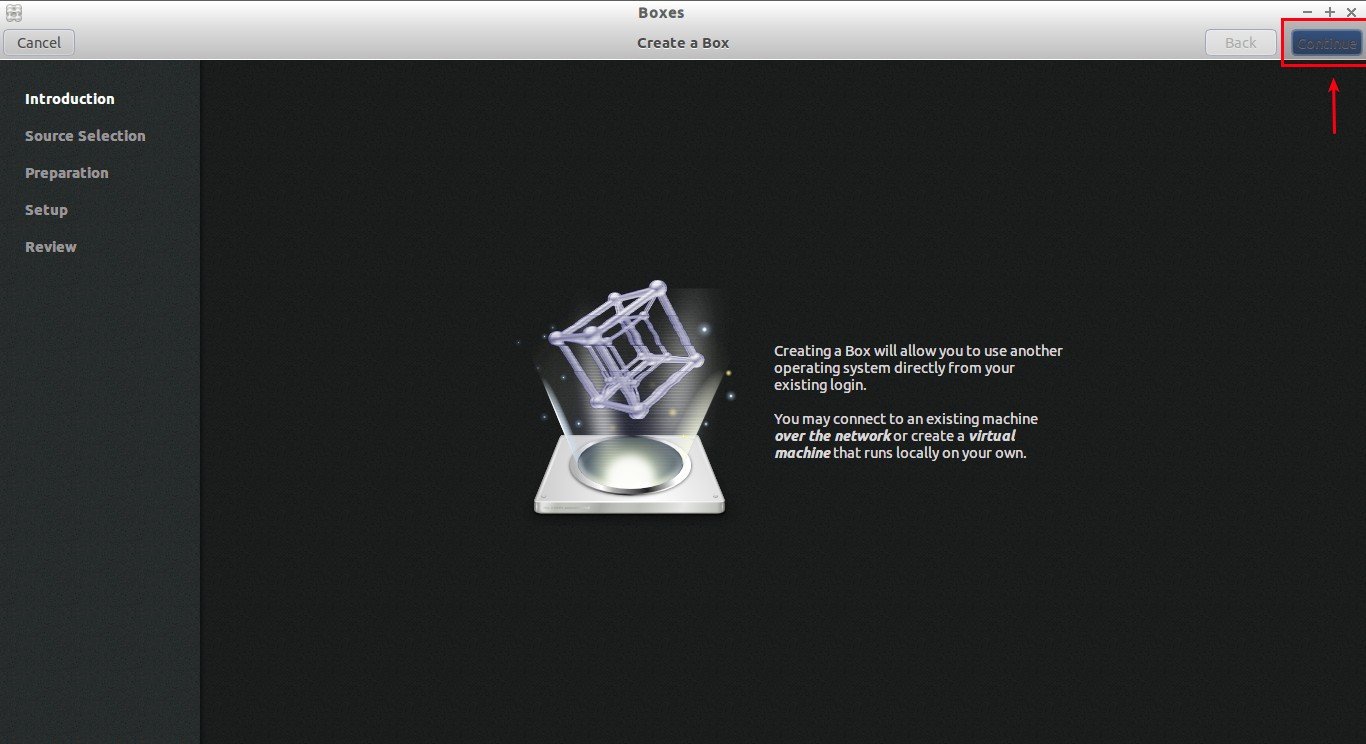
Click on the New button on the top right corner of Boxes window. The following screen will appear. Click Continue.
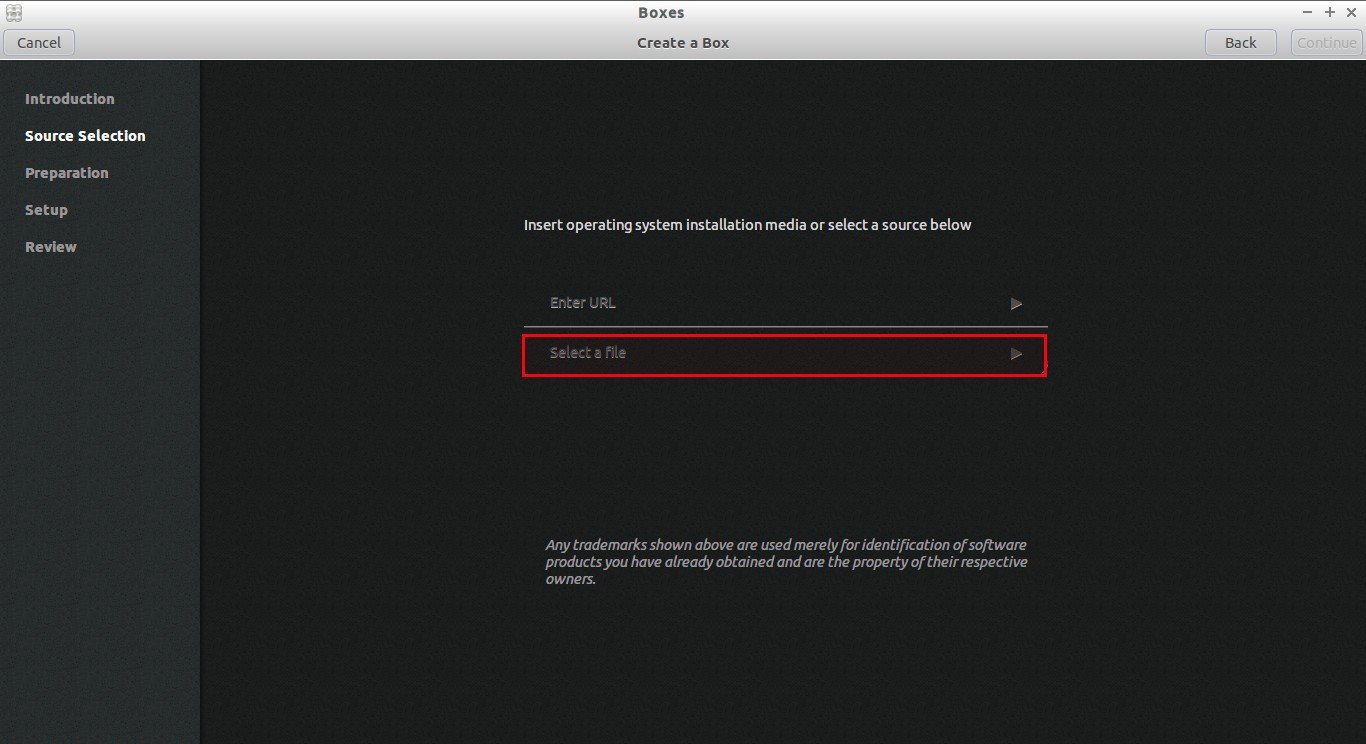
Now, select the Installation source.
You may either select the installation ISO from your local system or specify an URL or path to an ISO file. This can also be used to access a remote machine. The address should follow the pattern of
, for example:
spice://192.168.1.100?port=5906;
Here, I am going to select an ISO from my local system
In the Next screen, you’ll see the details of newly created VM details. You can either continue with the default values or you can customize the RAM, disk size details of the VM as per your liking.
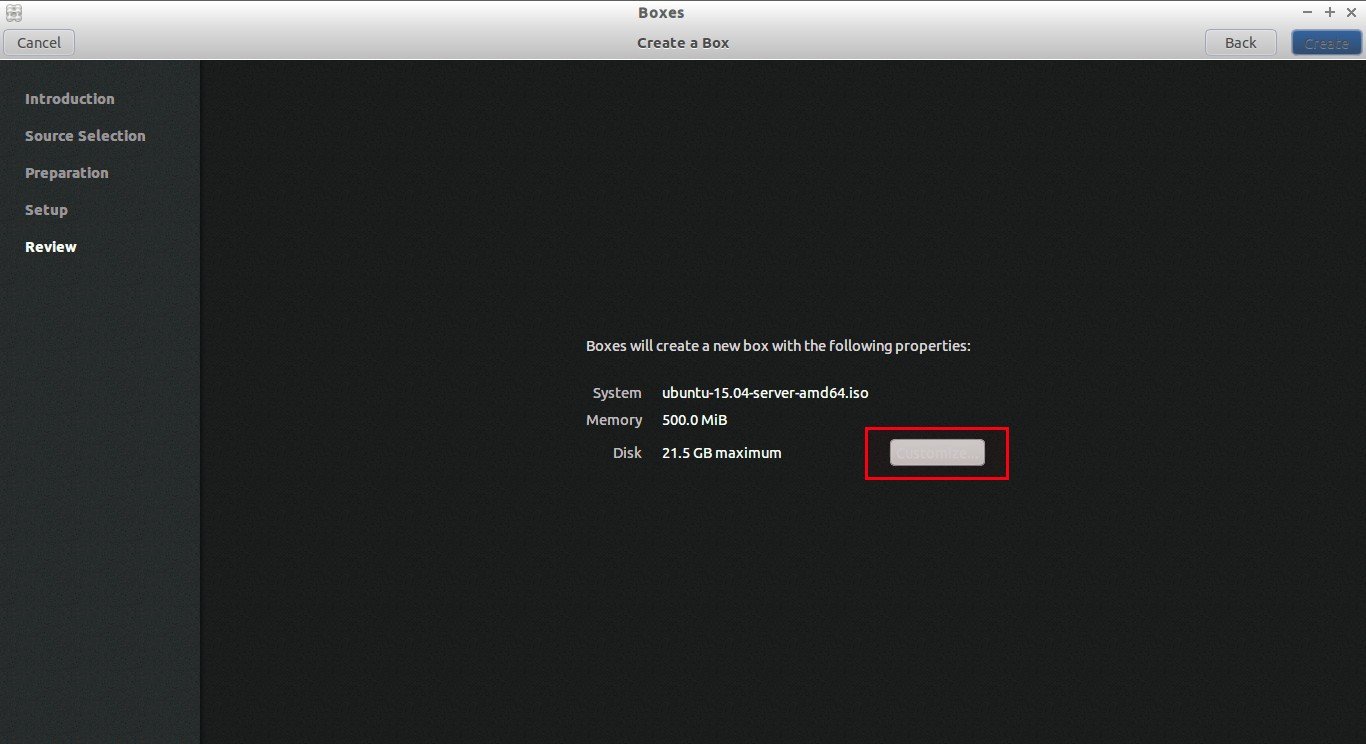
After customizing your VM settings, click on the reverse arrow button (<) on the top left corner to go back to the previous screen.
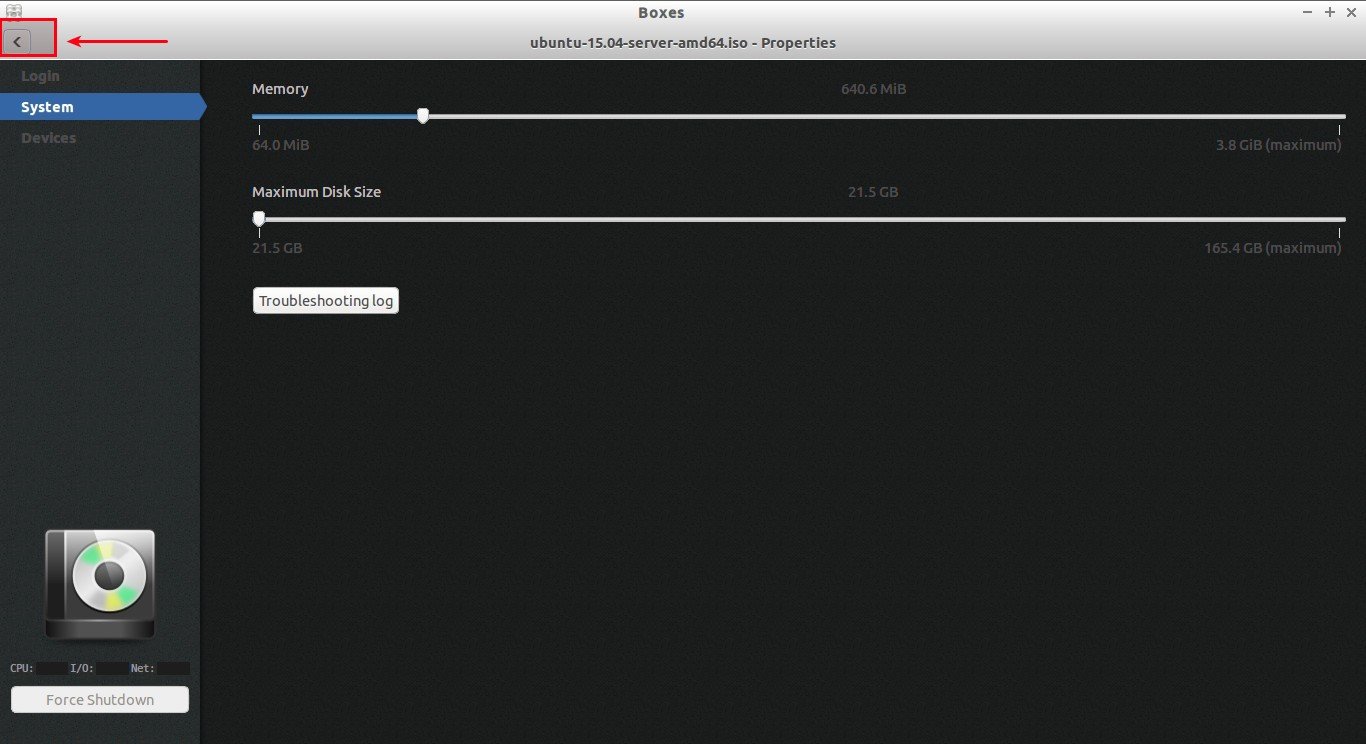
Finally, click on the Create button on the top right corner.
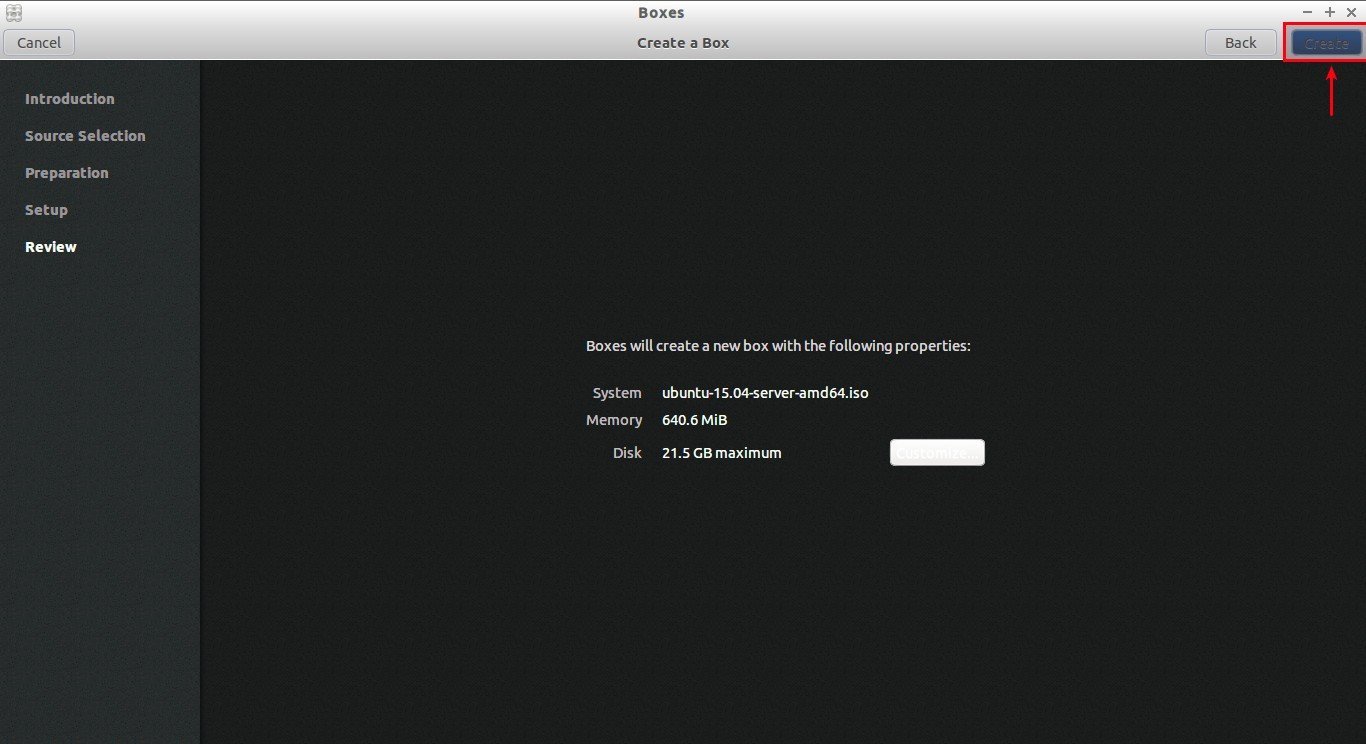
That’s it. Now, newly created will start to boot.
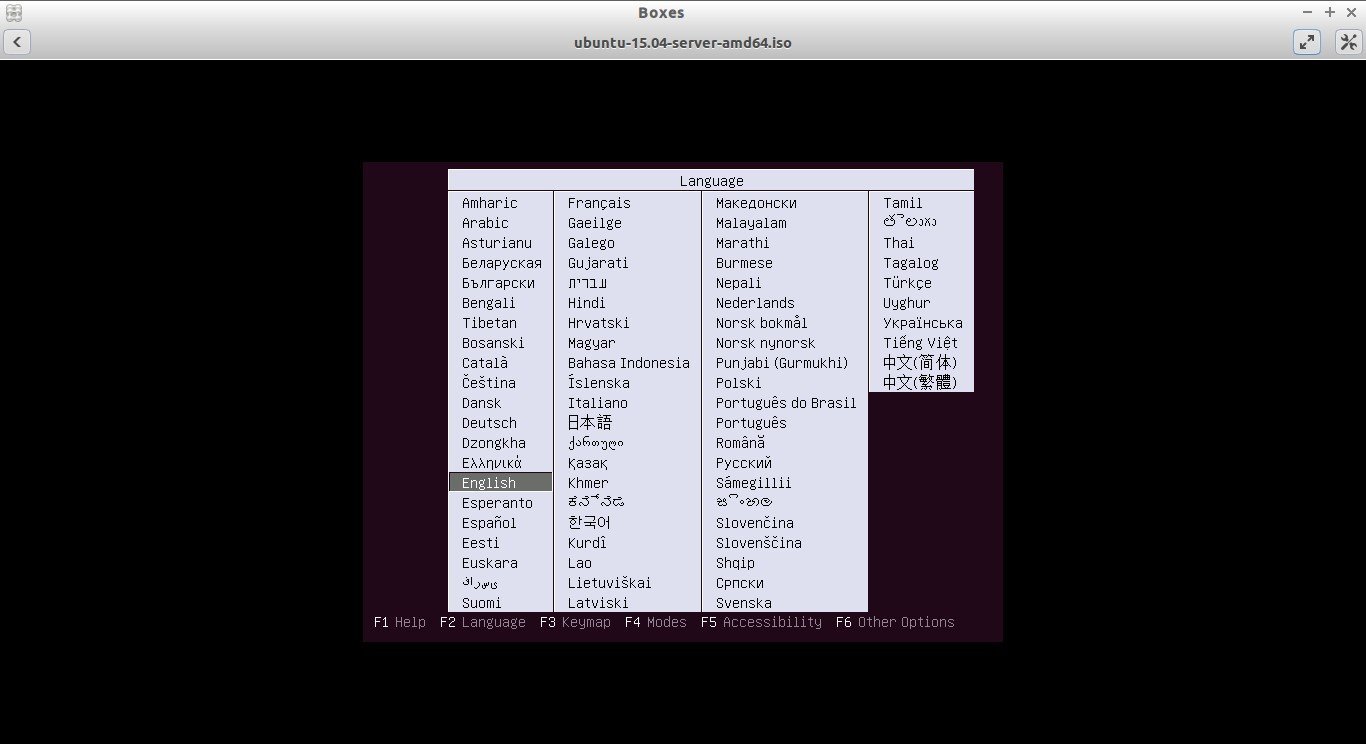
Now, continue the installation as the way you do in the physical machine.
Conclusion
Gnome Boxes is a great application designed with simplicity and ease of use in mind. Though it doesn’t has many advantages than any other virtualization tools, it just works out of the box and ideal to test or try various operating systems without having to pollute your system or without having to install third party softwares like VirtualBox, VMWare, and XEN etc..
That’s all for now.
Cheers! Happy weekend!!


