OpenDNS is a free DNS alternative to your ISP DNS. It helps you to get faster and as well as safer browsing at absolutely free. It speeds up your browsing experience by connecting to better DNS servers that are faster and reliable.
Anyone can use this DNS for their individual system or home network. For some enhanced security levels you need to pay, but for individual and home networks it is entirely free. It is damn easy to setup and configure. You don’t need to download and setup any extra software. And it’s operating system independent too!
Features
You can use this for your personal computer or a home or school network systems. If you have kids playing around with internet often, this is a must have option to setup in your home. It can protect the kids from visiting to inappropriate sites such as pornography, gambling and social networks etc.
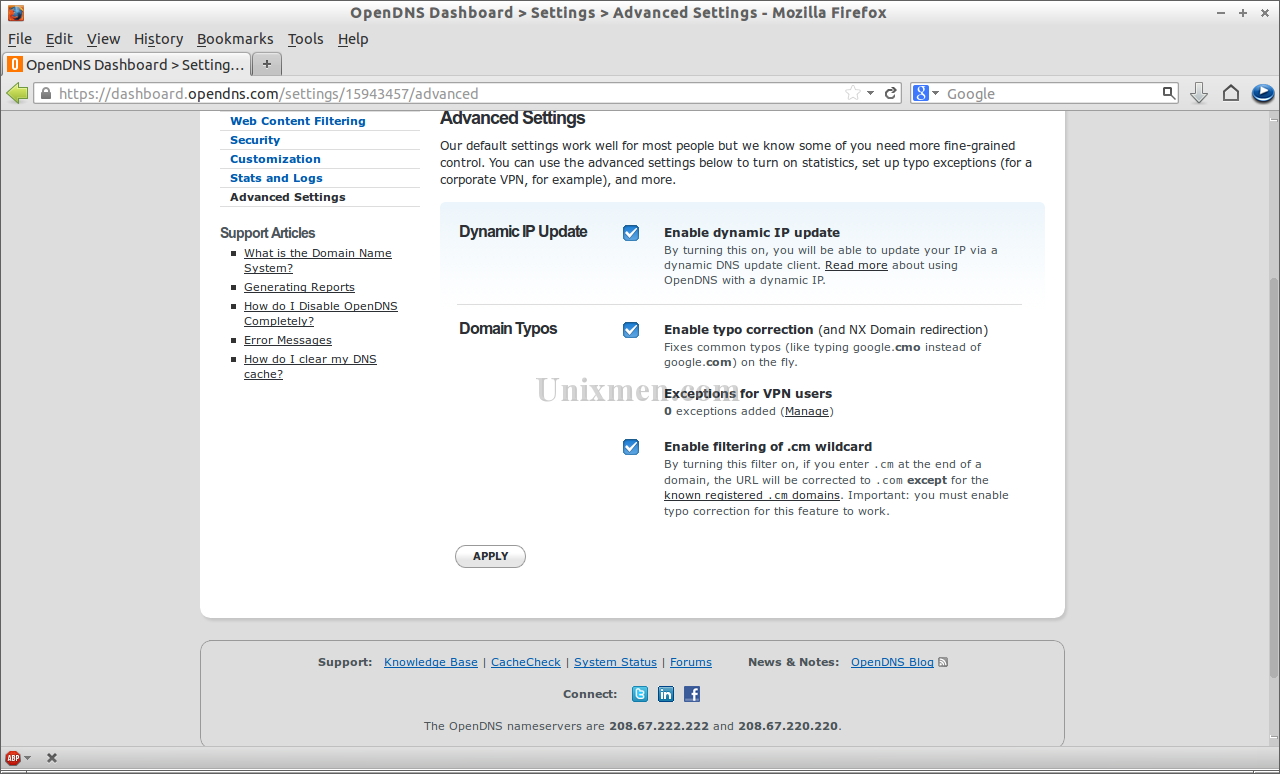
Also it has a smart enough feature to find typos in website addresses. For example if you type www.unixmen.om (note “c” is missing) in the address bar, OpenDNS will automatically correct the typo error and open the correct website www.unixmen.com.
Another notable advantages are Phishing, Malware protection and some other settings which are useful to protect your home network. For more information about OpenDNS, you can find in their official website.
Getting Started with OpenDNS
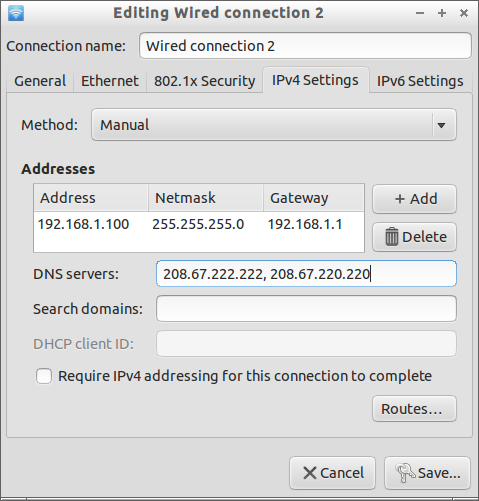
First you need to set the following DNS in your system or router. If you want to enable protection for a particular system, set the DNS in the network settings or if you want to enable protection to your home network, then enter the DNS in your router.
Here are the two DNS addresses provided by OpenDNS:
208.67.222.222
208.67.220.220
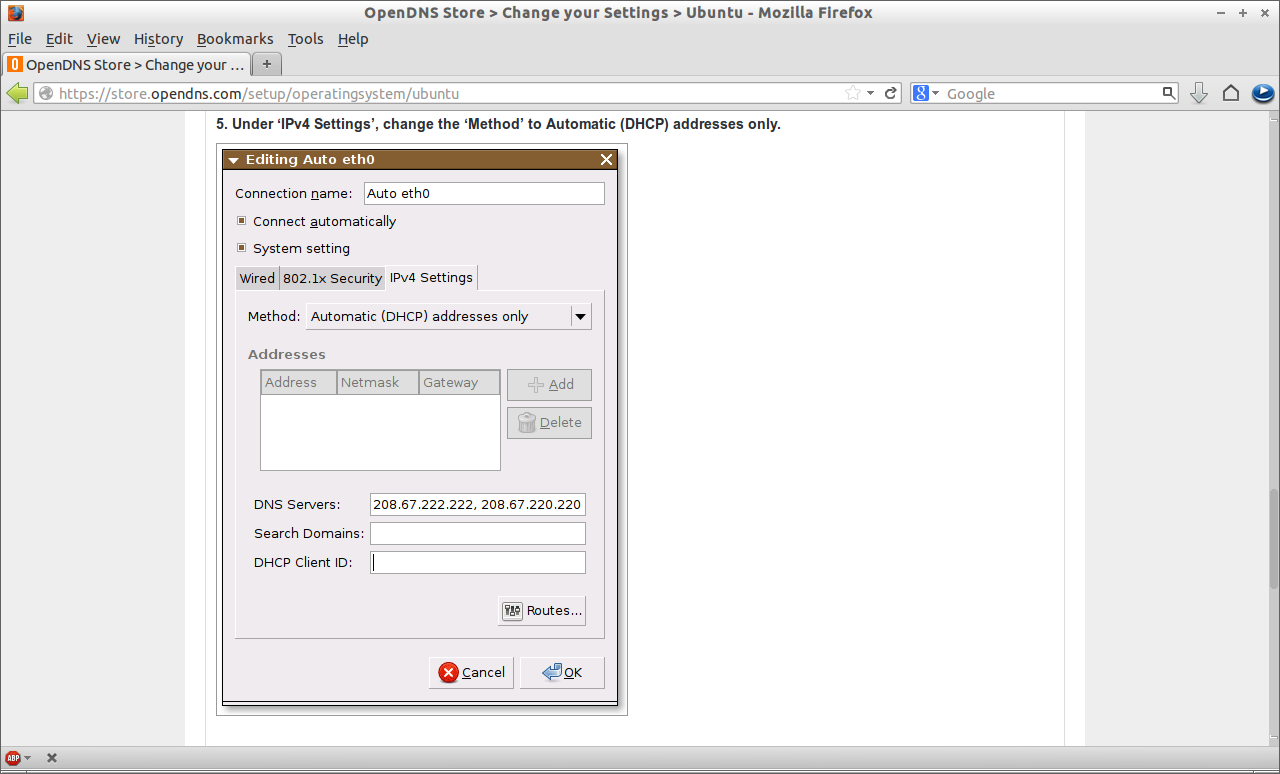
Set them in your network settings. Here I use this service for my personal system, so I set these two addresses in my network card settings.
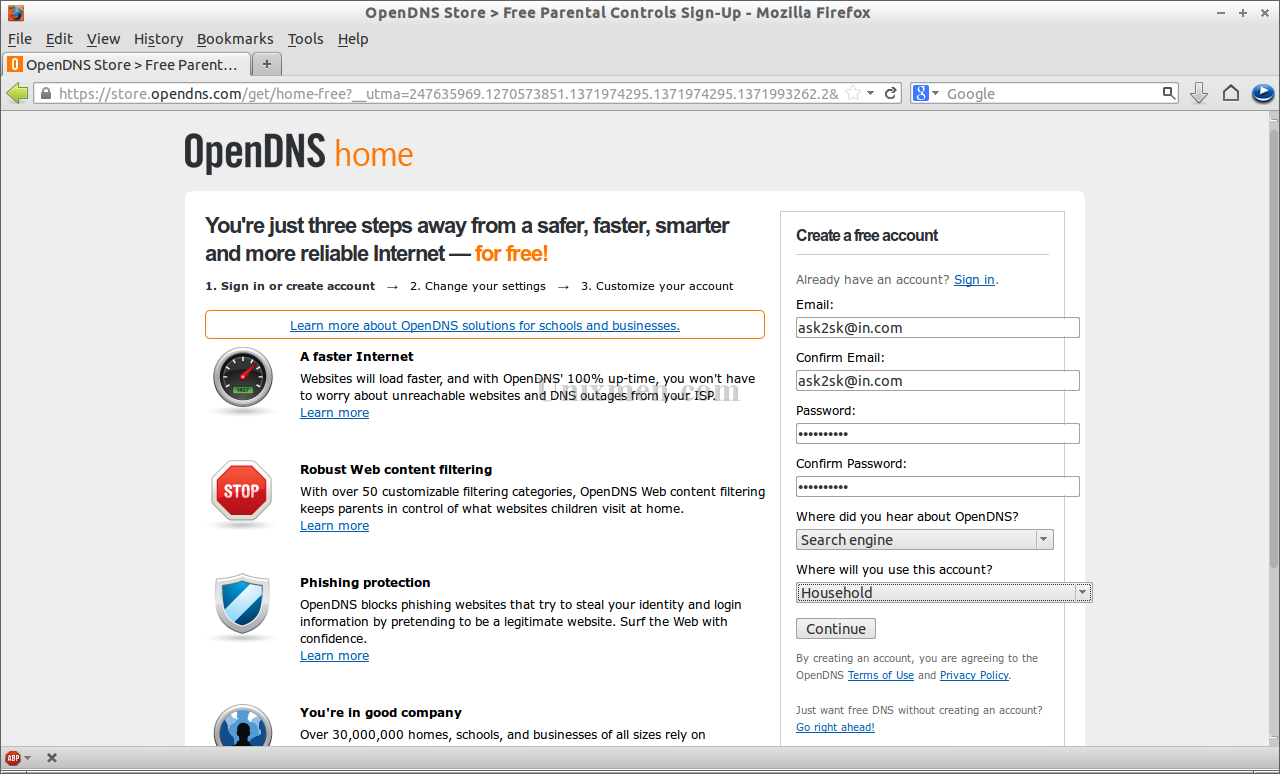
Here I select OpenDNS Home. Click on Sign Up button. Enter your mail ID and password etc. Finally, click Continue.
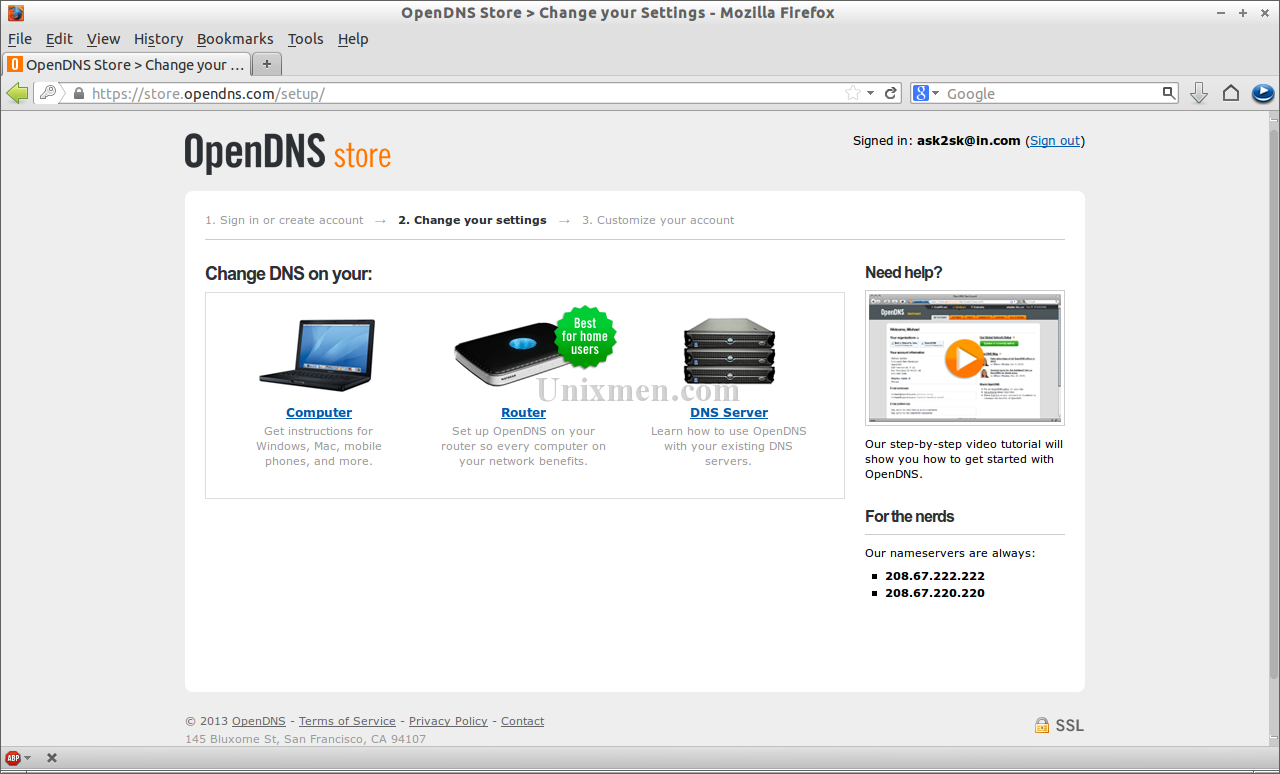
You will see the three options such as Computer, Router and DNS Server. I want to setup this service in my personal system, so here I select Computer.
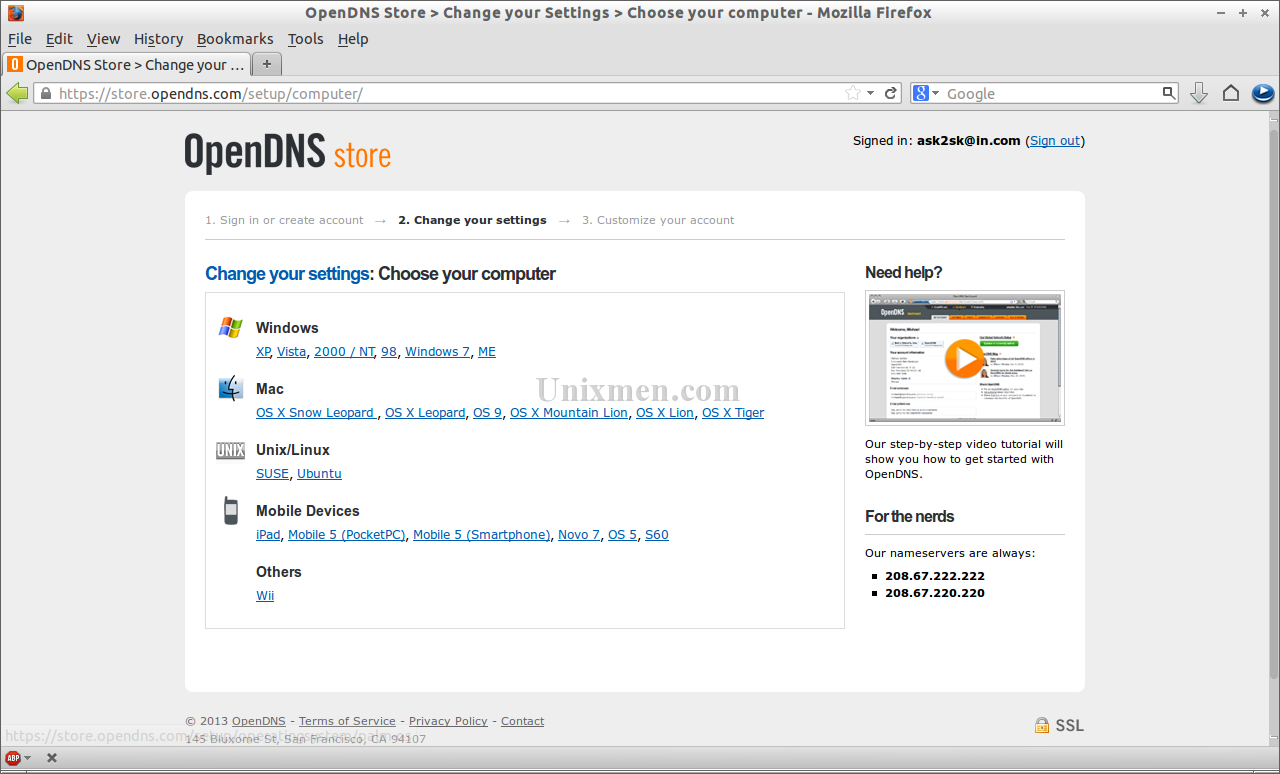
Choose your operating system. I select Ubuntu in the Unix/Linux tab.
The next window will show the instructions how to setup your network settings.
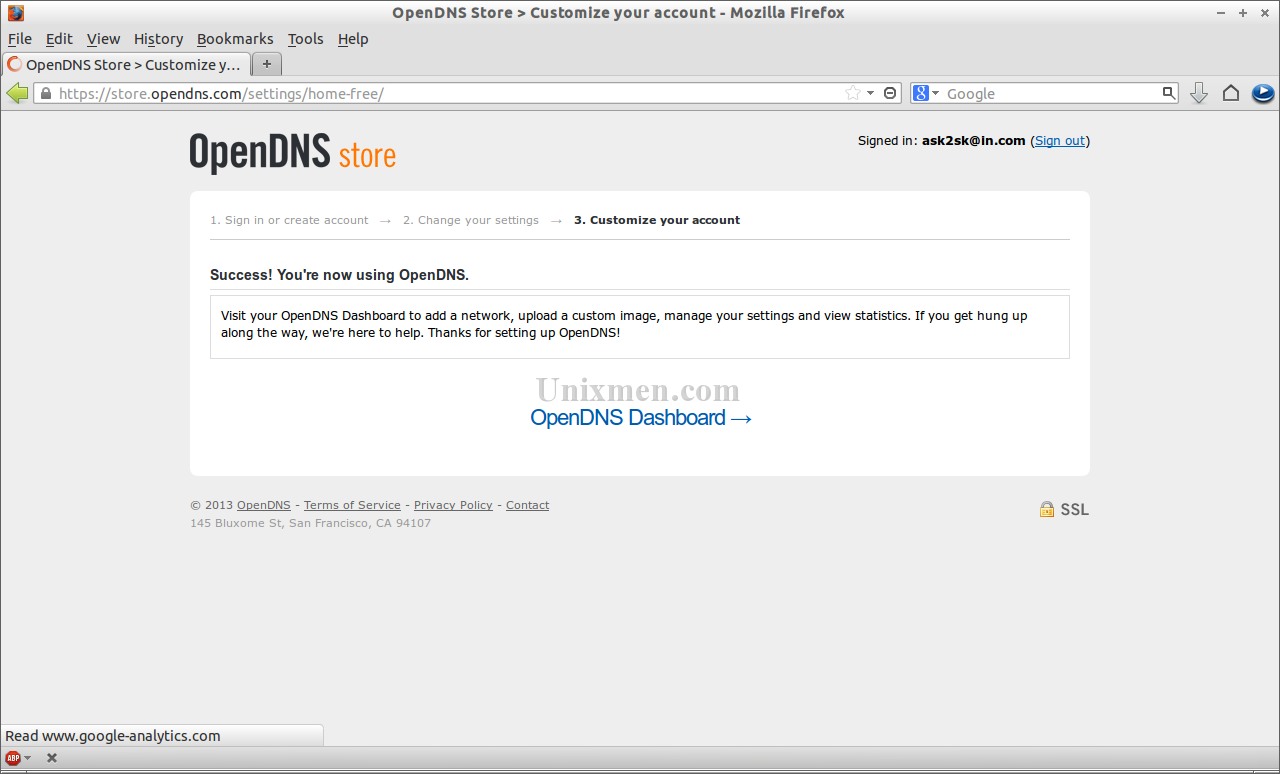
When all set click on the Test your new settings link at the bottom. Now you will be pleased with a success message. Click on OpenDNS Dashboard link to setup further settings.
Configuration
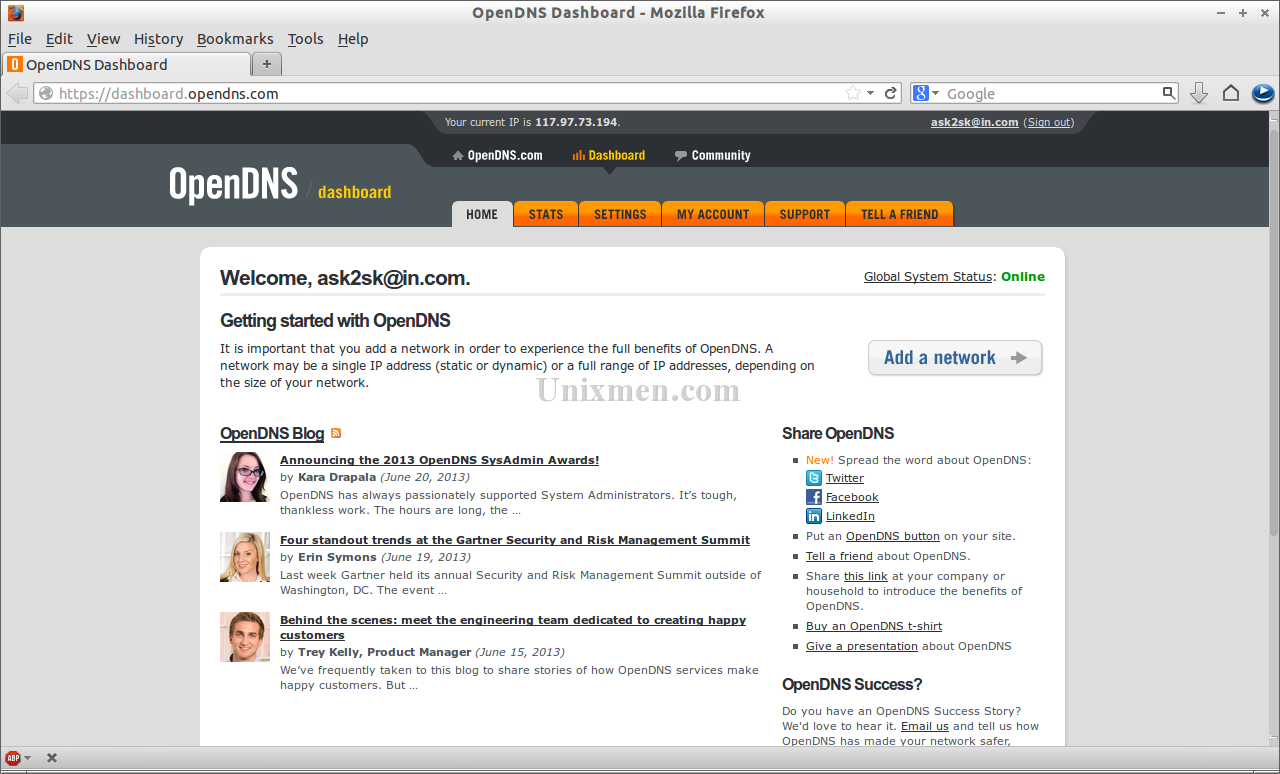
This is how your dashboard looks.
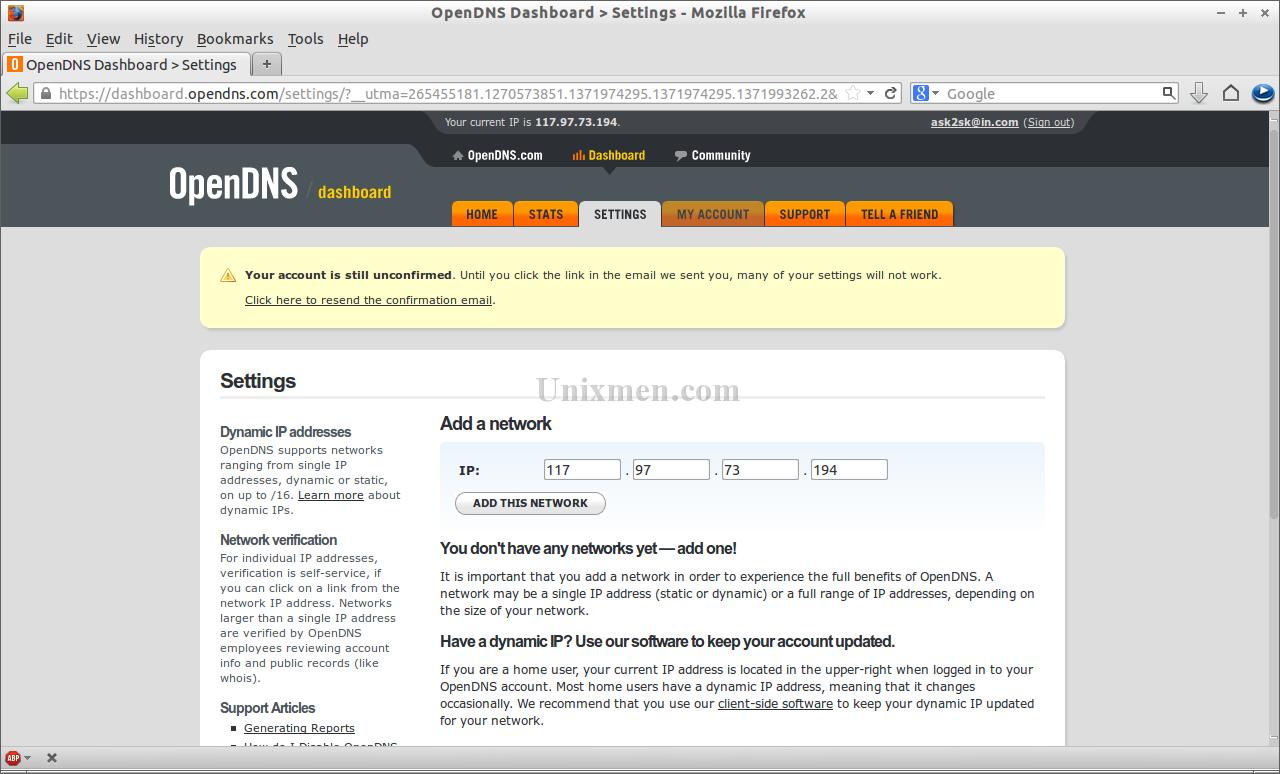
As you see in the above screen shot, I didn’t confirm my mail ID yet. If you didn’t confirm your mail ID, some features will not work as expected. To do that, go to your mail. OpenDNS will send a confirmation link to your mail. Click on the link and after you confirm your mail ID, this is how your OpenDNS dashboard looks.
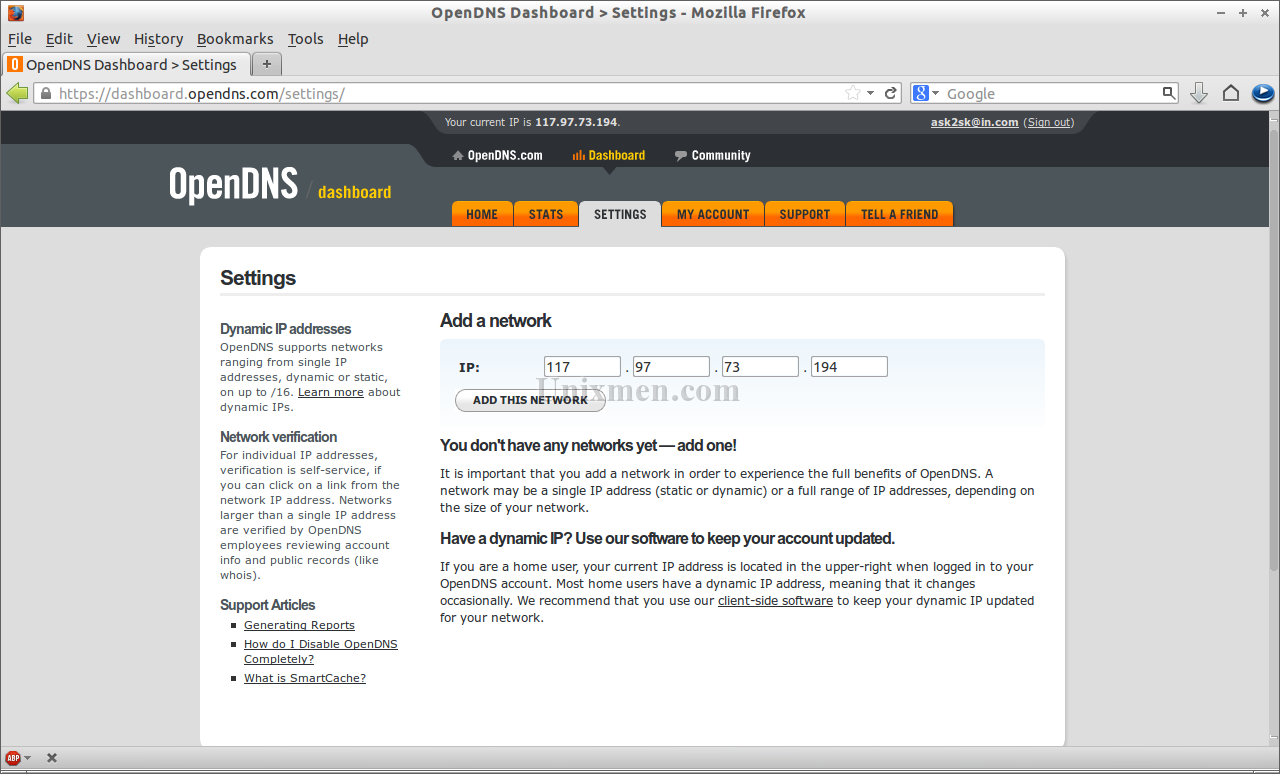
Click on Add a network. You will be redirected to the next page.
Enter your public IP. The public IP will be shown on the top of your dashboard or you can find it from www.whatismyip.com website. Click on Add this Network.
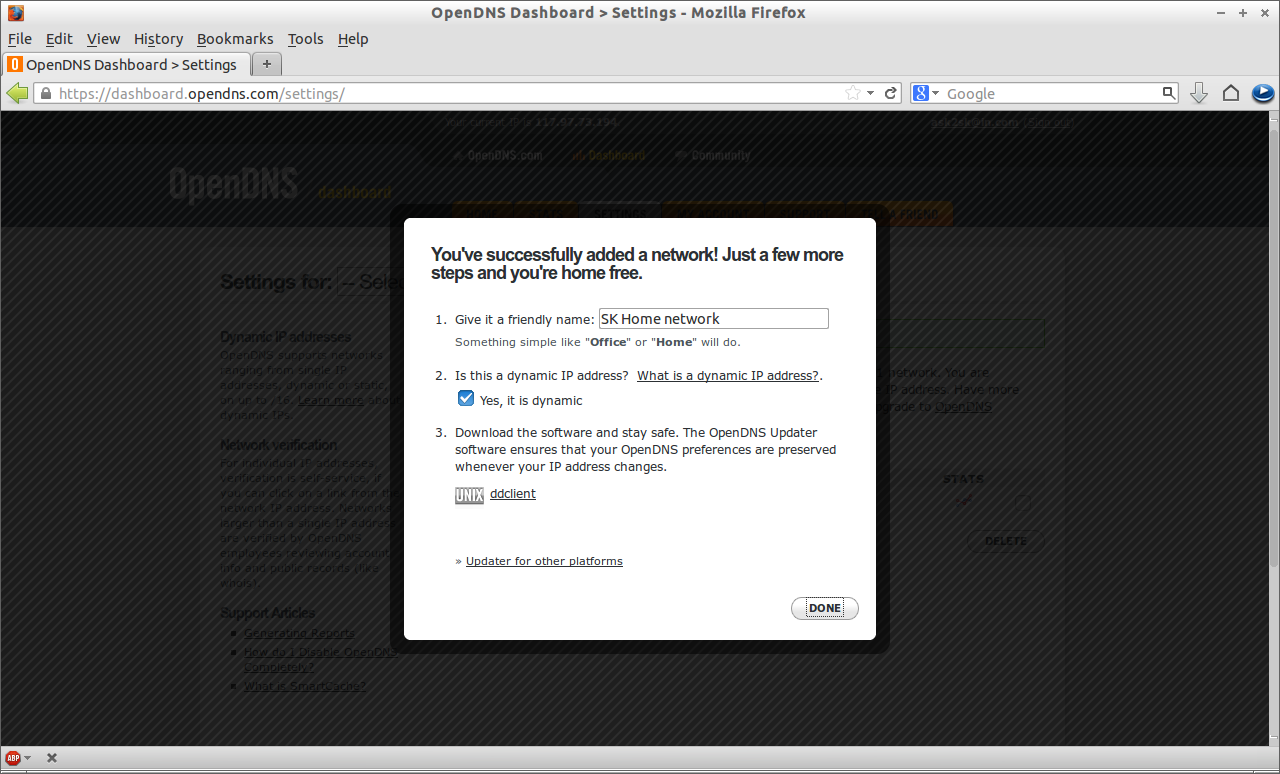
Check the box “Yes, it is a dynamic ip address” if yours is a dynamic address. Mine is dynamic IP. And download and install ddclient software in system to update the dynamic IP address to OpenDNS server whenever it changes.
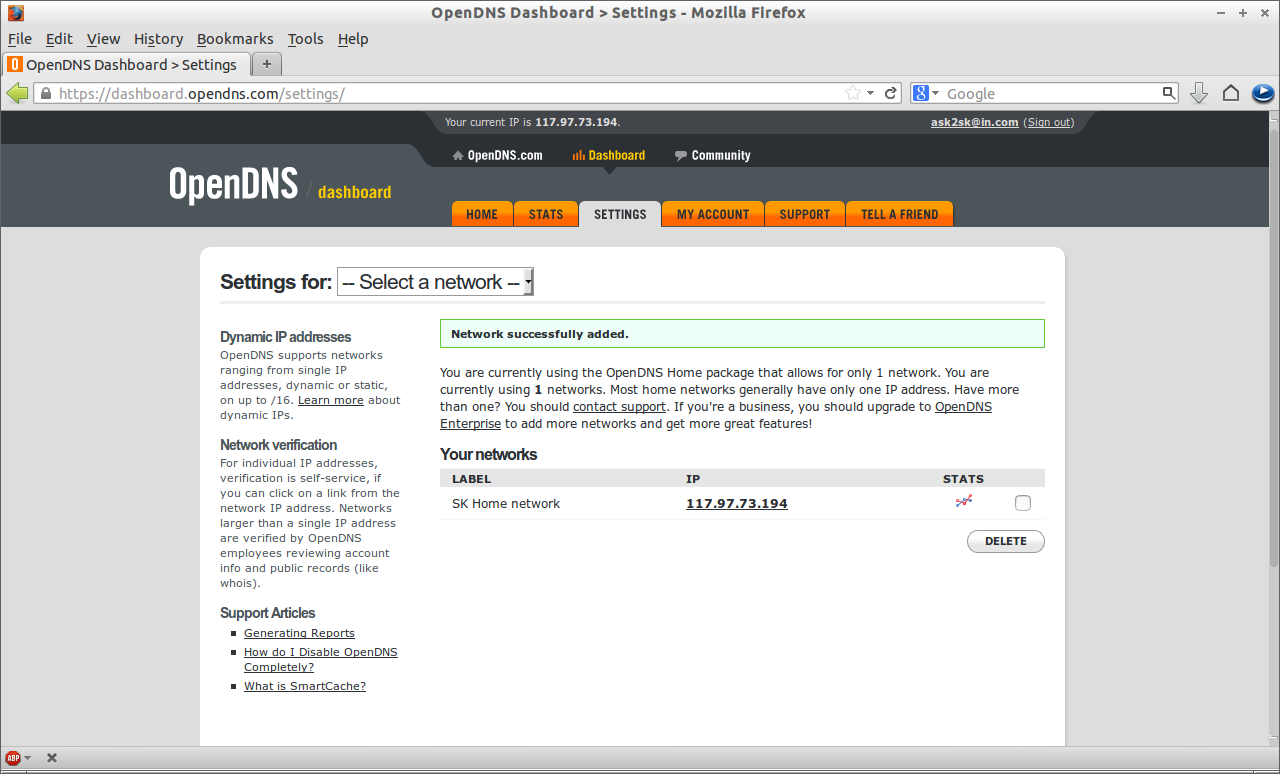
Now your network has been successfully added.
Now it is time to configure some settings for our newly added network. Select your home network from Settings drop down box.
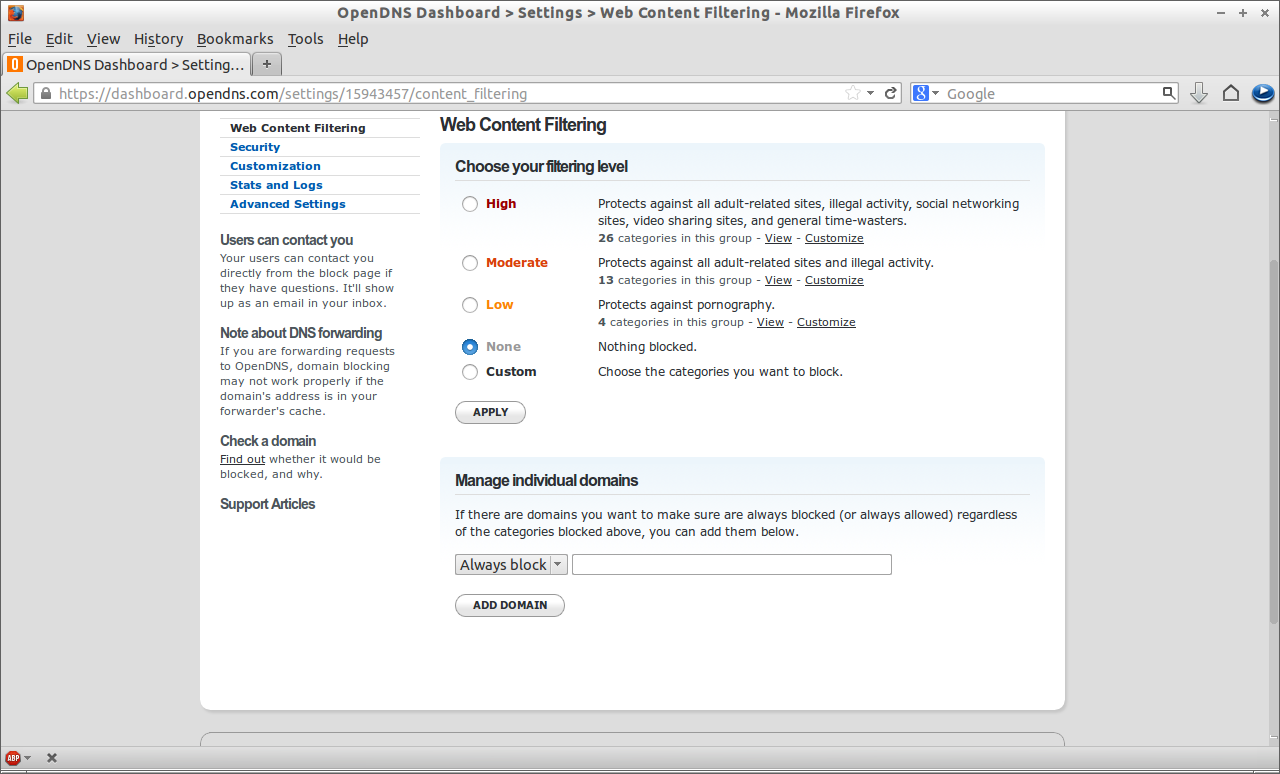
Web Content Filtering
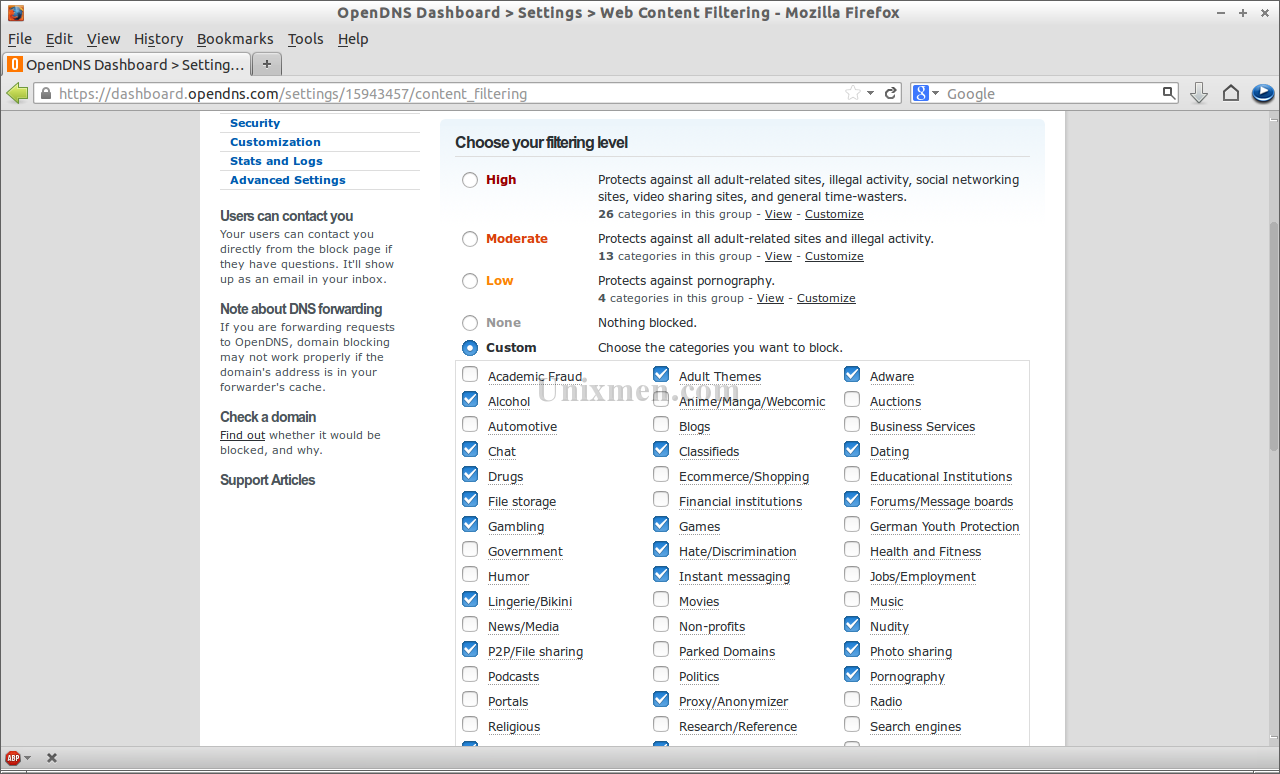
You may see the filtering levels such as High, Moderate, Low, None and Custom in this section. According to your setup, you can select any one of the levels. You can view the details of each level by clicking on the View button. Also you can customize the options of each level. Select the options what you want to restrict.
Also you can add the exceptions. For example if you want to allow mail.yahoo.com domain, then add the domain in the Manage Individual Domains section.
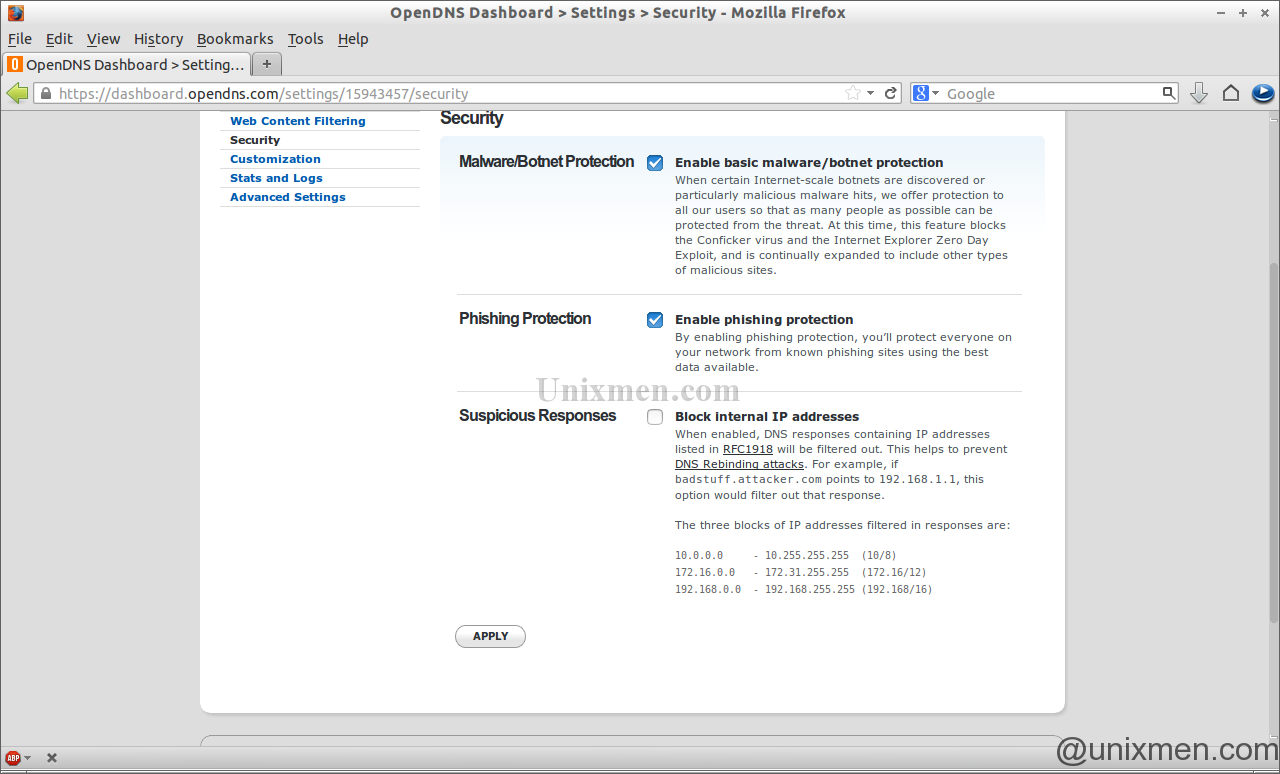
In this section, you can set Malware and Phishing protection options. Also you can block individual IP addresses as well.
Customization
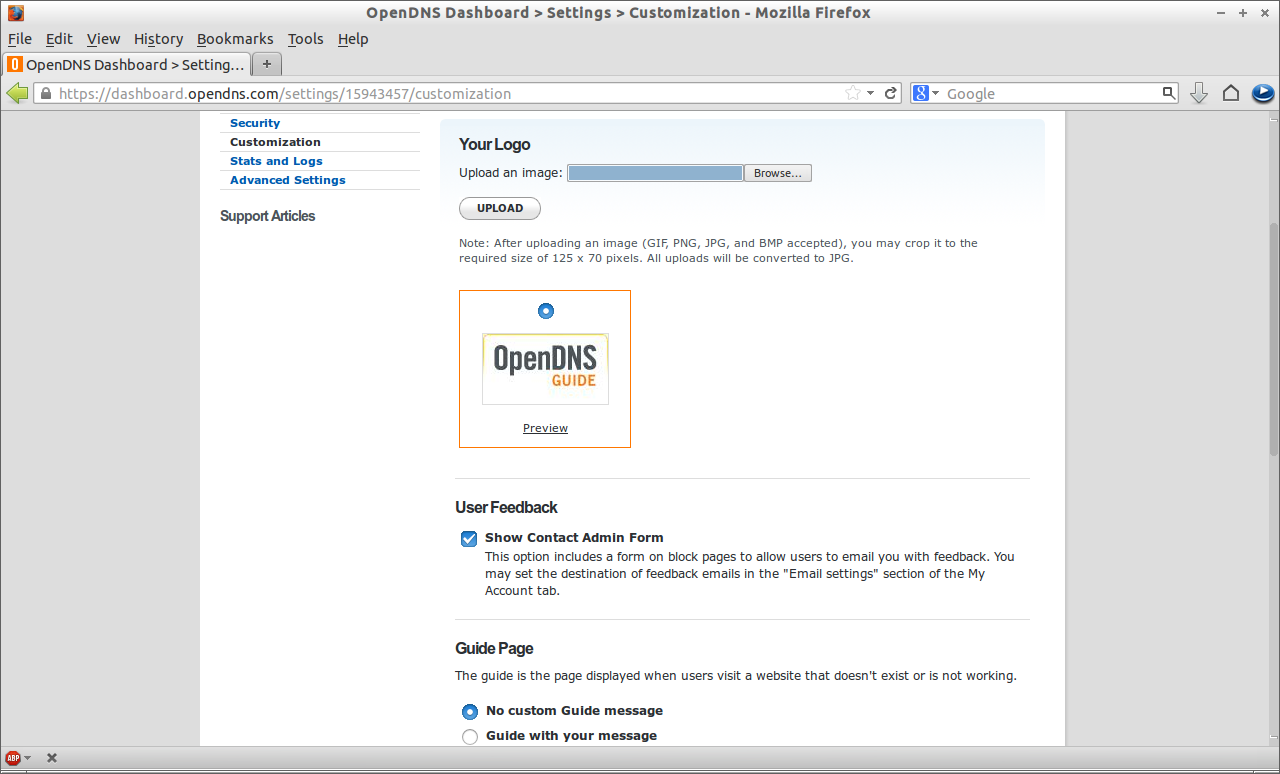
In this section, you can add your own logo or photo of yours. Also you can send customized message along with blocked page.
Stats and Logs
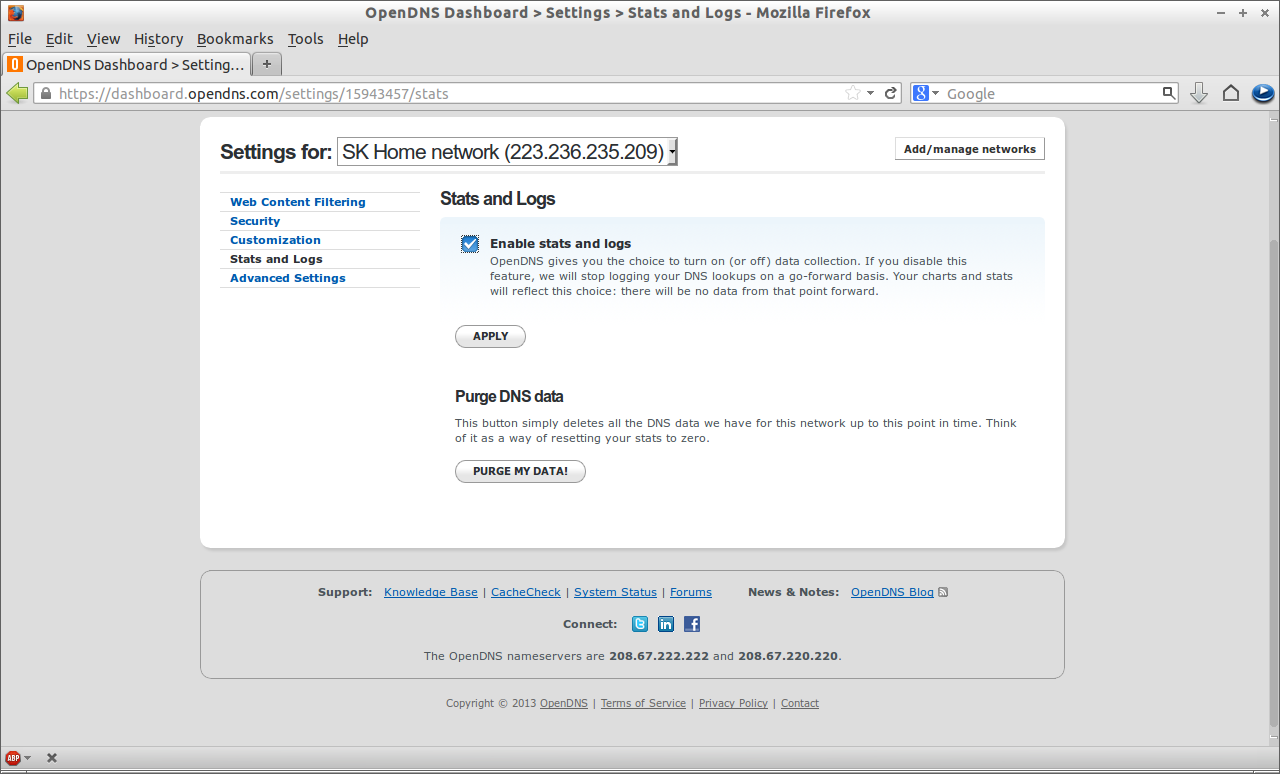
If you want to see the logging activity just check this option, OpenDNS servers will automatically collect the logs for you.
Advanced Settings
This section has the options to enable dynamic IP update, domain name typo correction option and VPN exceptions etc.
Once you all set, save the changes by clicking on the Apply button.
Test your settings
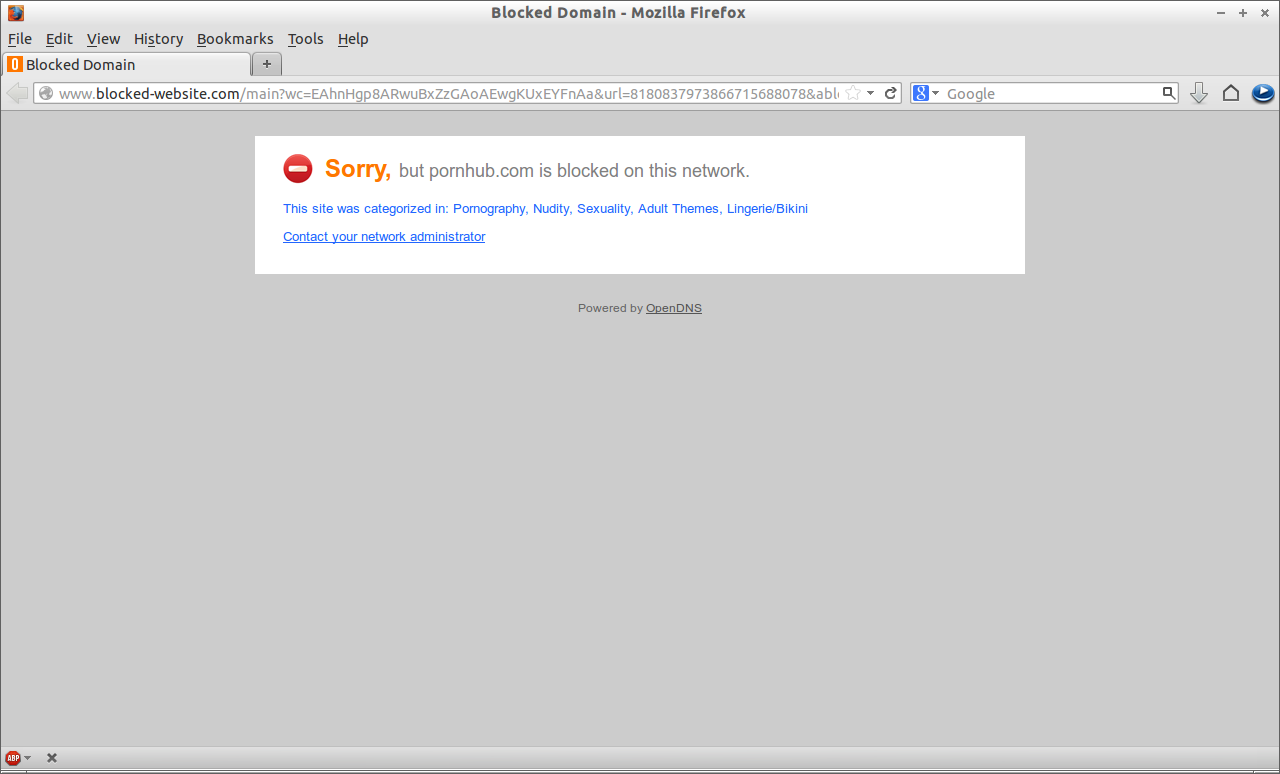
Say for example lets open a porn site to see what happens. You may see a message that the domain is blocked as shown in the below screen shot.
This method is quite easy to setup basic web content filtering for your home or small schools. If you like this you can go for paid solutions of OpenDNS. For more details visit their official website. If you not satisfied with OpenDNS, then try some open-source firewall distributions such as Untangle and IPFire etc. Happy and safe browsing!


