
Introduction
hMailServer is a free, open source, e-mail server for Microsoft Windows. It allows you to handle all your email yourself without having to rely on an Internet service provider (ISP) to manage it.
It supports the common e-mail protocols (IMAP, SMTP and POP3) and can easily be integrated with many existing web mail systems. It has flexible score-based spam protection and can attach to your virus scanner to scan all incoming and outgoing email.
The objective of this article is to provide you with an understanding of installation and configuration of the hMailServer, an open source e-Mail server for Microsoft Windows.
Note: As you may know, we really won’t encourage the Microsoft related stuffs in our site. But, this guide has been specially written for a reader who requested us to make an article about hMailServer. We strictly avoid the Windows related articles in future.
Prerequisites
Before you start install of hMailServer, you need to make sure that you have good operating systems version and you need to choose the database engine for your mail server.
System requirements
hMailServer can be installed in the following operating systems. The latest available Windows service pack must be installed. hMailServer 5.6 has only been tested on the following operating systems.
- Microsoft Windows 2012 (all editions)
- Microsoft Windows 2008 (all editions)
- Microsoft Windows 2003 (all editions)
- Microsoft Windows 7 (all editions)
- Microsoft Windows Vista
- Microsoft Windows XP Professional Service Pack 3
hMailServer 5.6 may work on other operating system versions as well, but only the versions below are officially and regulary tested.
Choosing database engine
hMailServer supports 5 different database engines :
- Microsoft SQL Server 2000 and later
- Microsoft SQL Server Compact Edition (CE)
- MySQL 4 and later
- PostgreSQL
And it’s recommended to use Microsoft SQL Server or MySQL.
Download and Install hMailServer
Go to the http://www.hmailserver.com/?page=download and download the latest stable binaries for the hMailServer onto your local machine.The file you download has a name of the form hMailServer-version-build.exe. As an example, version-build might stand for 5.6 – Build 2145.
Double click the downloaded .exe file to start the installation of the hMailServer.
Install hMailServer
This part of the article describes the steps for installing the hMailServer and then guides you with the configuration setup.
Double-click on the downloaded file to launch the setup.
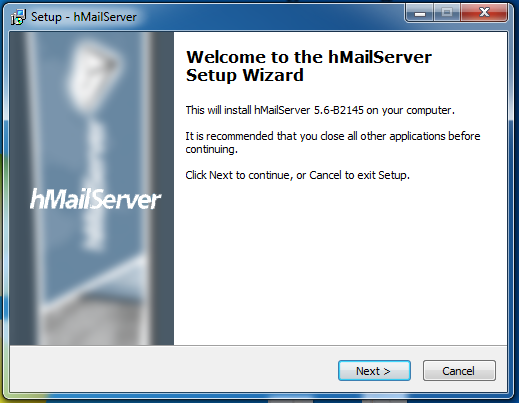
The first dialog which is shown is the Welcome dialog, in this one, simply click Next.
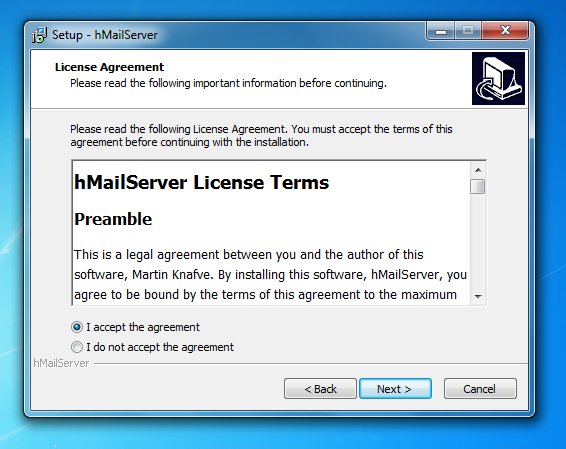
Next step read and accept the agreement and click Next.
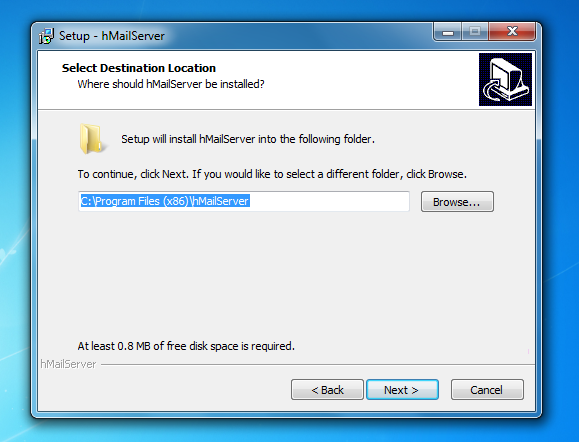
Select the destination folder and click Next.
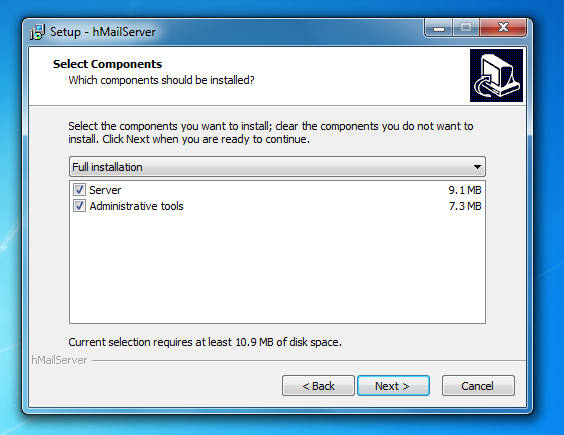
Select which components you want to install and click Next. On the server, you should install all available components.
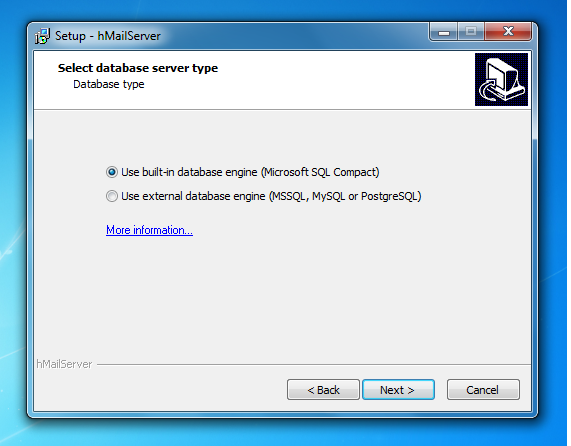
Choose the database server type that you will use it.
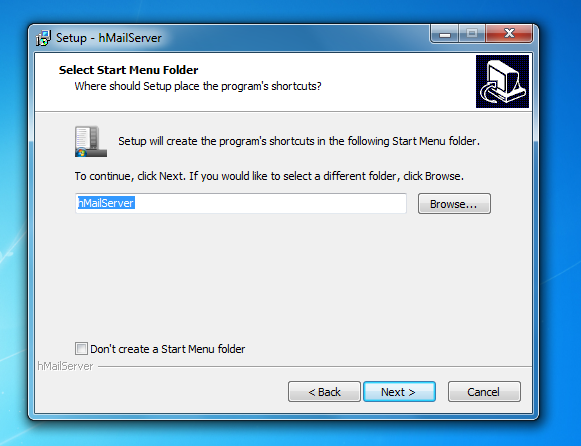
Select which start menu folder you want to place the hMailServer icons in and click Next.
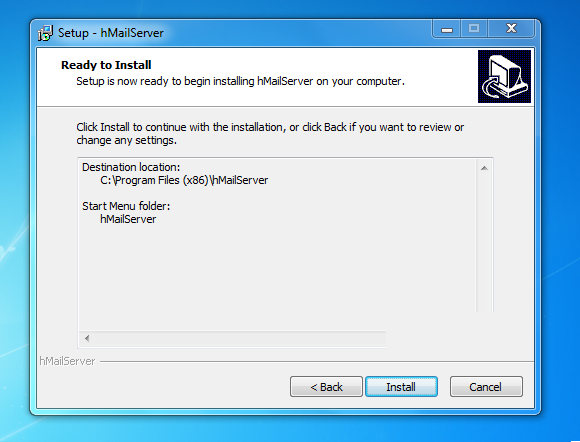
Verify and click Install on the summary screen. The installation takes less than a minute depending upon the system resources.
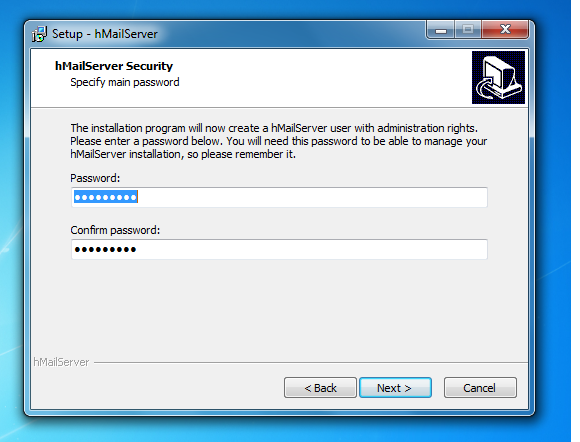
After the files have been installed, you need to Enter the password for the administration rights in this screen.
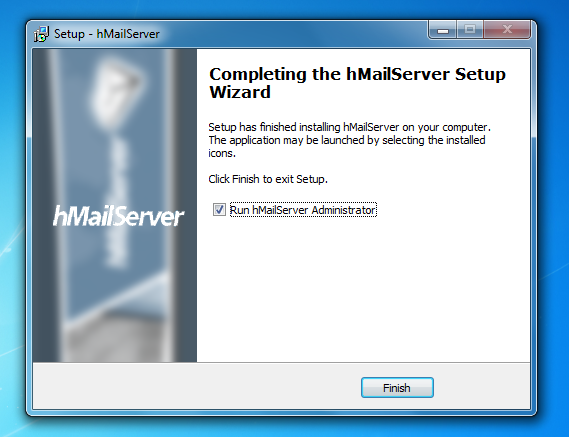
Clik Finish to complete the installation of hMailServer.
Configure hMailServer
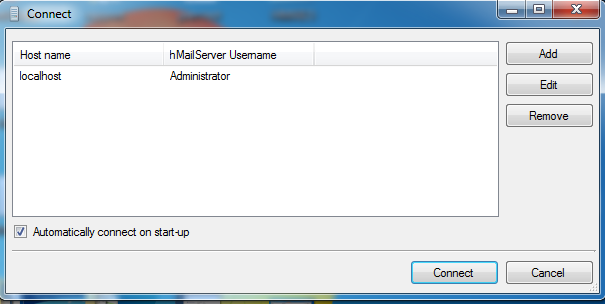
After you have finished the installation, it’s time to start hMailServer Administrator (found in the start menu). The first thing you need to connect to different hMailServer installations in your network.
Ensure that the Host name localhost is selected and click Connect.
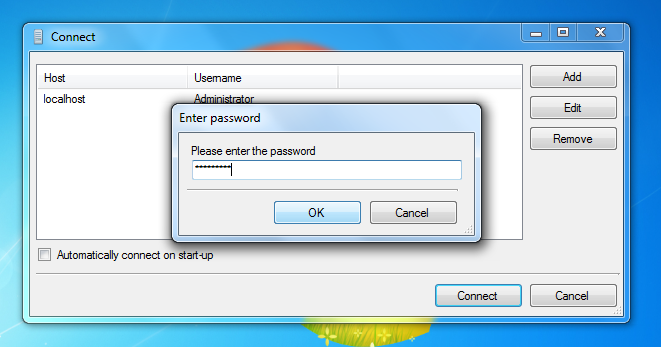
Enter the password for the administration rights in this screen.
The hMailServer Administrator window is opened.
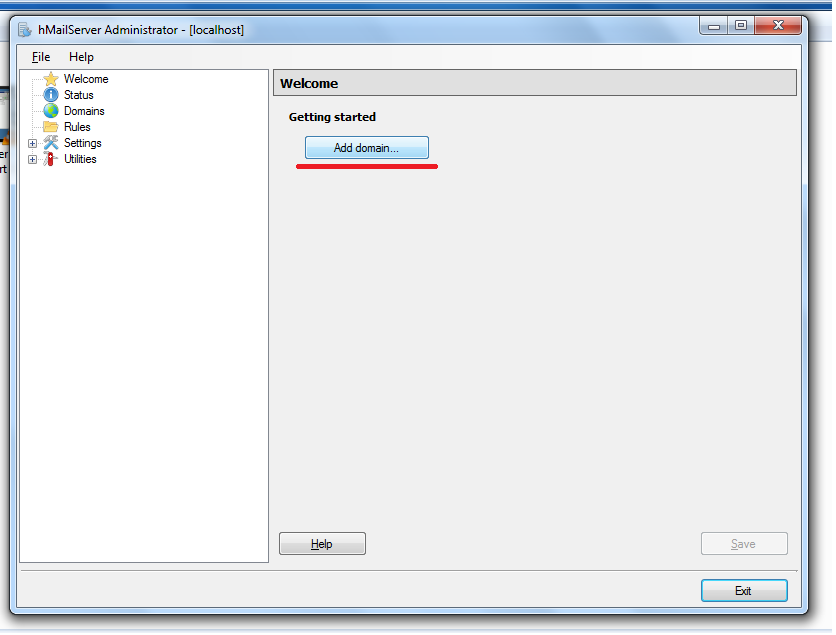
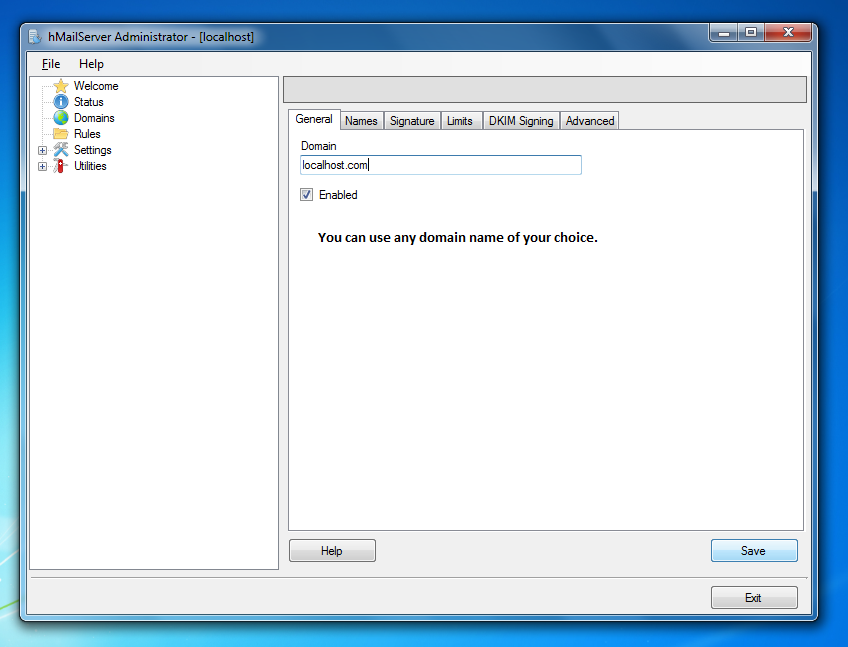
Every hMailServer domain should be connected to an internet domain. Click the Add domain… button and the Domain screen is opened
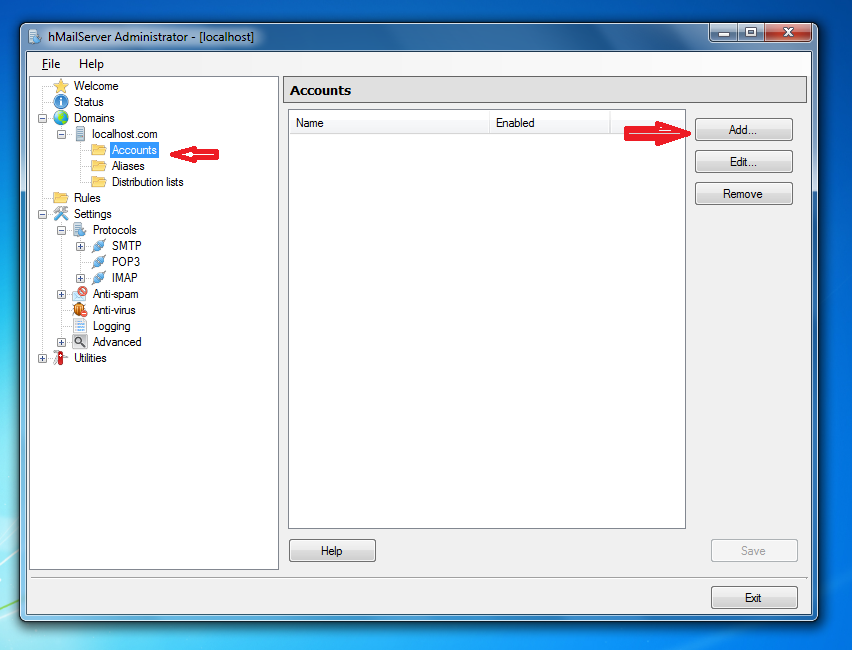
You will now see the domain listed under Domains in the left pane window. Click on accounts tab then click on Add button situated at right hand side of the administrator tool.
Add email address. We will use test@localhost.com you can use any of your choice. Add password for your email address. This email and password will be used as your SMTP Server Name and Password.
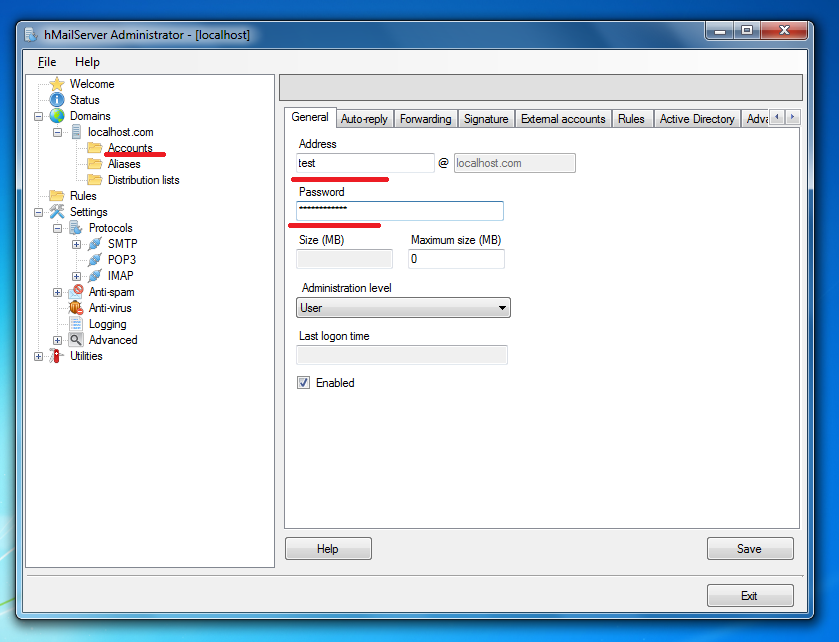
Click Save and then Exit. hMailServer is now successfully installed to your computer. You can use this Local SMTP server to send emails. You can configure wchich protocols (IMAP, SMTP and POP3) you want to use for your mail server.
Hope this helps and enjoy your mail server.


 to manage it.)