Introduction
GATE stands for General Architecture for Text Engineering; it is a freeware application for analyzing and processing of texts. It is almost 15 year old product but still being used widely for text analysis by people of various walks of life. It is being used in enterprises and also in educational and research institutes. It is probably the only application of its kind for the text analysis and processing. It’s applications are wide; from undergrad students to high level researchers and scientists. It is a robust, highly salable and comprehensive system. You can easily extend it functionality by adding various freely available plugins.
GATE has been under active development through last decade. It has emerged into a gigantic project, its an IDE (Integrated Development Environment) , a web application, a framework and an architecture. Scientific, Education and Business are major areas where this tool is being used by large number of experts to perform complex engineering and analysis operations.
In this article, we will review how to install it on Ubuntu Linux 16.04 operating system. These set of instructions should work for any older version of Ubuntu too.
Installing GATE
First of all make sure that your Ubuntu system is on the latest packages.
One important thing to note here is that GATE requires JDK version 8. If you don’t have JDK version 8 installed on your system, run following command to accomplish this task.
Verify that correct JDK version has been installed sucessfuly by using the following command.
Alright, our ubuntu system is all set to install GATE. Wisely choose a suitable location to download its installer file, we decided to download it inside /opt directory.
Additional Note : Always check its official download site for latest version.
Once the download process is complete, we might need to rename the downloaded file to a proper one. Run following command to do this.
Begin the installation process for GATE by using the following command.
It will launch an installation wizard, here is the very first screen you should see, click “Next” from here to initiate the installation process.
On the next step, accept the license agreement and click “Next”.
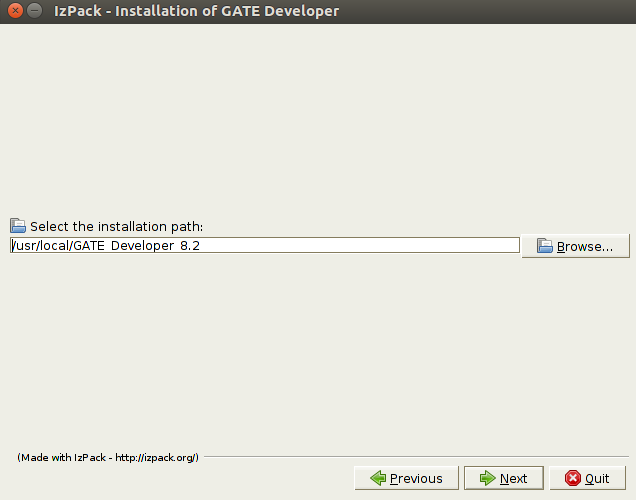
Select the installation path on next step and proceed further with the installation. Default path choice should be fine, but you can modify it if you are looking to install it in some other directory.
The installation process is in progress now, sit back and keep monitoring it for any possible errors.
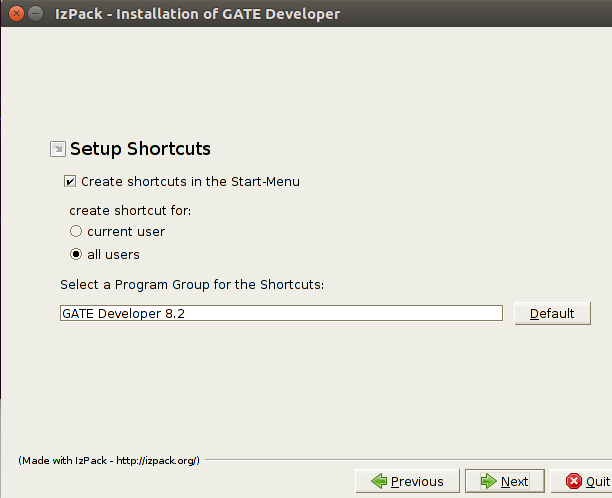
On the final step, choose how you want to setup shortcuts for this application.
There you go, GATE has been installed on your Linux system now. Congratulations!
Launching GATE IDE
Once GATE has been installed successfully and you haven’t created any desktop or start menu shortcuts, here is how you can launch its Graphical User Interface by using command line.
Go to the installation folder for GATE and browser into the “bin” directory.
Here run the “gate.sh” script to launch the Integrated environment for GATE.
Here is the very first screen you should see ; the loading screen for GATE.
There you go, its loaded now, start using it for text analysis.
 Conclusion
GATE is very popular and useful tool, it is feature rich, easy to use and freely available. It’s been active for last 15 years and still being updated on regular basis and new features are being added to cater the modern day needs and demands of users.
If you enjoy our article(s), Please use “Get Linuxpitstop articles by Email” option to get latest articles by email. Please like, follow and share our social network pages, we need help from esteemed visitors like yourself to keep this venture going.


