Today, we will learn how we can install OpenCart on our CentOS 7 Linux distribution.
Why CentOS?
CentOS Linux is a community-supported distribution derived from sources freely provided to the public by Red Hat for Red Hat Enterprise Linux (RHEL). As such, CentOS Linux aims to be functionally compatible with RHEL. The CentOS Project mainly changes packages to remove upstream vendor branding and artwork. CentOS Linux is no-cost and free to redistribute. Each CentOS version is maintained for up to 10 years (by means of security updates — the duration of the support interval by Red Hat has varied over time with respect to Sources released). A new CentOS version is released approximately every 2 years and each CentOS version is periodically updated (roughly every 6 months) to support newer hardware. This results in a secure, low-maintenance, reliable, predictable and reproducible Linux environment.
You can download CentOS from here. You can directly download the ISO file format disk image from here.
What is OpenCart?
OpenCart is a turn-key ready “out of the box” shopping cart solution. You simply install, select your template, add products and you’re ready to start accepting orders. It has order management and multiple payment gateways already built in and we provide lifetime free support and free software updates.
OpenCart is free open source ecommerce platform for online merchants. OpenCart provides a professional and reliable foundation from which to build a successful online store. This foundation appeals to a wide variety of users; ranging from seasoned web developers looking for a user-friendly interface to use, to shop owners just launching their business online for the first time. OpenCart has an extensive amount of features that gives you a strong hold over the customization of your store. With OpenCart’s tools, you can help your online shop live up to its fullest potential.
OpenCart is supported by a large and friendly community / forum where any one can take technical help regarding OpenCart. Here is the official forum link for you guys.
It has all the features that a modern e-commerce CMS should have like
- Categories
- Products
- Manufacturers
- Multi-Language
- Multi-Currency
- Product Reviews / Ratings and many more.
To know more about OpenCart, visit this link. To download latest OpenCart from here.
Prerequisites
To install OpenCart, we will need these following thing that needs to be installed or available on our CentOS 7 Linux server.
- Web Server (Apache suggested)
- PHP 5.3+
- Database (MySQLi suggested)
Required PHP libraries / modules
- Curl
- ZIP
- Zlib
- GD
- Library
- Mcrypt
- Mbstrings
Also, make sure your firewall / iptables or SELinux is not blocking any port(s) which is required over here or you don’t have any problem with proper user permission.
To disable SELinux, type the following
setenforce 0
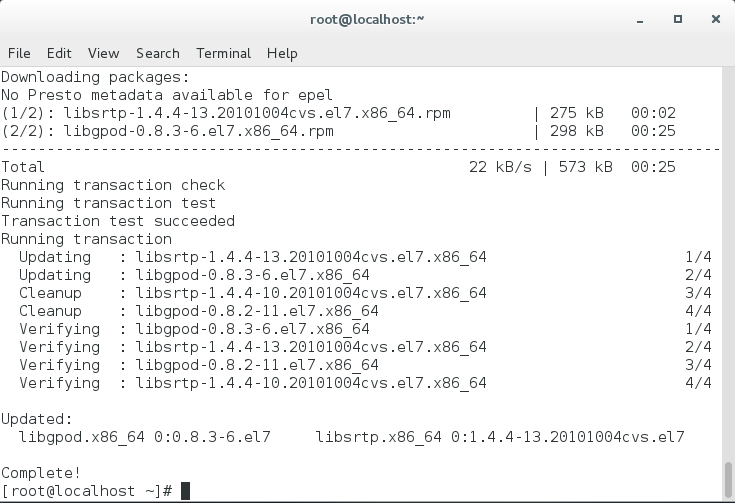
Let’s update the CentOS 7 Linux server first. This is a good practise to keep your server up to date. To do so, issue the below command one after another and wait till it gets updated. It will depends on your internet speed and it will take a long. So, please have patience.
sudo yum clean all
sudo yum -y update
You will see something like below image once you are done with it. Depending on how old your system softwares are or which packages are needs to be updated. The below image indicates an successful update and may require to reboot system as well.
Installing Apache as web server
To install Apache on your CentOS 7, issue the below command on your terminal.
sudo yum -y install httpd
This will download and install Apache as a web server on the system.
Let’s start Apache by issuing the below command.
sudo systemctl start httpd
Set Apache at start or booting time so after every reboot, it get started automatically without manual start.
sudo systemctl enable httpd
Test Apache
To test apache issue the below command.
sudo systemctl status httpd
This will show the status of Apache for you.
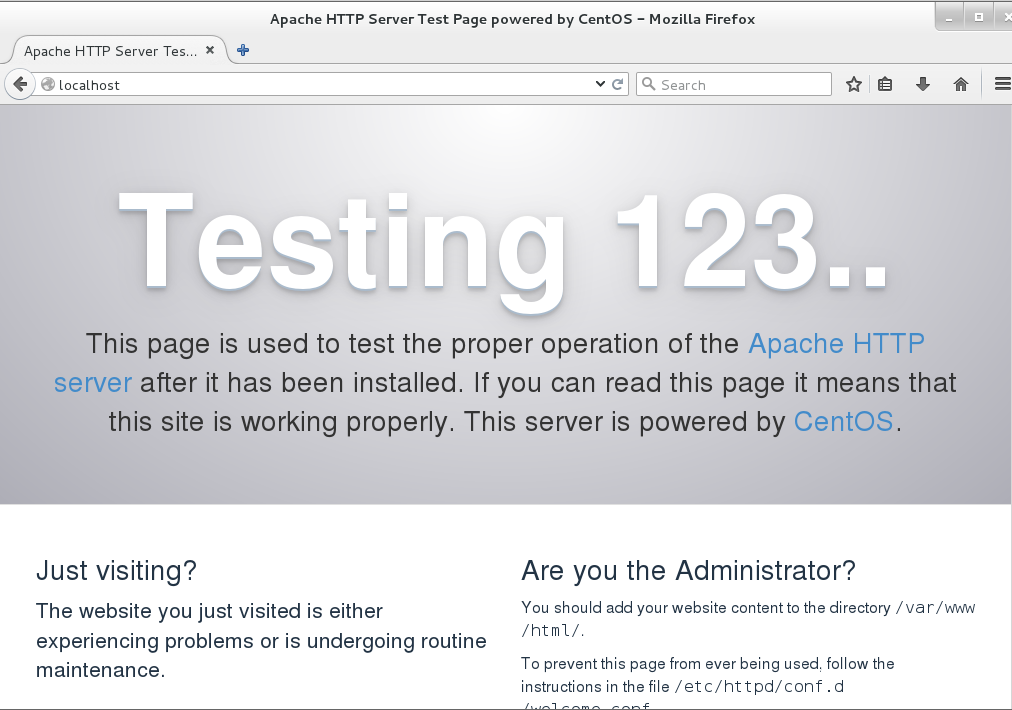
Or you can open a web browser and type “localhost” without the double quote in to the address bar. You will see something like this.
It indicates that our web server up and running 🙂
You may need to enable mod_rewrite module as well. Just open the file located on /etc/httpd/conf/httpd.conf by your faviourute file editor and change the following line
AllowOverride None
to
AllowOverride All
We are done with Apache.
Installing MySQL / MariaDB
To install MySQL / MariaDB on to your system, issue the below command.
sudo yum install mariadb-server mariadb
This will download and install MySQL / MariaDB on to the system.
To start the MariaDB server, issue the below command.
sudo systemctl start mariadb
Now, we need to set the password for the “root” user of MySQL / MariaDB. Let’s do it by typing the following and this is must for security reason.
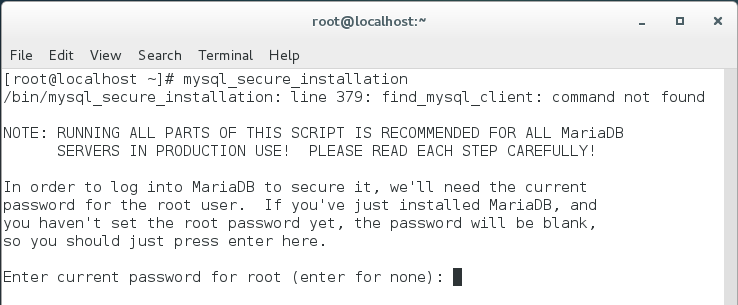
sudo mysql_secure_installation
You will see something like this. Hit Y to continue and type a complex password and remember it.
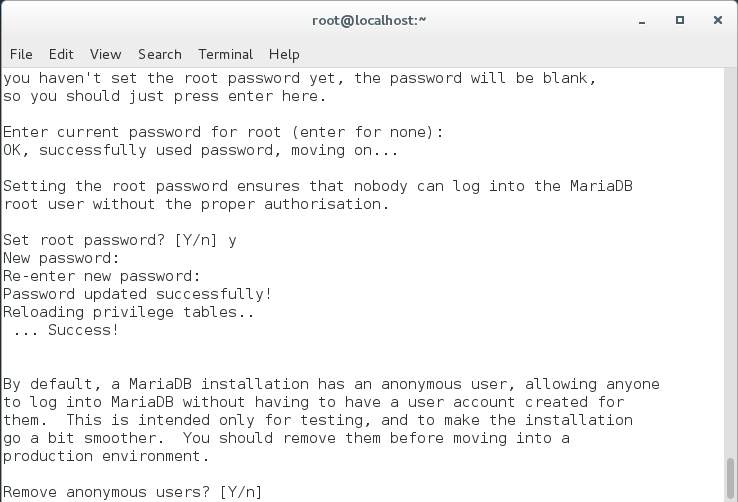
After setting the root password, you will see something like below image.
Now, you will get few prompts on your terminal with Y/N options.
Hit Y for the prompt “Remove anonymous users?”
Hit Y for the prompt “Disallow root login remotely?”
Hit Y for the prompt “Remove test database and access to it?”
Hit Y for the prompt “Reload privilege tables now?”
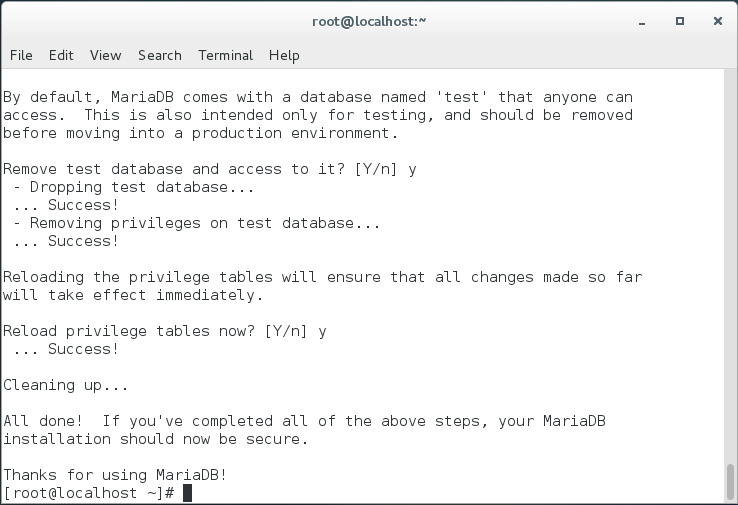
After finishing all the prompts, you will see something like below.
We are done with MySQL / MariaDB.
Installing PHP
To install PHP, open a terminal and issue the below command.
sudo yum -y install php php-mysql php-gd php-ldap php-odbc php-pear php-xml php-xmlrpc php-mbstring php-snmp php-soap php-mcrypt curl zlib
This will download and install PHP on your CentOS 7 system along with some others PHP modules which are required for OpenCart.
Installing phpMyAdmin
To install phpMyAdmin, issue the below command in the terminal.
sudo yum -y install epel-release
And then issue the below command again.
sudo yum -y install phpmyadmin
After installing PHP, we need to restart the Apache or other web server in order to work with PHP. Type the following to do so.
sudo systemctl restart httpd.service
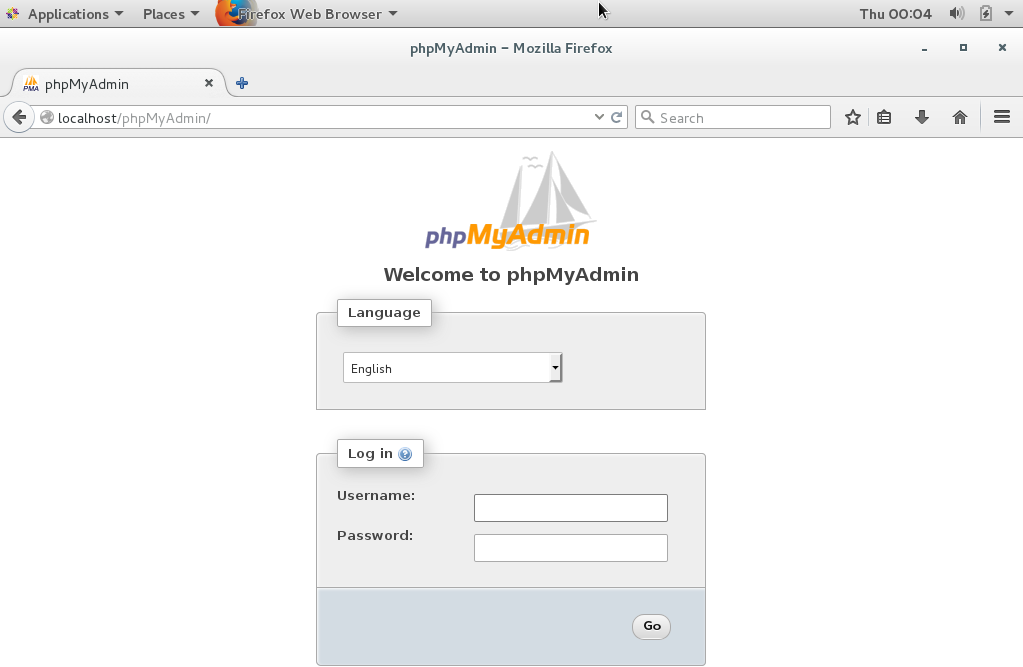
To test whether you can access phpMyAdmin or not, open any web browser and type the following in the address bar.
localhost/phpmyadmin
You will see something like this.
We are done installing PHP.
Installing OpenCart
Create a folder called opencart and change directory to that opencart folder.
mkdir opencart
cd opencart
Download the latest OpenCart from here. You need to download a zip archive format file with a name “opencart-2.1.0.2.zip”.
Let’s unzip it by typing the below command on the terminal.
sudo unzip opencart-2.1.0.2.zip
Now, after unzipping the zip archive file, you will get a folder name “opencart-2.1.0.2”. Rename this opencart-2.1.0.2 folder to opencart.
Now, copy this “opencart” folder to the /var/www/html folder path by doing the following.
sudo cp -avr opencart /var/www/html
Now, move to the /var/www/html folder and issue the below two commands.
sudo chmod -R 775 opencart
sudo chown apache:apache opencart
Now change directory to the following directory or folder location.
sudo cd /var/www/html/opencart/upload
Then rename the config file from config-dist.php to config.php.
cp config-dist.php config.php
We need to rename one more file under admin folder on the following path location. To the file renaming by issuing the below command.
cp /var/www/html/opencart/upload/admin/config-dist.php /var/www/html/opencart/upload/admin/config.php
Now, type the following in your web browser address bar.
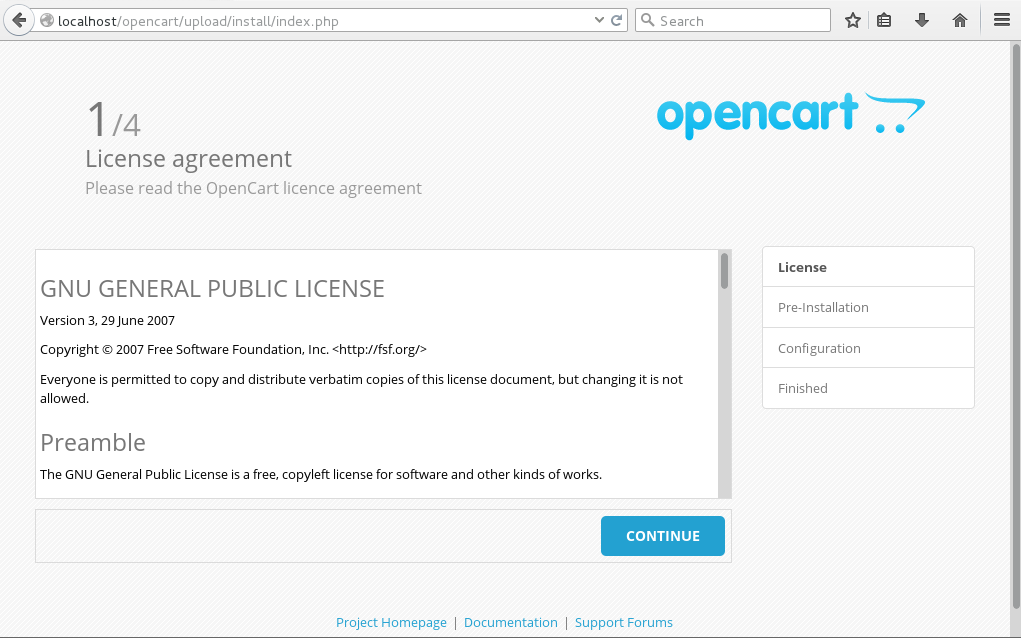
localhost/opencart/upload
You will see the below image. So let’s begin installing OpenCart.
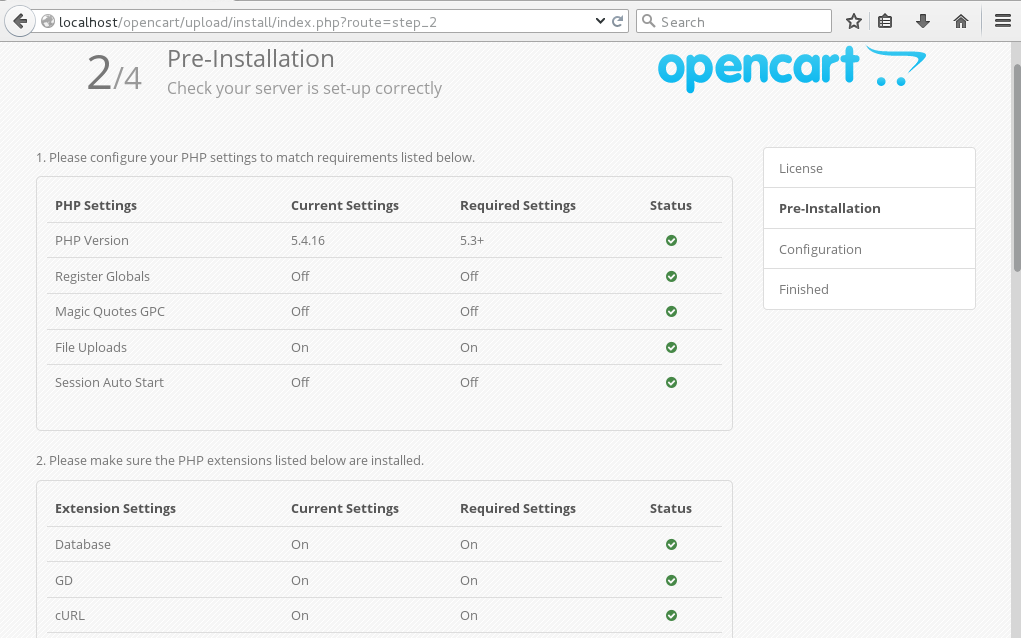
Click “CONTINUE” button for continue. Then you will see something like below image.
For the above image, please make sure you have green tick mark for all the Pre-Installation 5 sections and no red mark at all. If you have any red mark which indicates a problem, please resolve that issue before making further more proceeding. If you have green tick mark for all the Pre-Installation 5 sections, click “CONTINUE” button.
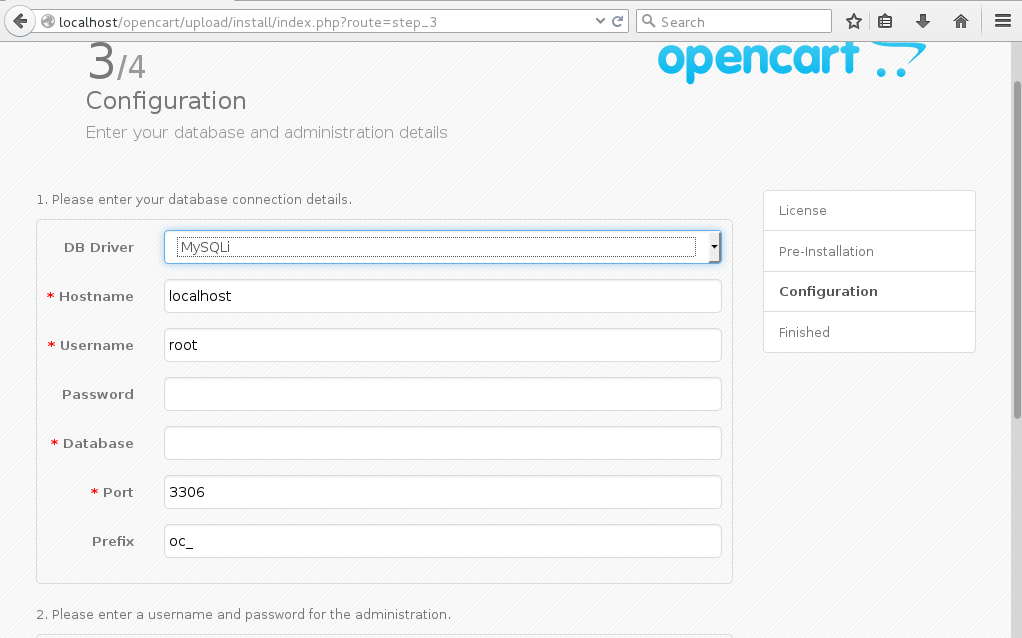
Now, you will see something like this below image.
Now, we need to create a database with a name whatever you wish for installing OpenCart.
Let’s create the database then. To do so, open the web browser and type the following.
localhost/phpmyadmin
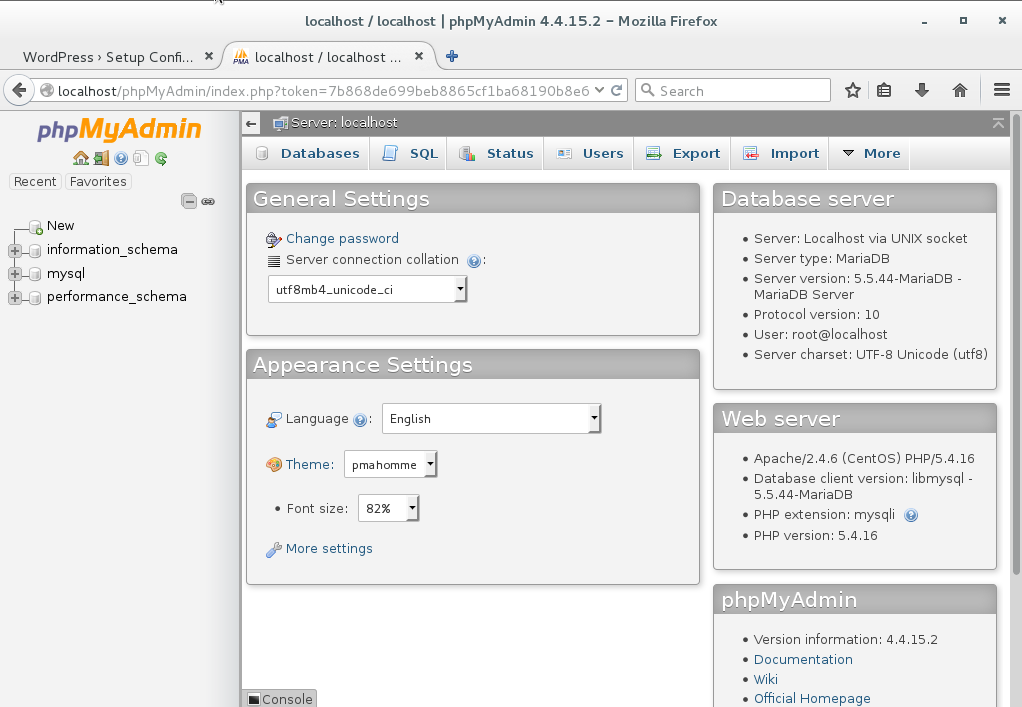
Then it will ask for a user name & password. Type “root” as user name and the password that you had set earlier while installing MySQL/ MariaDB. I hope that you can remember that. Once you are logged in, you will see something like this.
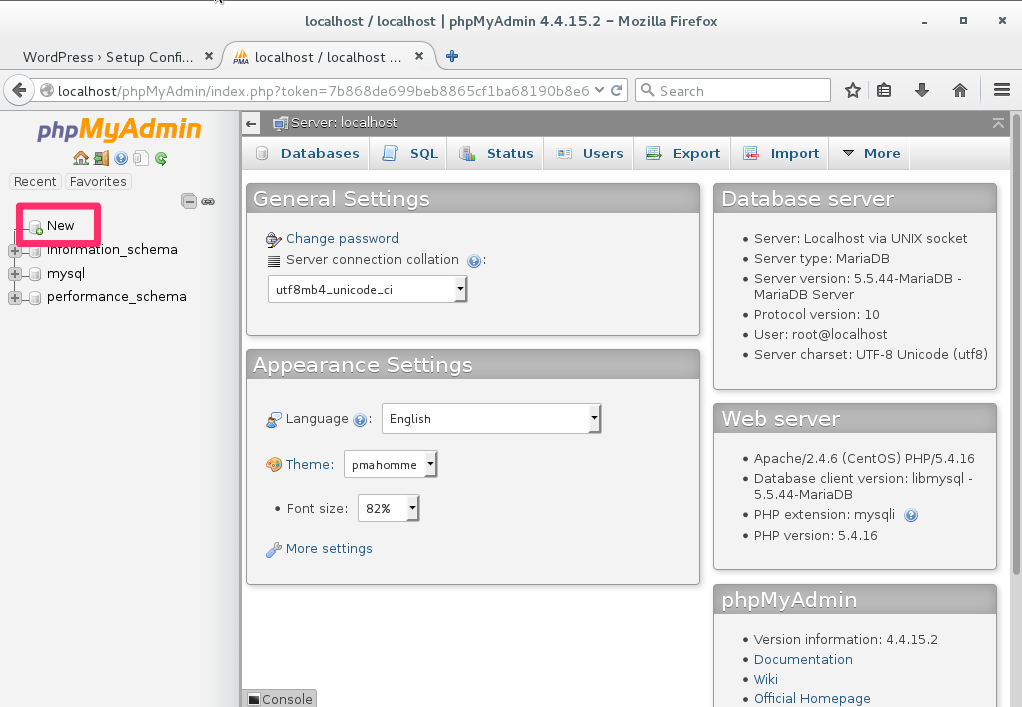
Now click New from the left top corner marked as red in the following image.
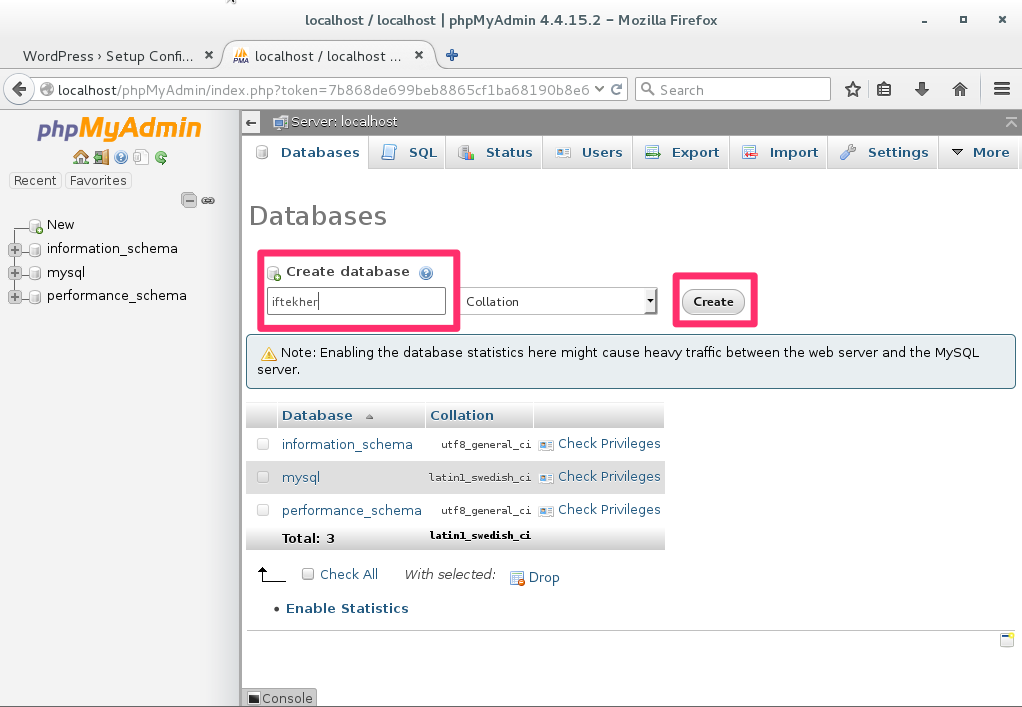
After clicking New, you will see something like below image. Type a database name and click “Create” button. Here, I am typing iftekher for my database name. You can type whatever you wish.
We are done creating our database for installing OpenCart.
Now move back to the OpenCart installation.
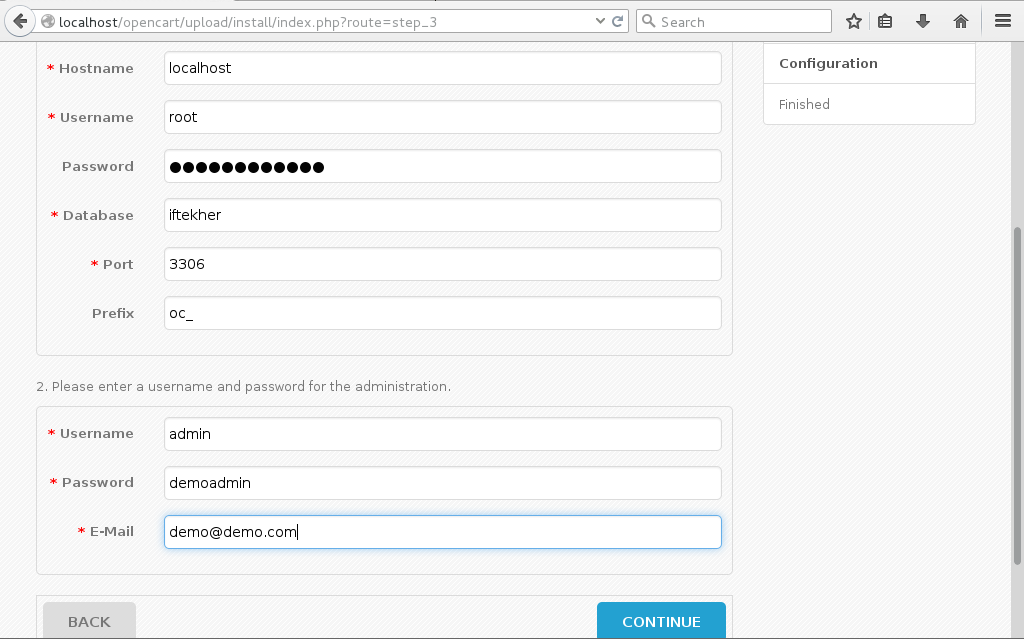
Now, select “MySQLi” as DB Driver, “localhost” as Hostname, “root” as Username, Use your MySQL password for the Password field, type your Database name, I am typing “iftekher” for my Database name and left Port & Prefix field as it is. Also enter a Admin Password & email address which will be used to access the admin panel of OpenCart. Click “CONTINUE” button.
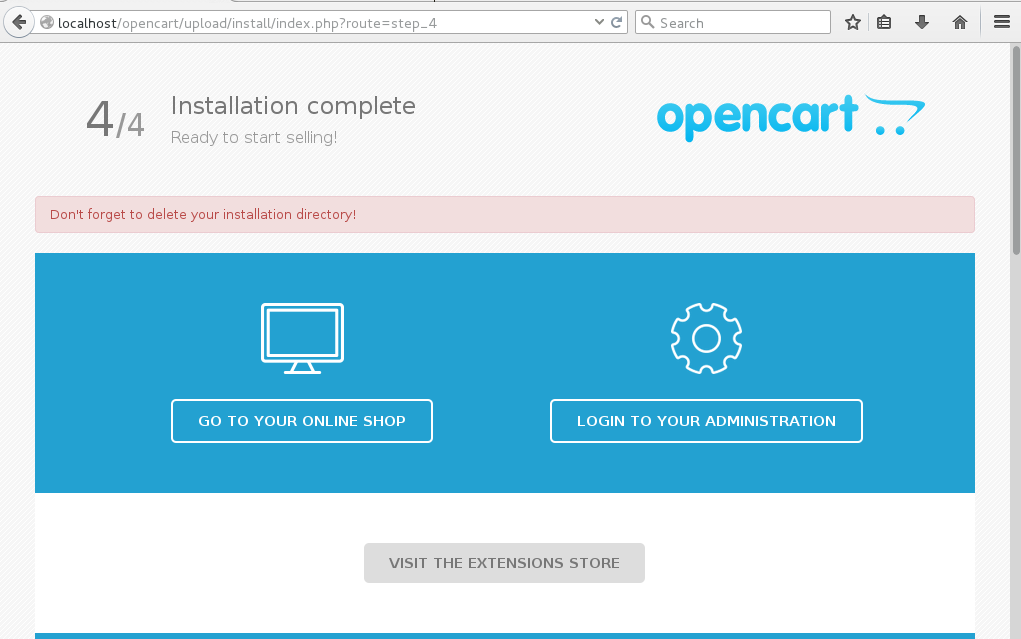
After clicking CONTINUE button, you will see a similar image like below.
Now, type the following in your web browser address bar and you will see something like this.
localhost/opencart/upload
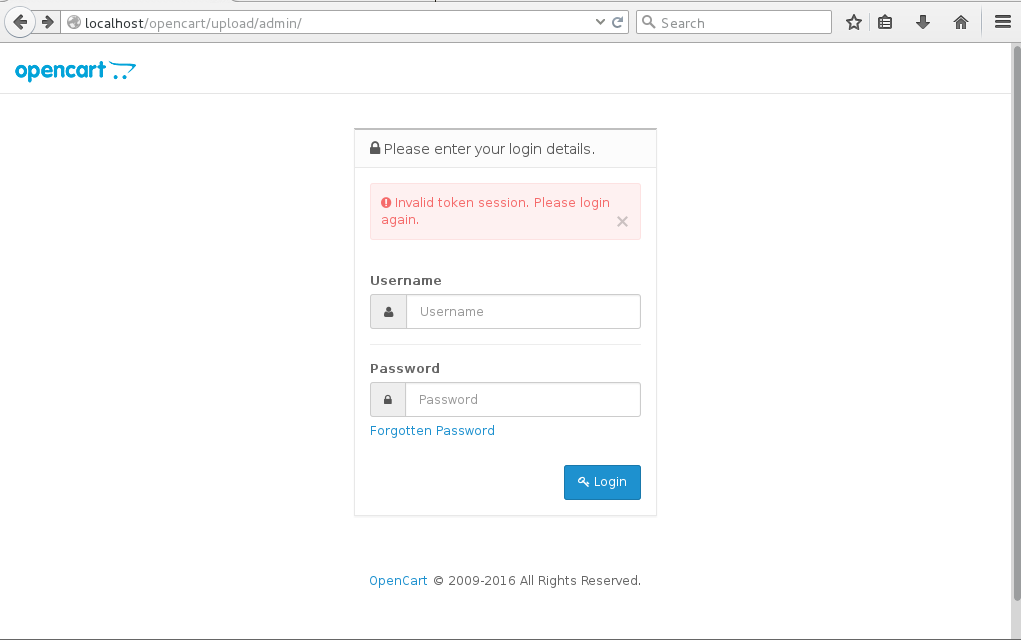
To access the OpenCart admin panel, type the following in the web browser.
localhost/opencart/upload/admin
You will see something like this.
Enter “Admin” as Username and the password that you entered earlier while setting up OPenCart.
We are done with installing OpenCart on our CentOS 7 Linux server.
I hope this will help you.
Thanks and have a great day.


