About Phabricator
Phabricator is an open source collection of web applications which help software companies build better software. Phabricator is similar to GIT, and SVN. Phabricator was originally developed as an Internal tool at Facebook for building applications. Then, the lead developer of Phabricator, Mr.Evan Priestley, left Facebook to continue Phabricator’s development in a new company called Phacility. On November 24, 2014, Wikimedia starts using Phabricator as its new Collaboration platform.
Phabricator includes applications for:
- Reviewing and auditing source code;
- Hosting and browsing repositories;
- Tracking bugs;
- Managing projects;
- Conversing with team members;
- Assembling a party to venture forth;
- Writing stuff down and reading it later;
- Hiding stuff from coworkers;
- And many.
Install Phabricator On CentOS 6
In this tutorial, we will see how to install and configure Phabricator in CentOS 6.6 64bit edition. The same steps might work on other RPM based distributions.
Download the Phabricator installation script for RPM distros, such as RHEL, CentOS, and Scientific Linux etc.
wget http://www.phabricator.com/rsrc/install/install_rhel-derivs.sh
Set executable permission to the script:
chmod +x install_rhel-derivs.sh
Finally, start the Phabricator installation using command:
./install_rhel-derivs.sh
The installation will start now. Press Enter to continue.
 PHABRICATOR RED HAT DERIVATIVE INSTALLATION SCRIPT
 This script will install Phabricator and all of its core dependencies.
 Run it from the directory you want to install into.

 Phabricator will be installed to: /root.
 Press RETURN to continue, or ^C to cancel.  ## Press Enter

 [...]

 perl                                           x86_64                          4:5.10.1-136.el6_6.1                             updates                           10 M
 perl-DBD-MySQL                                 x86_64                          4.013-3.el6                                      base                             134 k
 perl-DBI                                       x86_64                          1.609-4.el6                                      base                             705 k
 perl-Error                                     noarch                          1:0.17015-4.el6                                  base                              29 k
 perl-Git                                       noarch                          1.7.1-3.el6_4.1                                  base                              28 k
 perl-Module-Pluggable                          x86_64                          1:3.90-136.el6_6.1                               updates                           40 k
 perl-Pod-Escapes                               x86_64                          1:1.04-136.el6_6.1                               updates                           32 k
 perl-Pod-Simple                                x86_64                          1:3.13-136.el6_6.1                               updates                          212 k
 perl-libs                                      x86_64                          4:5.10.1-136.el6_6.1                             updates                          578 k
 perl-version                                   x86_64                          3:0.77-136.el6_6.1                               updates                           51 k
 php-pdo                                        x86_64                          5.3.3-40.el6_6                                   updates                           78 k
 php-pear                                       noarch                          1:1.9.4-4.el6                                    base                             393 k
 rsync                                          x86_64                          3.0.6-12.el6                                 base                             335 k

 Transaction Summary
 ========================================================================================================================================================================
 Install      41 Package(s)

 Total download size: 36 M
 Installed size: 114 M
 Is this ok [y/N]: y ## Type 'y' and press Enter
After few minutes, the installation of required prerequisites will be completed. Now, press Enter to download and install Phabricator.
 Complete!
 Please remember to start the httpd with: /etc/init.d/httpd start
 Please remember to start the mysql server: /etc/init.d/mysqld start
 Press RETURN to continue, or ^C to cancel. ## Press Enter

 Cloning into 'libphutil'...
 remote: Counting objects: 11320, done.
 remote: Total 11320 (delta 0), reused 0 (delta 0), pack-reused 11320
 Receiving objects: 100% (11320/11320), 6.41 MiB | 243.00 KiB/s, done.
 Resolving deltas: 100% (6043/6043), done.
 Cloning into 'arcanist'...
 remote: Counting objects: 14314, done.
 remote: Compressing objects: 100% (110/110), done.
 remote: Total 14314 (delta 73), reused 0 (delta 0), pack-reused 14204
 Receiving objects: 100% (14314/14314), 5.79 MiB | 238.00 KiB/s, done.
 Resolving deltas: 100% (8202/8202), done.
 Cloning into 'phabricator'...
 remote: Counting objects: 159477, done.
 remote: Total 159477 (delta 0), reused 0 (delta 0), pack-reused 159477
 Receiving objects: 100% (159477/159477), 66.24 MiB | 235.00 KiB/s, done.
 Resolving deltas: 100% (107467/107467), done.

 Install probably worked mostly correctly. Continue with the 'Configuration Guide':
 http://www.phabricator.com/docs/phabricator/article/Configuration_Guide.html
The following three directories will be downloaded in the current directory.
ls
Sample output:
anaconda-ks.cfg arcanist install.log install.log.syslog install_rhel-derivs.sh libphutil phabricator
Move the above three directories to the apache root document folder.
cp -fr arcanist/ libphutil/ phabricator/ /var/www/html/
ls /var/www/html/
Sample output:
arcanist libphutil phabricator
Start MySQL and Apache services and make them to start automatically on every reboot.
service httpd start
chkconfig httpd on
service mysqld start
chkconfig mysqld on
Setup MySQL root password
By default, mysql root user doesn’t has password. To secure mysql, we have to setup mysql root user password.
Enter the following command to secure MySQL:
mysql_secure_installation
NOTE: RUNNING ALL PARTS OF THIS SCRIPT IS RECOMMENDED FOR ALL MySQL
      SERVERS IN PRODUCTION USE!  PLEASE READ EACH STEP CAREFULLY!
In order to log into MySQL to secure it, we'll need the current
password for the root user.  If you've just installed MySQL, and
you haven't set the root password yet, the password will be blank,
so you should just press enter here.

Enter current password for root (enter for none):     ## Press Enter ##
OK, successfully used password, moving on...
Setting the root password ensures that nobody can log into the MySQL
root user without the proper authorisation.

Set root password? [Y/n]     ## Press Enter ##
New password:                ## Enter new password ##
Re-enter new password:       ## Re-enter new password ##
Password updated successfully!
Reloading privilege tables..
 ... Success!

By default, a MySQL installation has an anonymous user, allowing anyone
to log into MySQL without having to have a user account created for
them.  This is intended only for testing, and to make the installation
go a bit smoother.  You should remove them before moving into a
production environment.

Remove anonymous users? [Y/n]     ## Press Enter ##
 ... Success!

Normally, root should only be allowed to connect from 'localhost'.  This
ensures that someone cannot guess at the root password from the network.

Disallow root login remotely? [Y/n]     ## Press Enter ##
... Success!
By default, MySQL comes with a database named 'test' that anyone can
access.  This is also intended only for testing, and should be removed
before moving into a production environment.

Remove test database and access to it? [Y/n]     ## Press Enter ##
 - Dropping test database...
 ... Success!
 - Removing privileges on test database...
 ... Success!
Reloading the privilege tables will ensure that all changes made so far
will take effect immediately.

Reload privilege tables now? [Y/n]     ## Press Enter ##
 ... Success!

Cleaning up...

All done!  If you've completed all of the above steps, your MySQL
installation should now be secure.

Thanks for using MySQL!
Configure Apache Web server For Phabricator
Open the Apache configuration file with your favourite text editor.
vi /etc/httpd/conf/httpd.conf
At the bottom of the file, paste the following:
<VirtualHost *>
  # Change this to the domain which points to your host.
  ServerName phabricator.unixmen.local

  # Change this to the path where you put 'phabricator' when you checked it
  # out from GitHub when following the Installation Guide.
  #
  # Make sure you include "/webroot" at the end!
  DocumentRoot /var/www/html/phabricator/webroot/

  RewriteEngine on
  RewriteRule ^/rsrc/(.*)     -                       [L,QSA]
  RewriteRule ^/favicon.ico   -                       [L,QSA]
  RewriteRule ^(.*)$          /index.php?__path__=$1  [B,L,QSA]

<Directory "/var/www/html/phabricator/webroot/">
  Order allow,deny
  Allow from all
</Directory>
</VirtualHost>
Replace the path of the phabricator directory and hostname with your own.
Restart apache service.
service httpd restart
Configure MySQL For Phabricator
Now, we need to configure MySQL for Phabricator.
Go to the html/phabricator directory,
cd /var/www/html/phabricator/
Run the following commands one by one.
./bin/config set mysql.host localhost
./bin/config set mysql.user root
./bin/config set mysql.pass <mysql-root-password>
Then, run storage upgrade script to load the Phabricator schemata into it. You’ll be asked to press ‘y’ while loading database schema.
To do this, run:
./bin/storage upgrade --user root --password <mysql-root-password>
Sample output:
Before running storage upgrades, you should take down the Phabricator web
interface and stop any running Phabricator daemons (you can disable this
warning with --force).

    Are you ready to continue? [y/N] y ## Type 'Y' and press Enter

Loading quickstart template...
Applying patch 'phabricator:20150312.filechunk.1.sql'...
Applying patch 'phabricator:20150312.filechunk.2.sql'...
Applying patch 'phabricator:20150312.filechunk.3.sql'...
Applying patch 'phabricator:20150317.conpherence.isroom.1.sql'...
Applying patch 'phabricator:20150317.conpherence.isroom.2.sql'...
Applying patch 'phabricator:20150317.conpherence.policy.sql'...
Applying patch 'phabricator:20150410.nukeruleedit.sql'...
Storage is up to date. Use 'storage status' for details.
Verifying database schemata...
Found no adjustments for schemata.
Restart MySQL service to take effect the changes.
service mysqld restart
Configure Firewall
We must allow apache server’s default port ’80’ through in-order to access the Phabricator’s Web UI from a remote machine.
To do that, edit /etc/sysconfig/iptables/:
vi /etc/sysconfig/iptables
Add the following line:
[...]
-A INPUT -m state --state NEW -m tcp -p tcp --dport 80 -j ACCEPT
[...]
Restart iptables service.
service iptables restart
Configure Phabricator Web UI
Now, we will configure the Phabricator Web UI.
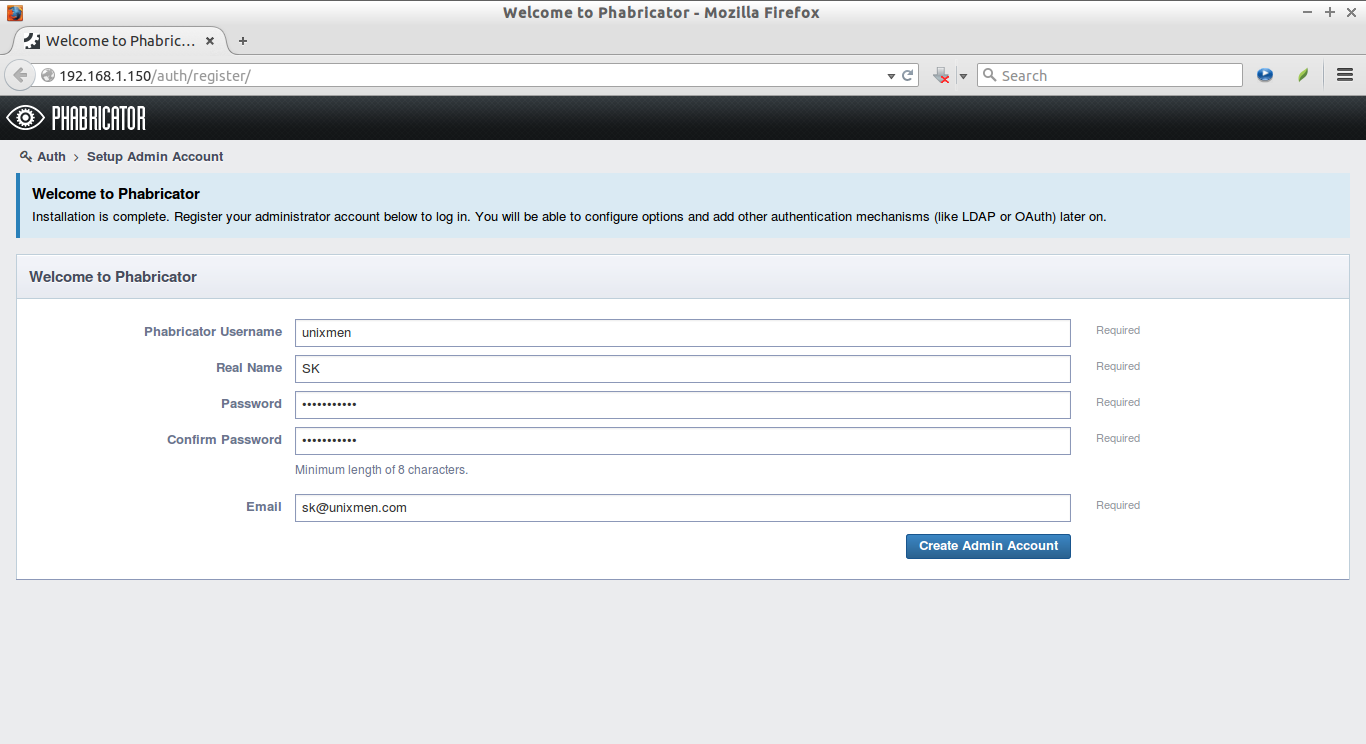
Open up your Web browser and type: http://ip-address/ or http://domain-name/ in the address bar. You should see the following screen.
The first step is to setup Admin account. Enter the admin account name, Real name, and Password etc. Click Create Admin Account link in the bottom.
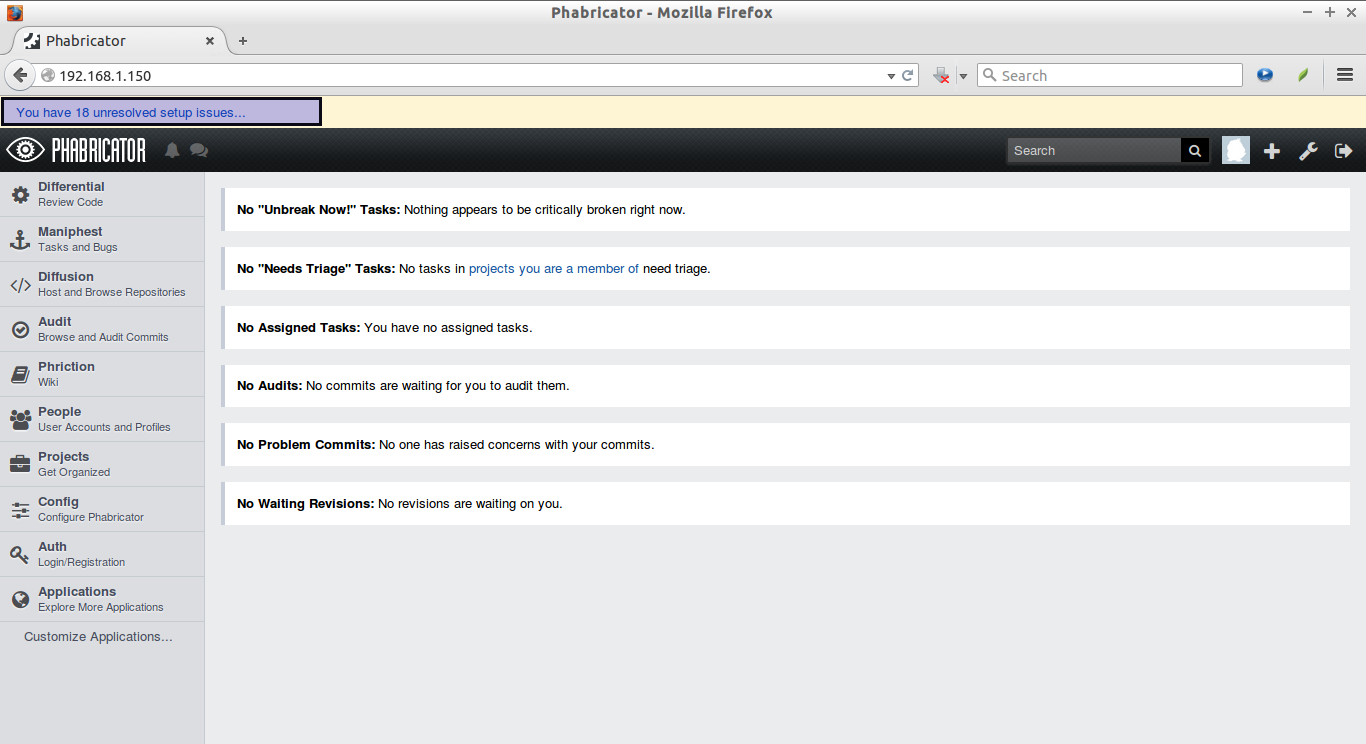
Now, you’ll be redirected to Phabricator’s Dashboard. You may notice some unresolved setup issues on the top left corner. You have to resolve them before using Phabricator.
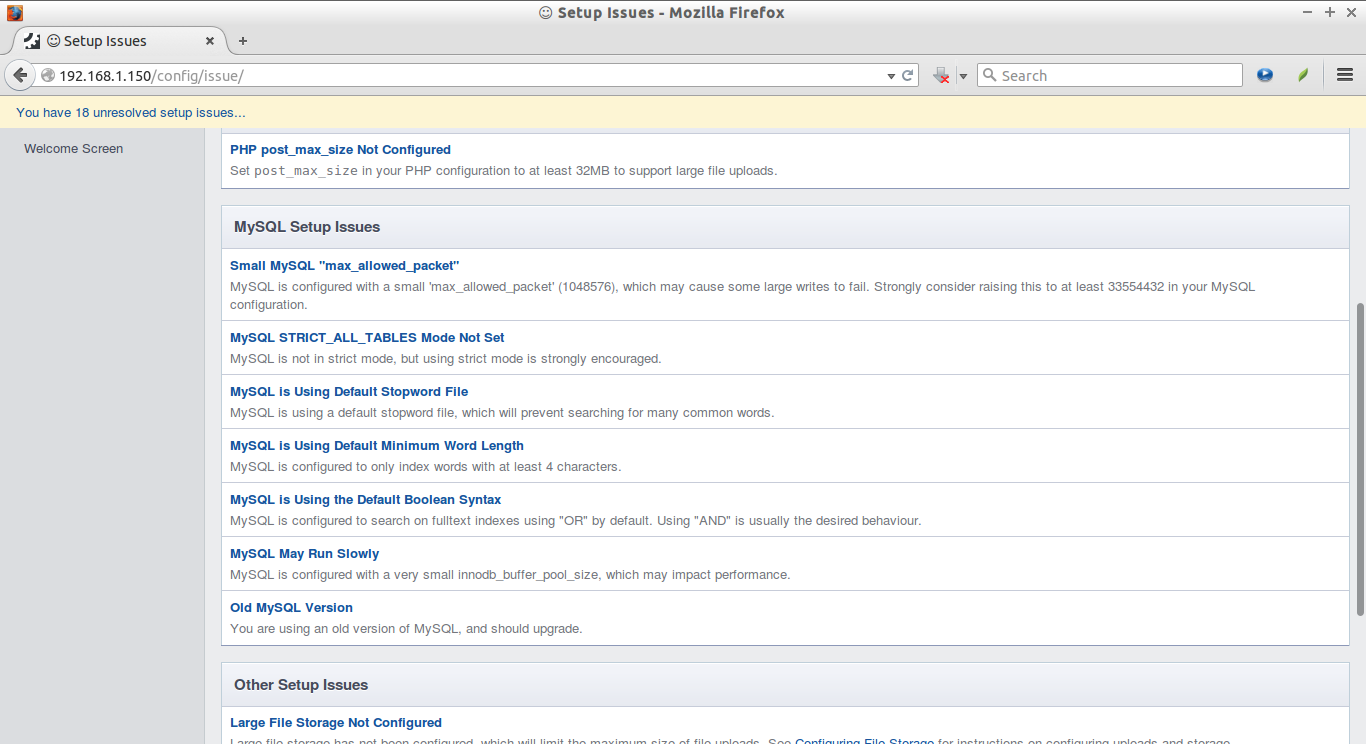
Click on the “Unresolved setup issues” link to view the list of issues.
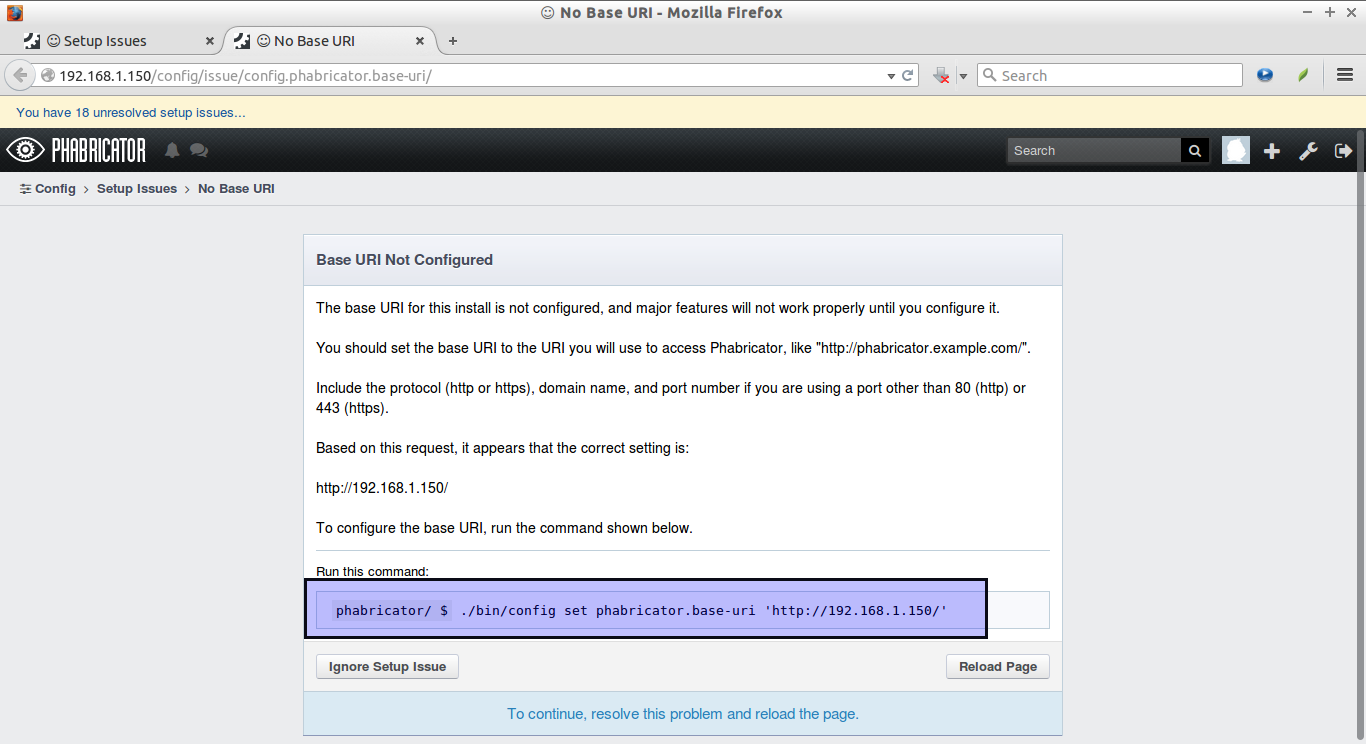
Click on the each issue to see how to resolve the corresponding issue. For example, I clicked the first issue and it’s shows the following the method to resolve it.
I opened the Terminal and ran the following command:
./bin/config set phabricator.base-uri 'http://192.168.1.150/'
After solving each issues, restart the following services to take effect the changes.
service httpd restart
service mysqld restart
./bin/phd restart
Then, click “Reload page” button on the right bottom corner.
Similarly, click on the each issue, Phbricator will display the way about how to resolve that particular issue.
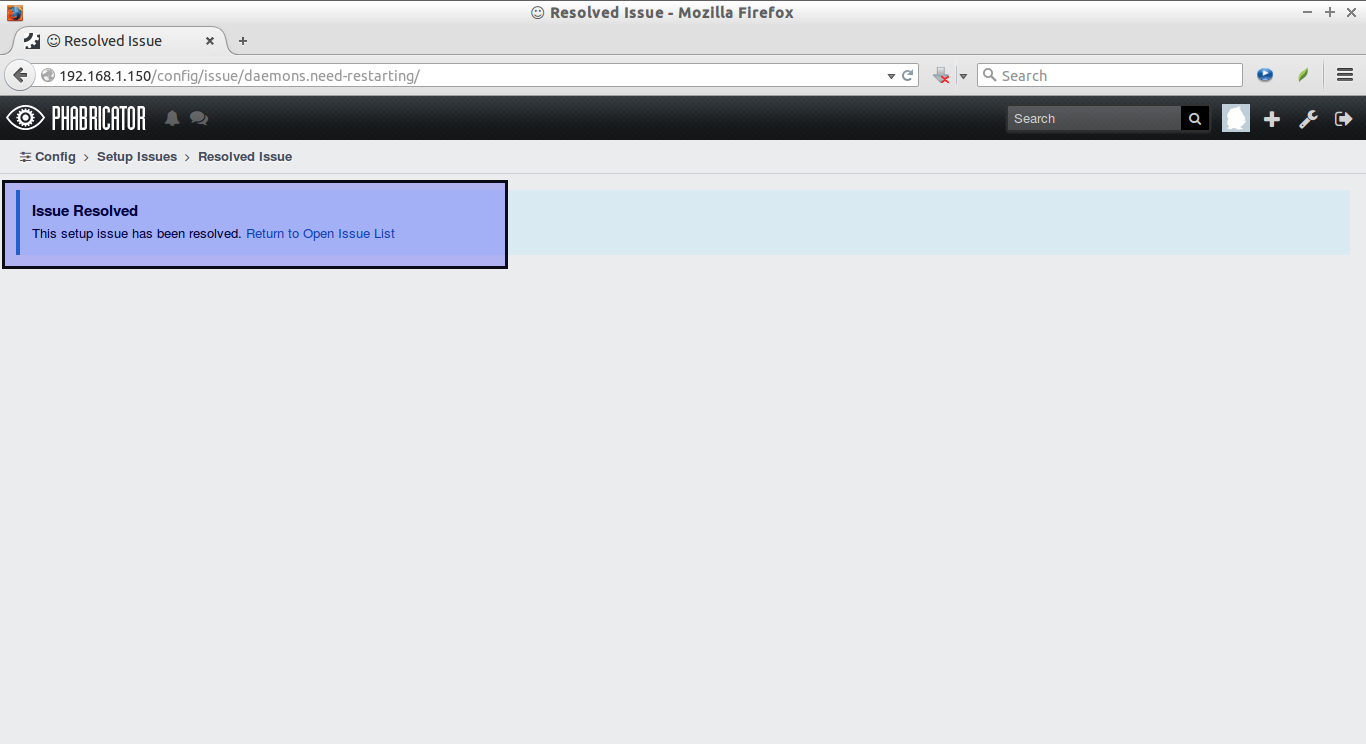
After clearing all issues, you will see the following message:
Issue Resolved
This setup issue has been resolved. Return to Open Issue List
Due to the lack of time and space, we can’t show how to resolve all issues.
After solving all issues, you will see the “Ready to use” message.
Just close the current window and open the new window, and navigate to http://ip-address/ or http:domain-name/.
Creating New Users
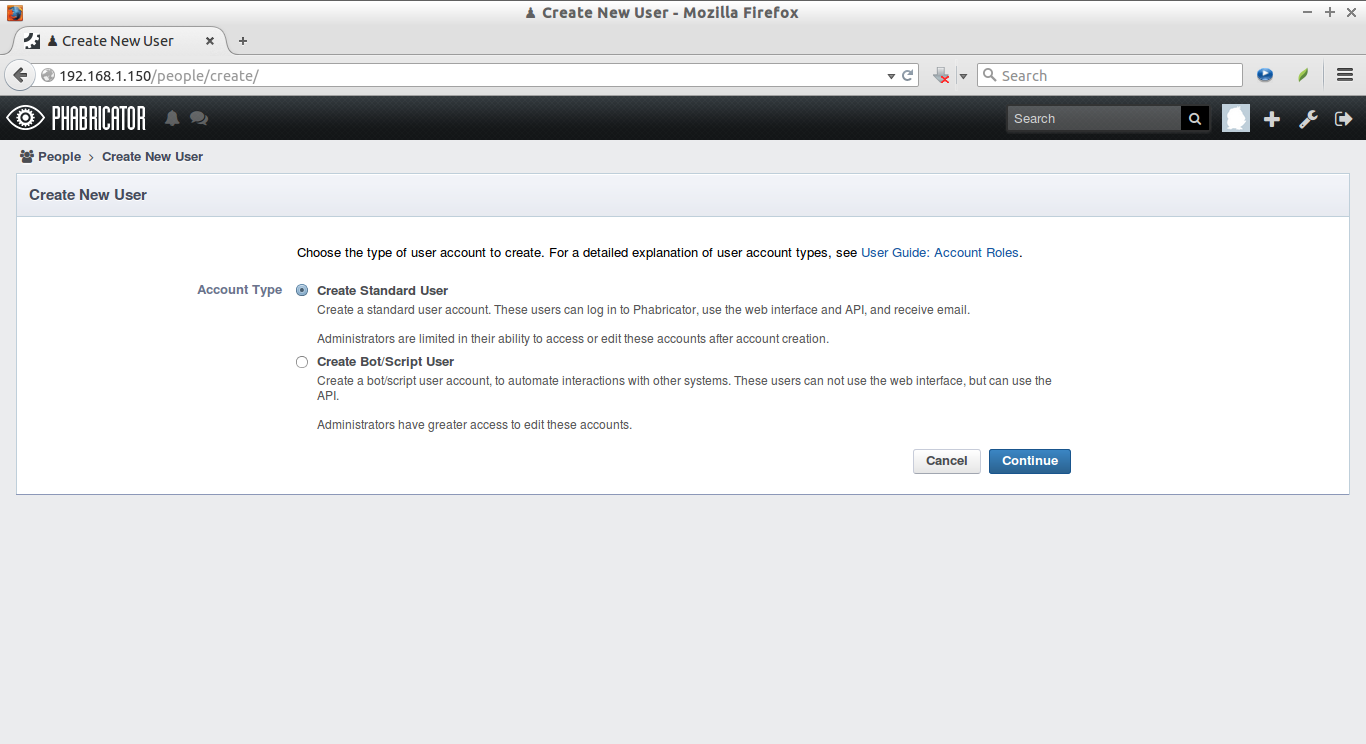
Let us create a new user. To to do that, click on the People link on the Dashboard and click “Create new user” link in the next window. Select Standard user and click Continue.
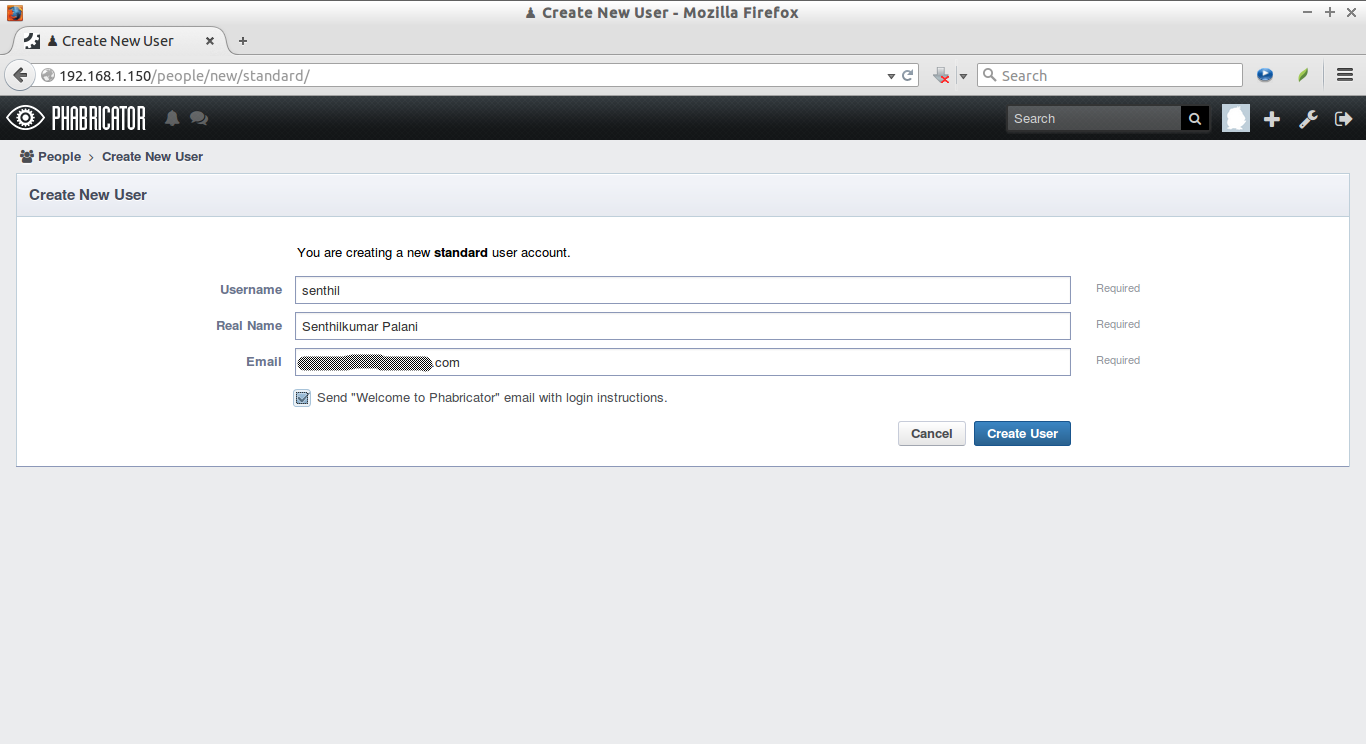
Enter the username, Real name, and mail-id etc.
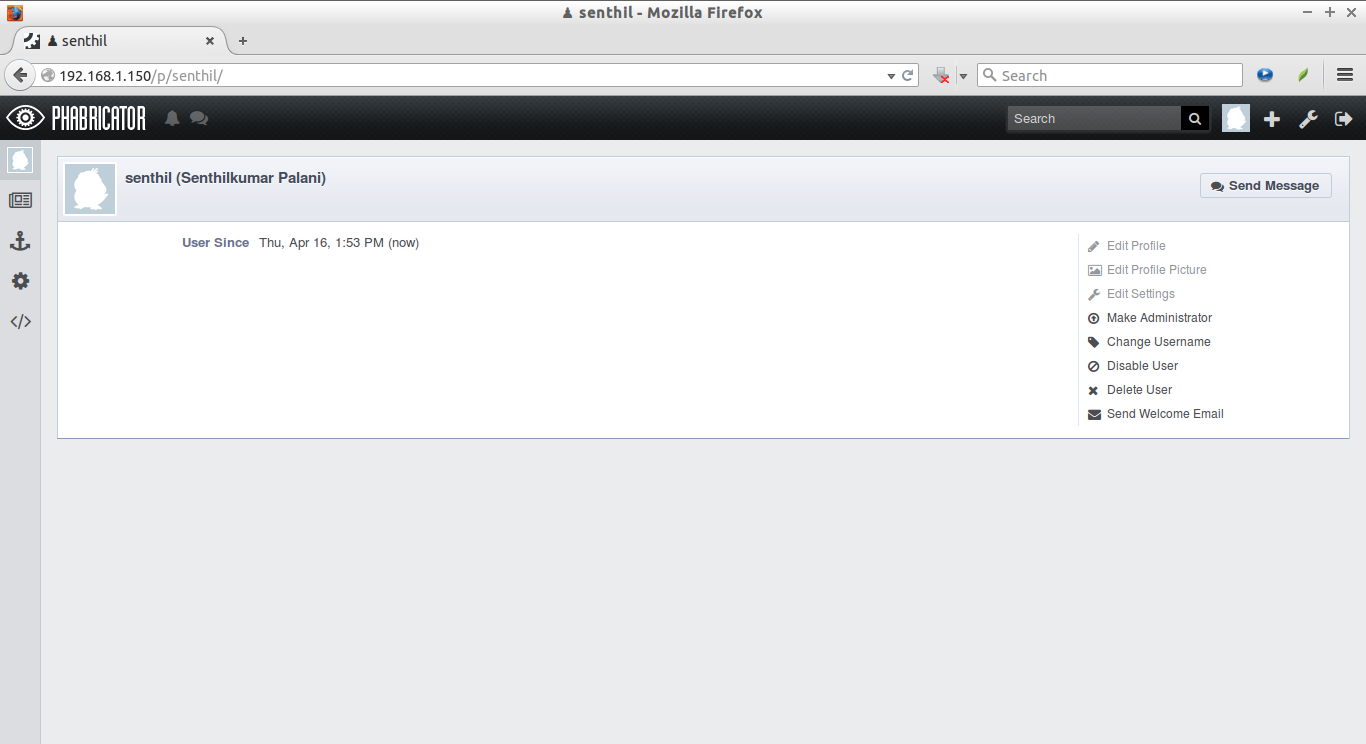
Now, the new user will be created.
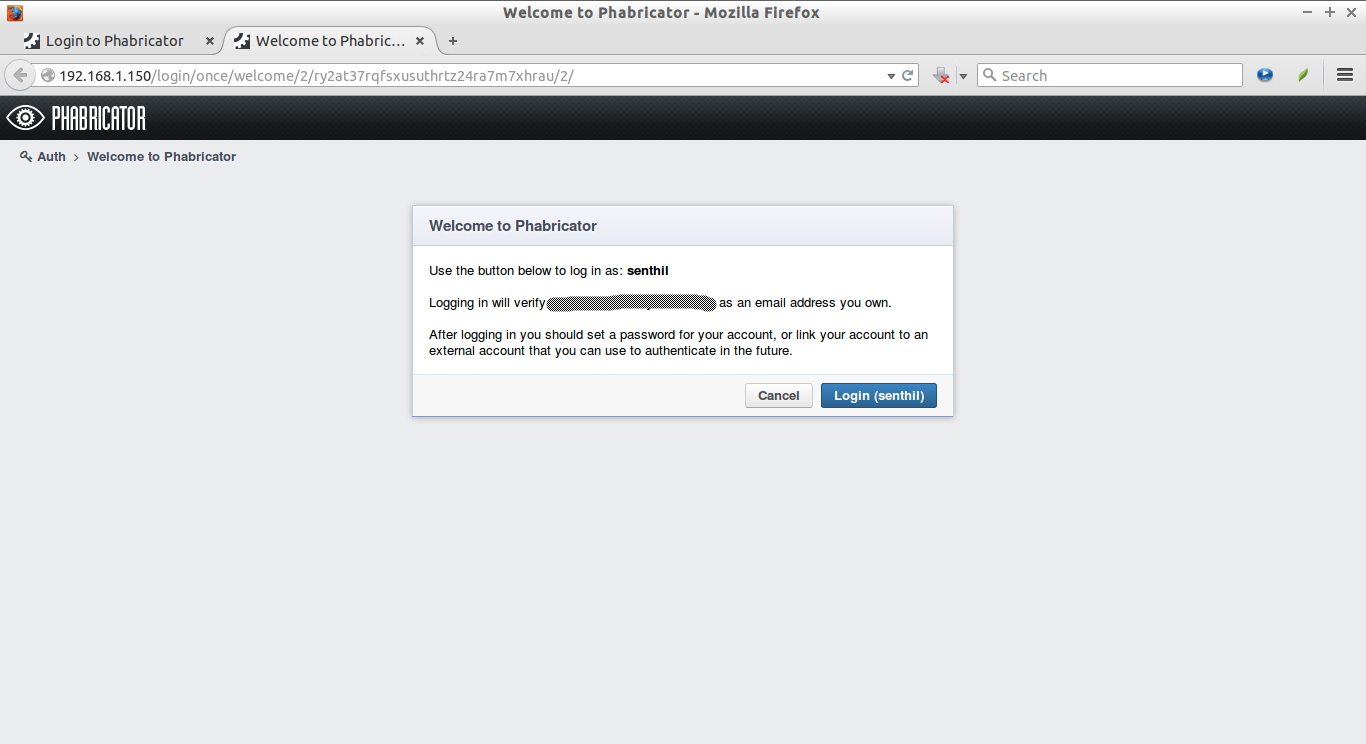
A confirmation mail will be send to the user’s mail. To login to Phabricator, follow the confirmation link and set a password:
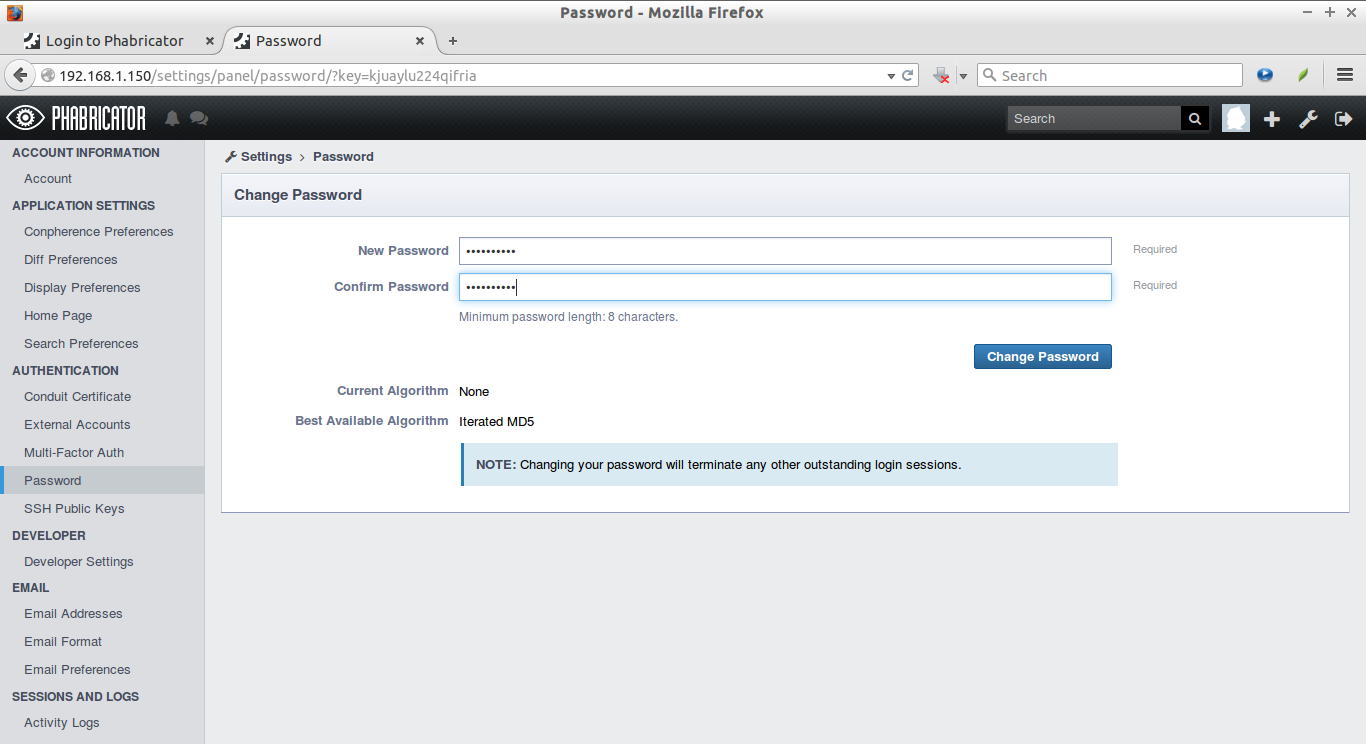
Set new password:
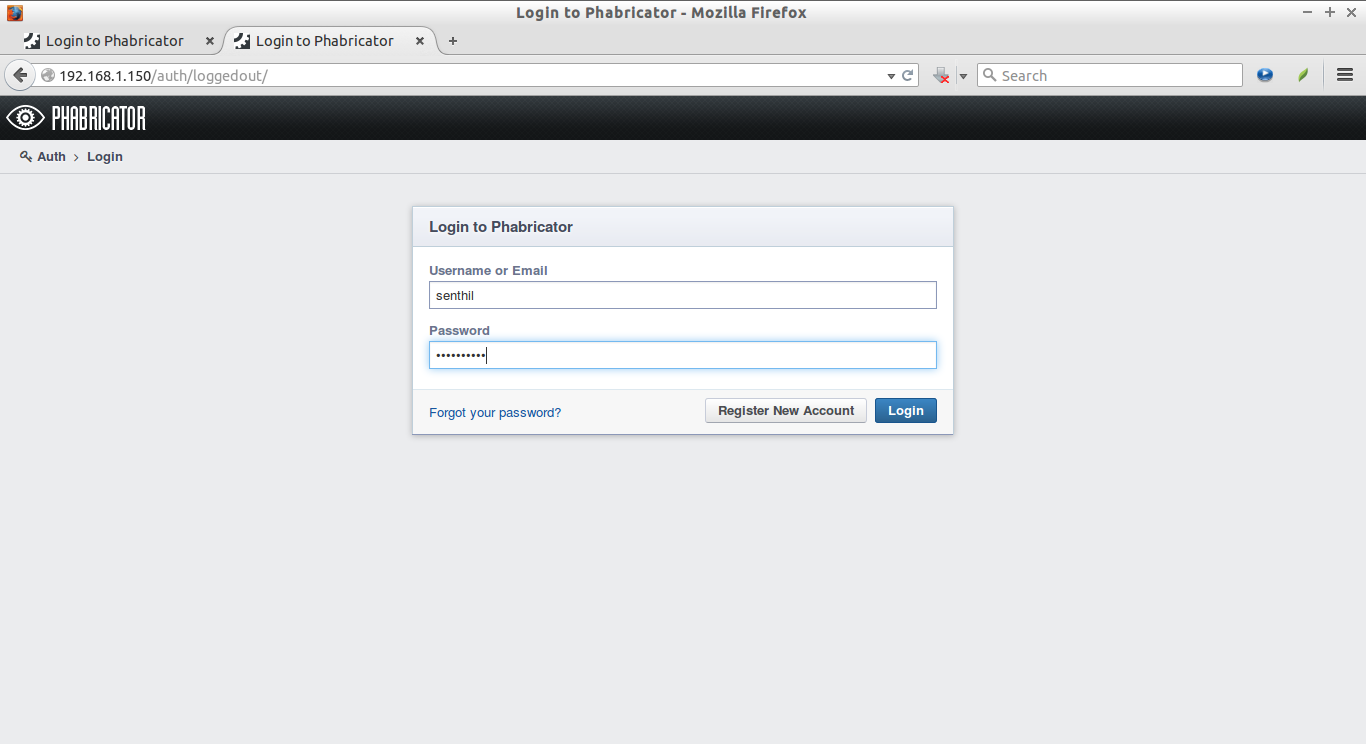
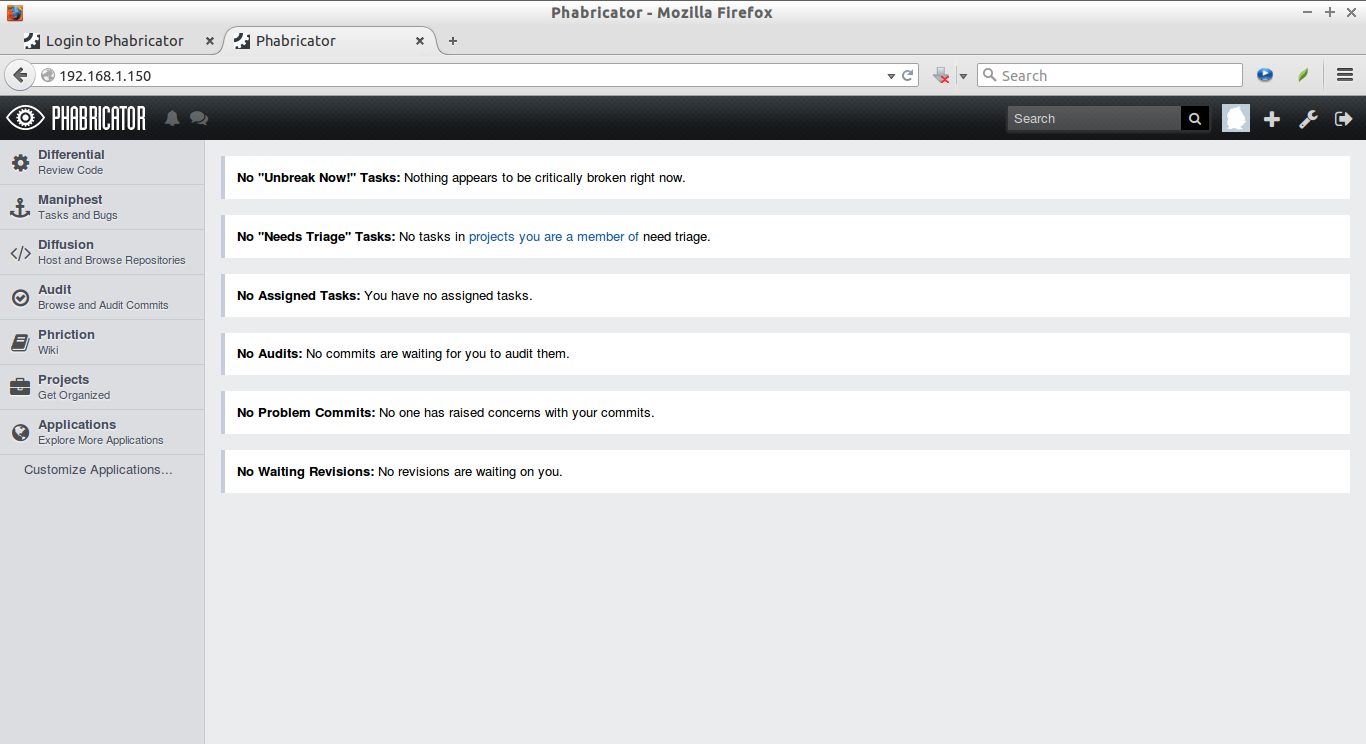
After you have set a password, you can login in the future by going here:
http://ip-address/ or http://domain-name/
Reset admin user password
In case, you forgot the admin user password, you can reset it using command:
./bin/auth recover unixmen
Here, unixmen is my admin user password.
Sample output:
Use this link to recover access to the "unixmen" account from the web interface:

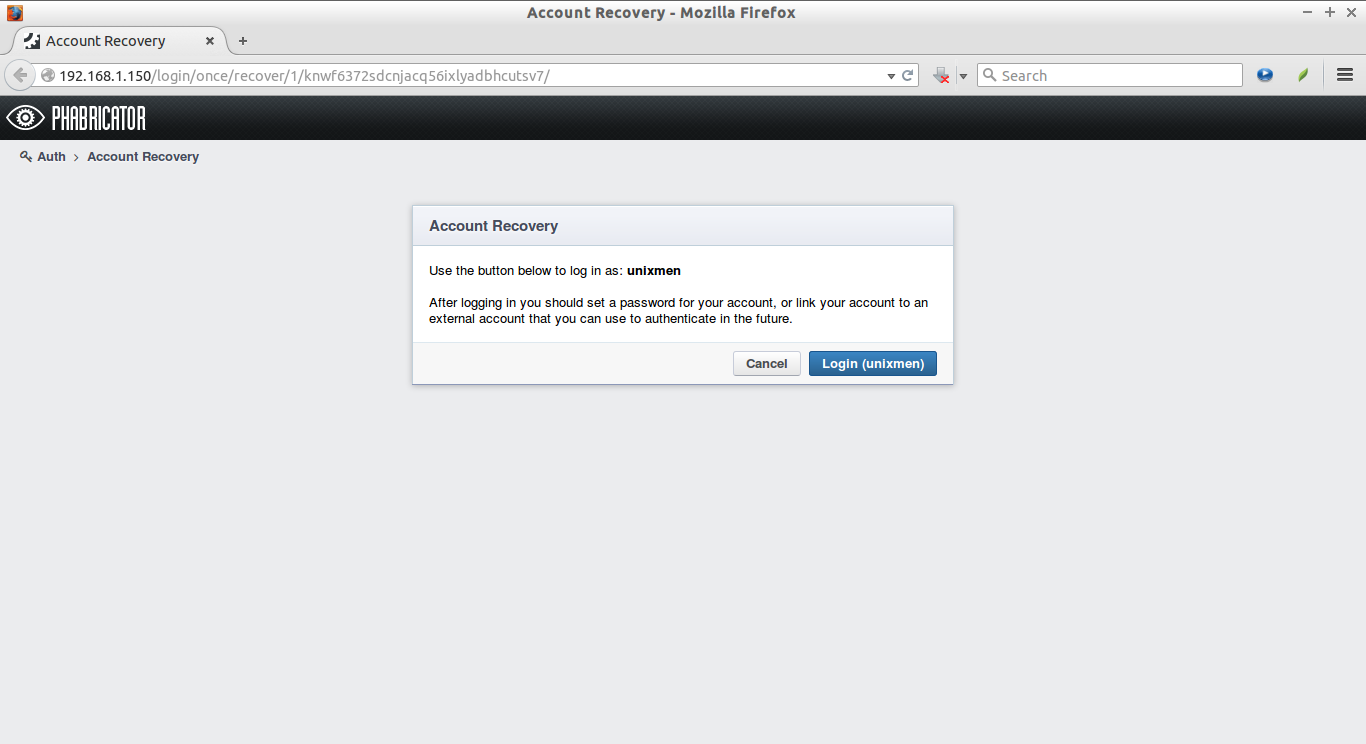
    http://192.168.1.150/login/once/recover/1/knwf6372sdcnjacq56ixlyadbhcutsv7/

After logging in, you can use the "Auth" application to add or restore authentication providers and allow normal logins to succeed.
Copy/paste the above link in your browser.
Click Login.
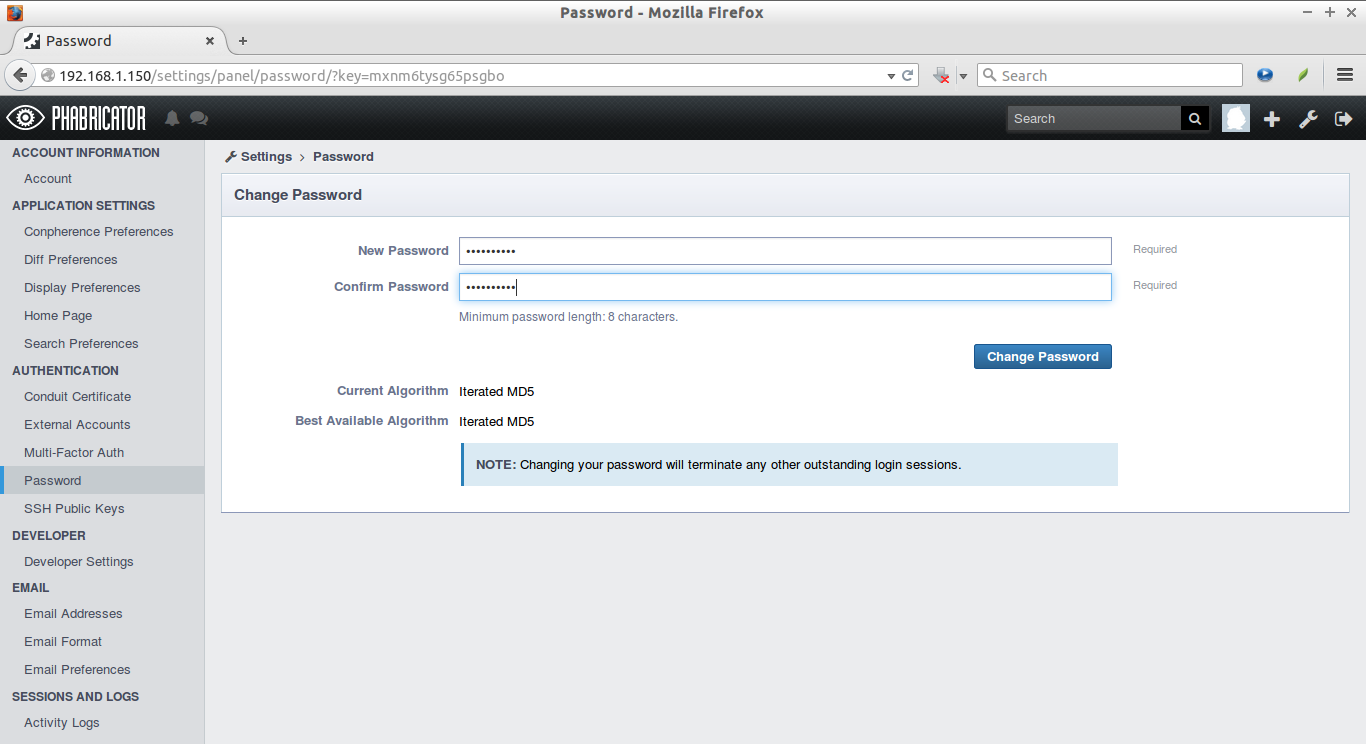
Enter new password twice.
That’s it. Now, you can login using the new password.
Cheers!
For more details, refer the Phabricator official documentation.


