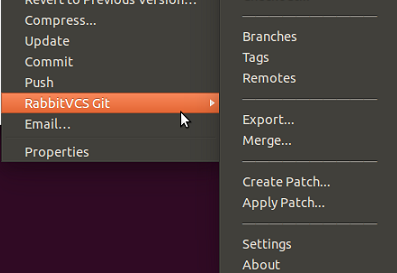
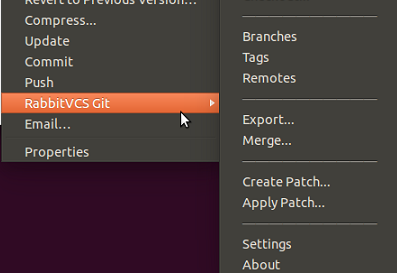
RabbitVCS is graphical user interface for all version control systems currently supported on Linux operating system. It makes the use of version control systems easy, because once installed, it get integrated into your current file manager and you can communicate with your version control system right from your file manager.
Features and History
It was originally called NautilusSvn because in start it used to work with Nautilus File manager only, but with the passage of time, it added support for all popular File managers and now it is considered a universal graphical interface to communicate with VCS via Linux file managers. The very first release of this app was made public in 2010.
It is a feature rich, lightweight application, installation process is simple and it consumes very short amount of system resources. It is a must-have application for software developers. Using this tool, within couple of mouse clicks, you can get your version control related tasks performed.
Installing Rabbitvcs on Ubuntu
In order to intall Rabbitvcs on ubuntu, first of all make sure to add its PPA to APT sources. Launch your terminal and run following command:
Now run following command to update your package manager.
Installing rabbitvcs for nautilus
If you are using Nautilus file manager run following command to install RabbitVCS:
Installing rabbitvcs for Thunar
If you are using Thunar file manager run following command to install RabbitVCS:
That’s it, now whenever you will right click any file or directory in file manager, you should see the option to use RabbitVCS 🙂
Conclusion
RabbitVCS is easy to configure and use, all you need to do is to install required packages and it gets configured with your current file manager and version control system. Start uploading your code to the repos easily 🙂


