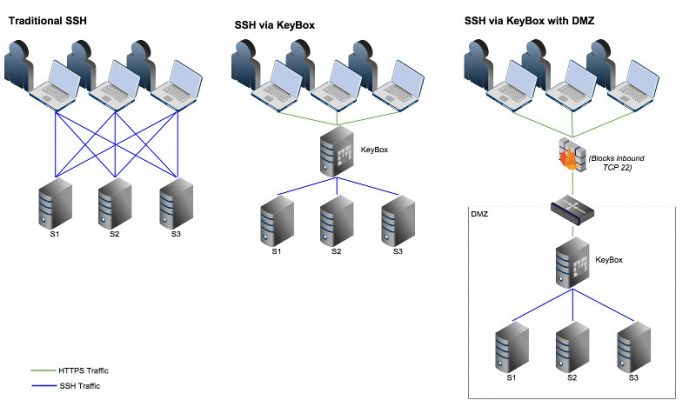
KeyBox is a free, web-based open source application that can be used to manage multiple SSH sessions on multiple systems. It allows you to execute commands on multiple shells, manage keys, share terminal commands, and upload files to multiple systems simultaneously. It will generate a private/public key pair on initial startup, also you can define your own custom key if you like. Moreover, you can add additional system admins, and audit terminal history of them. KeyBox allows you to control the users, so that you can define which users can access which systems. After starting the SSH session, you’ll be able to manage single or multiple systems via a web browser of your choice more easily and effectively.
This tutorial describes how to install KeyBox on your Linux systems, and how to manage multiple remote servers through KeyBox web console.
Installation
KeyBox is written using Java, so you have to install Java on your system.
To install Java on Ubuntu like systems, run the following command:
sudo apt-get install openjdk-7-jdk
To install Java on RPM based systems, refer the following link.
After installing Java, download KeyBox latest version from the official download page.
Go to the download location, and extract the downloaded tar file. Then, navigate to KeyBox extracted folder, and execute it as shown below.
cd Downloads/KeyBox-jetty/
./startKeyBox.sh
Accessing KeyBox Web console
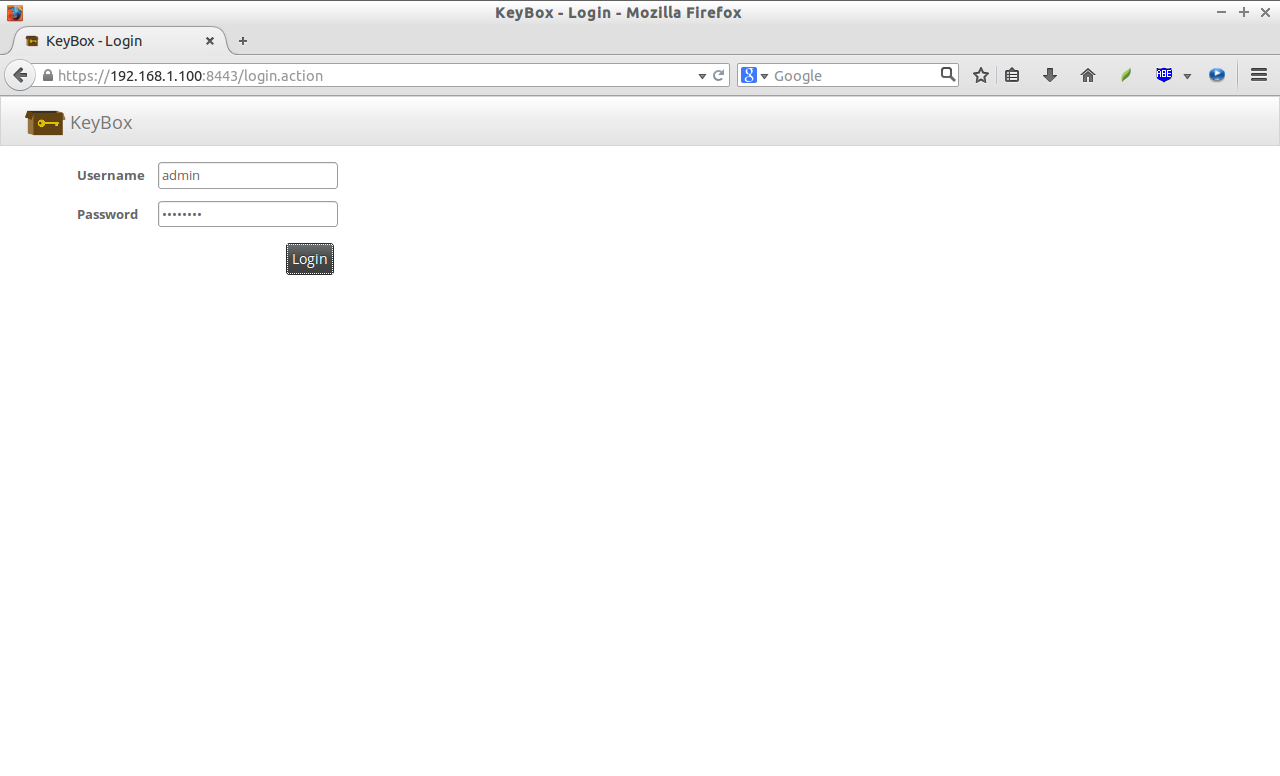
Now, open up your web browser, and point it to https://IP-Address:8443/. You’ll be pleased with the following screen. Enter the username and password. The default user name is admin, and password is changeme.
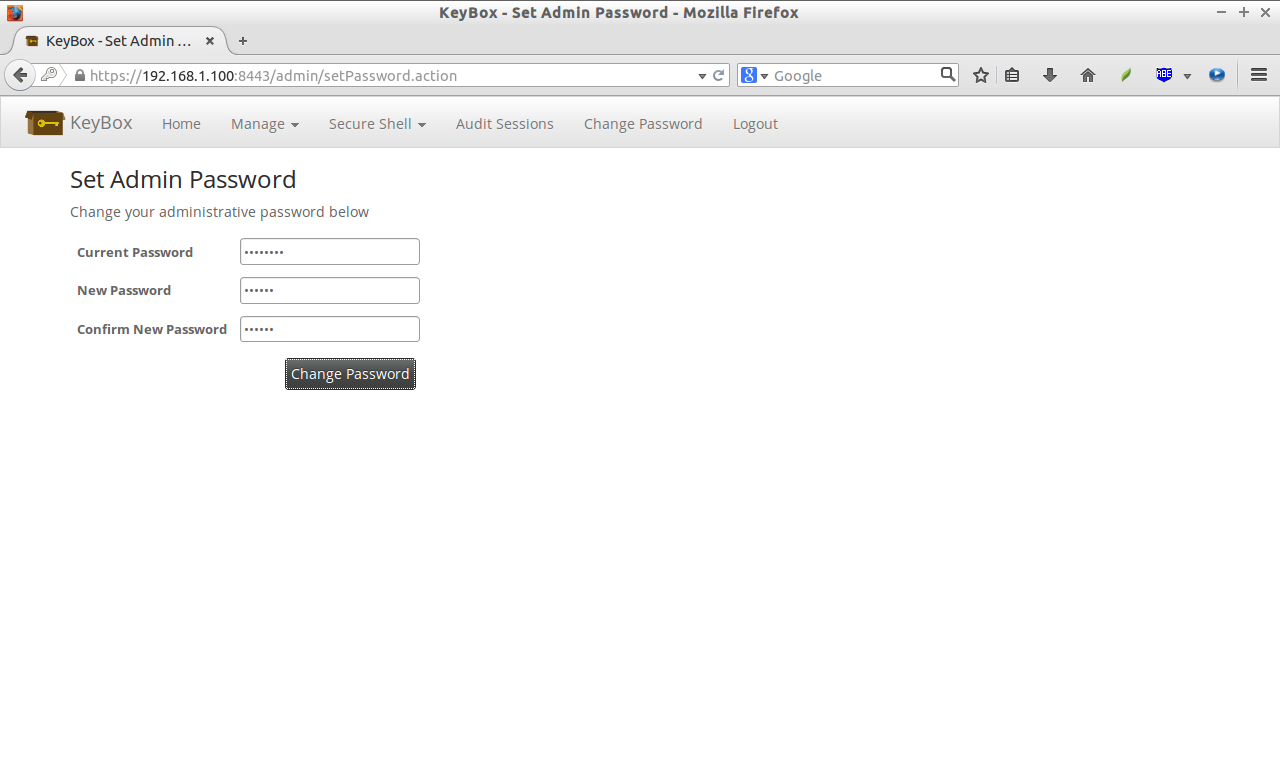
At first login, you’ll prompted to change the default password. Enter password of your choice, and hit Change password button.
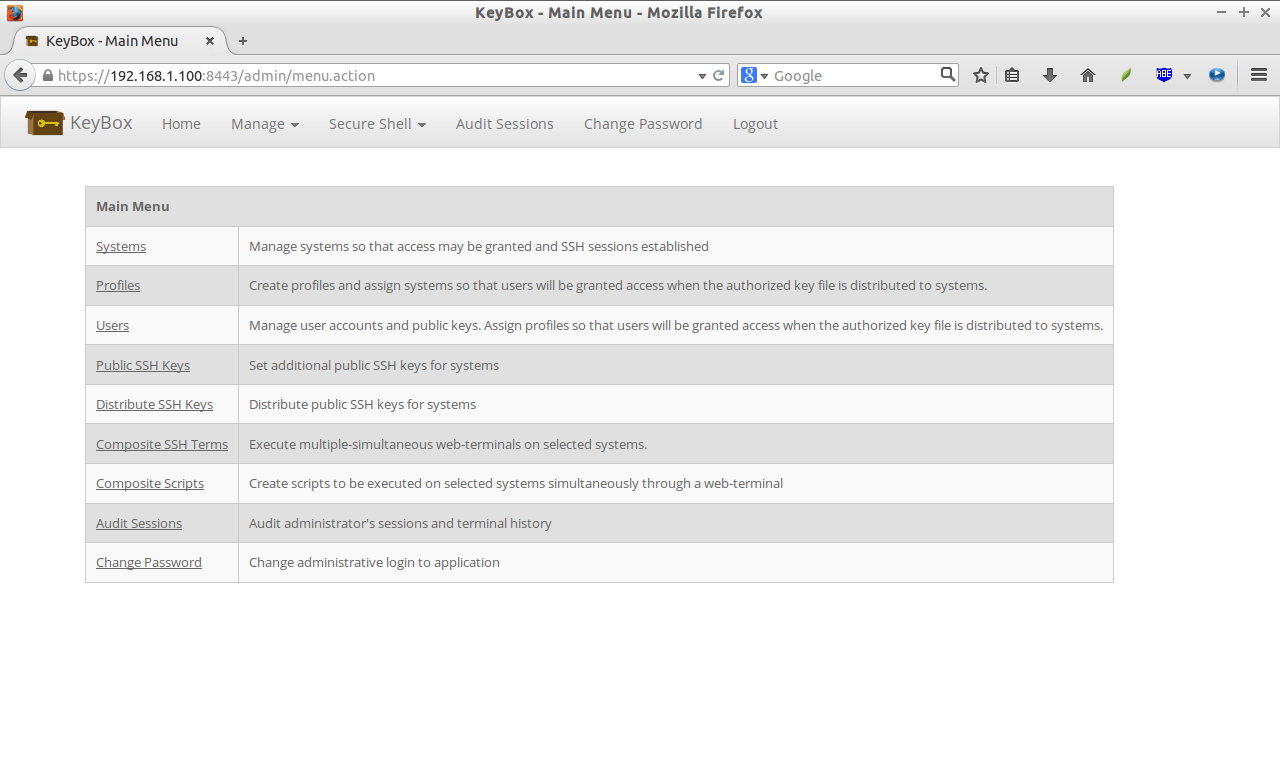
Now, you’ll be able to access the administrative console. This is how my administrative dashboard looked.
Usage
For the purpose of this tutorial, I will be using a system running with CentOS 6.5. First of all, you have to add the systems to KeyBox.
1. Creating Systems
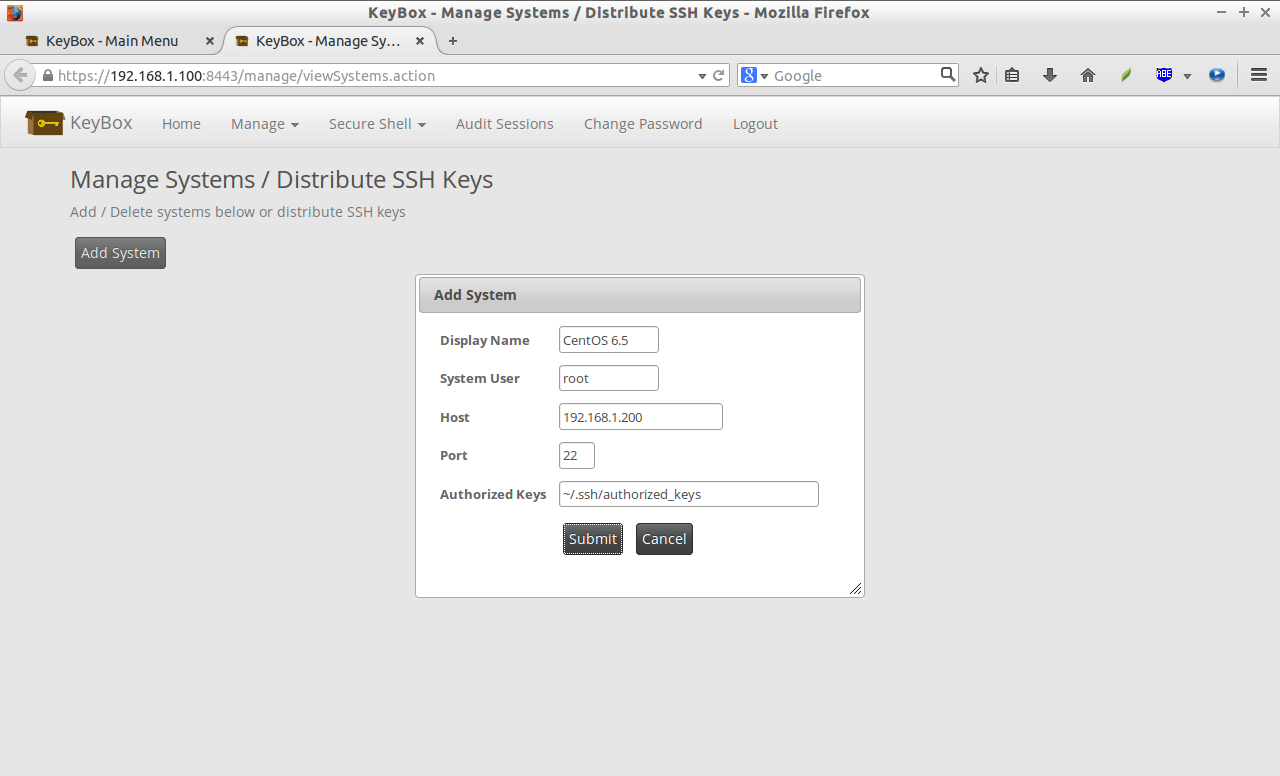
Click on the link that says: Systems on the home page. Click on the Add System button. Next, enter the display name, user name, ip address, and click Submit.
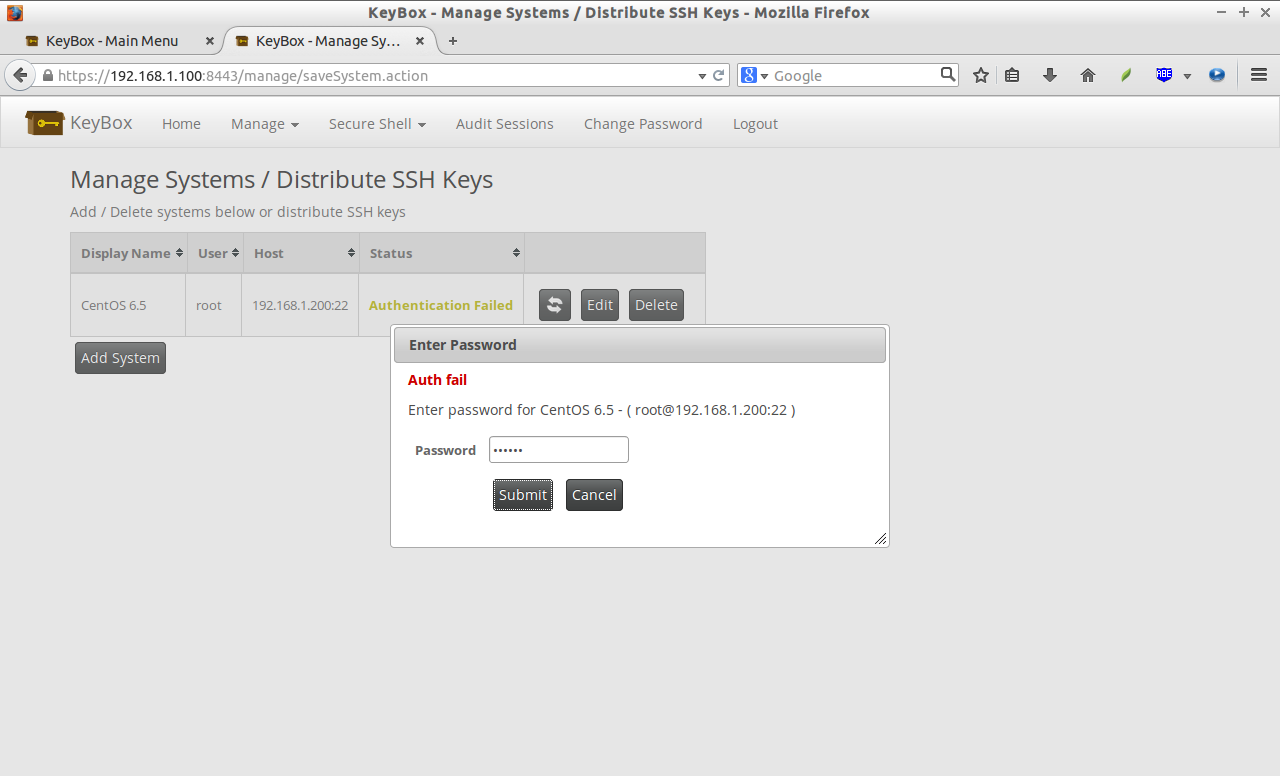
Enter the CentOS 6.5 root user password.
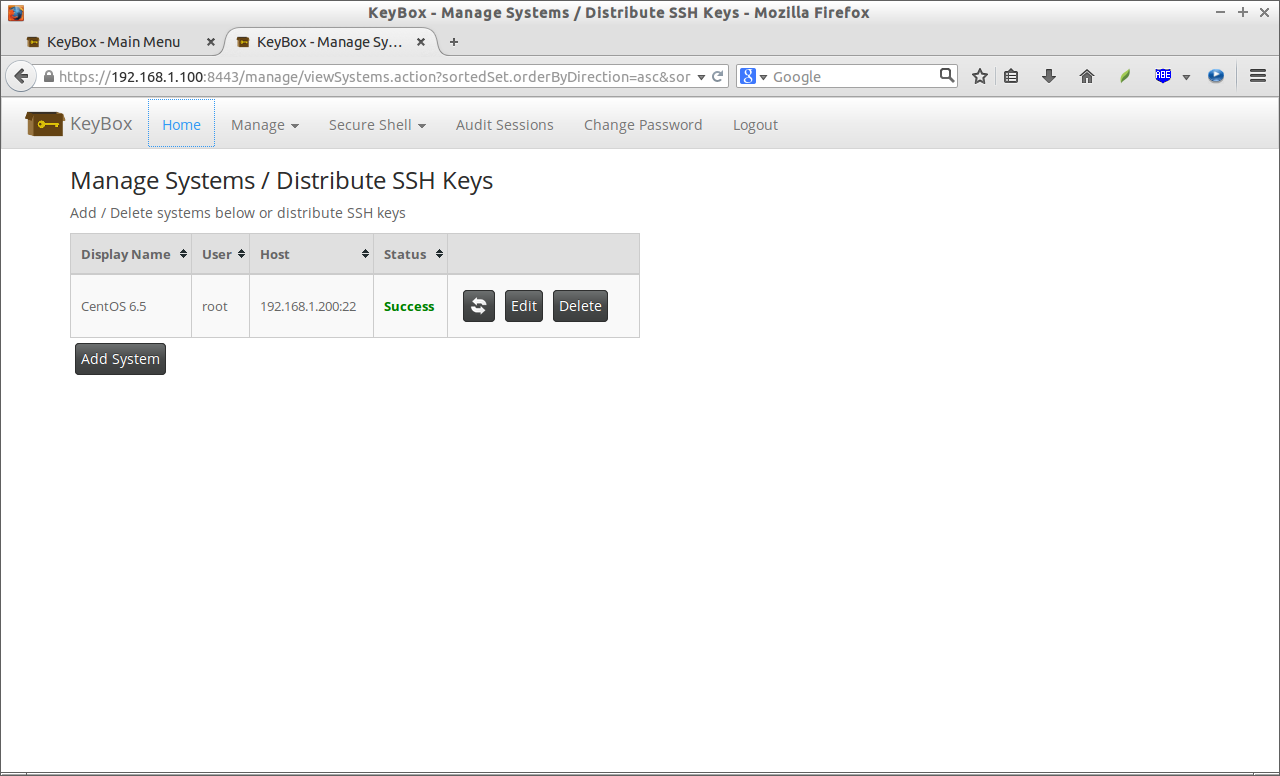
Now, the new system has been added.
Like this way, you can add as many as systems you want to manage.
2. Creating profiles, and Assign Systems to them
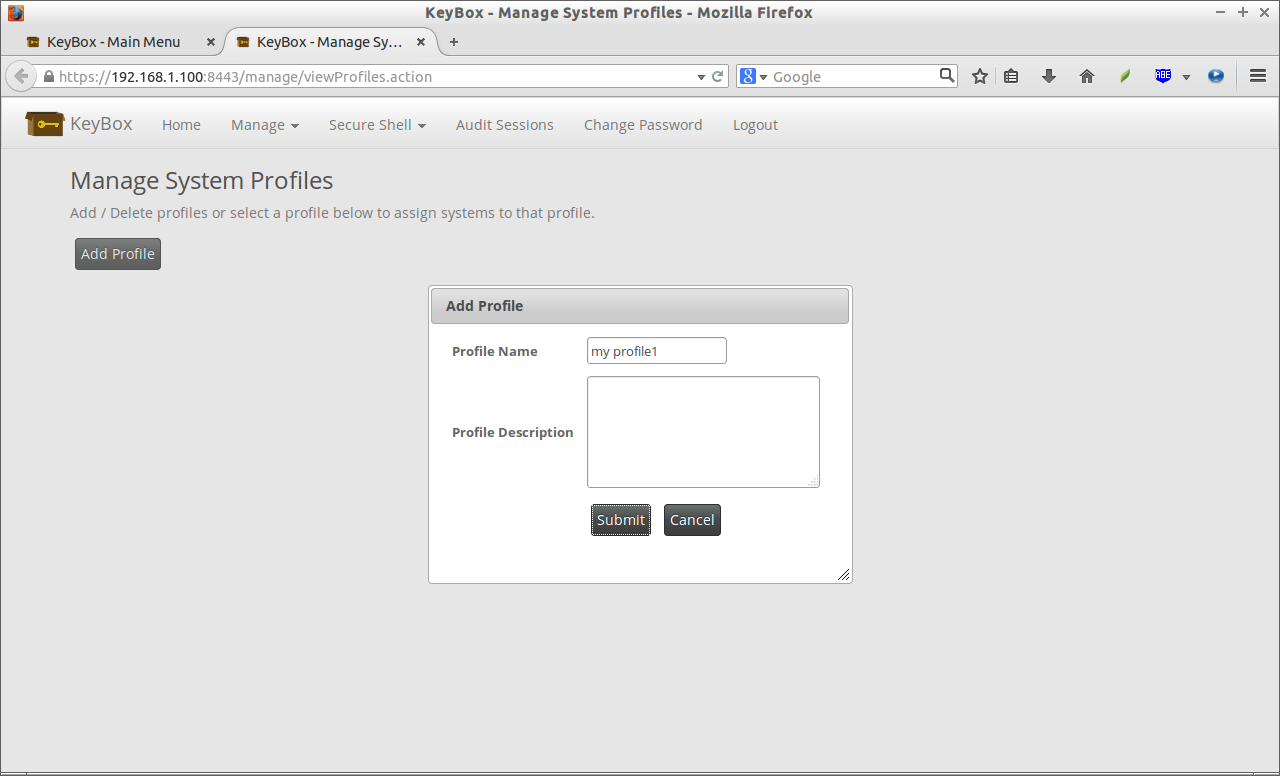
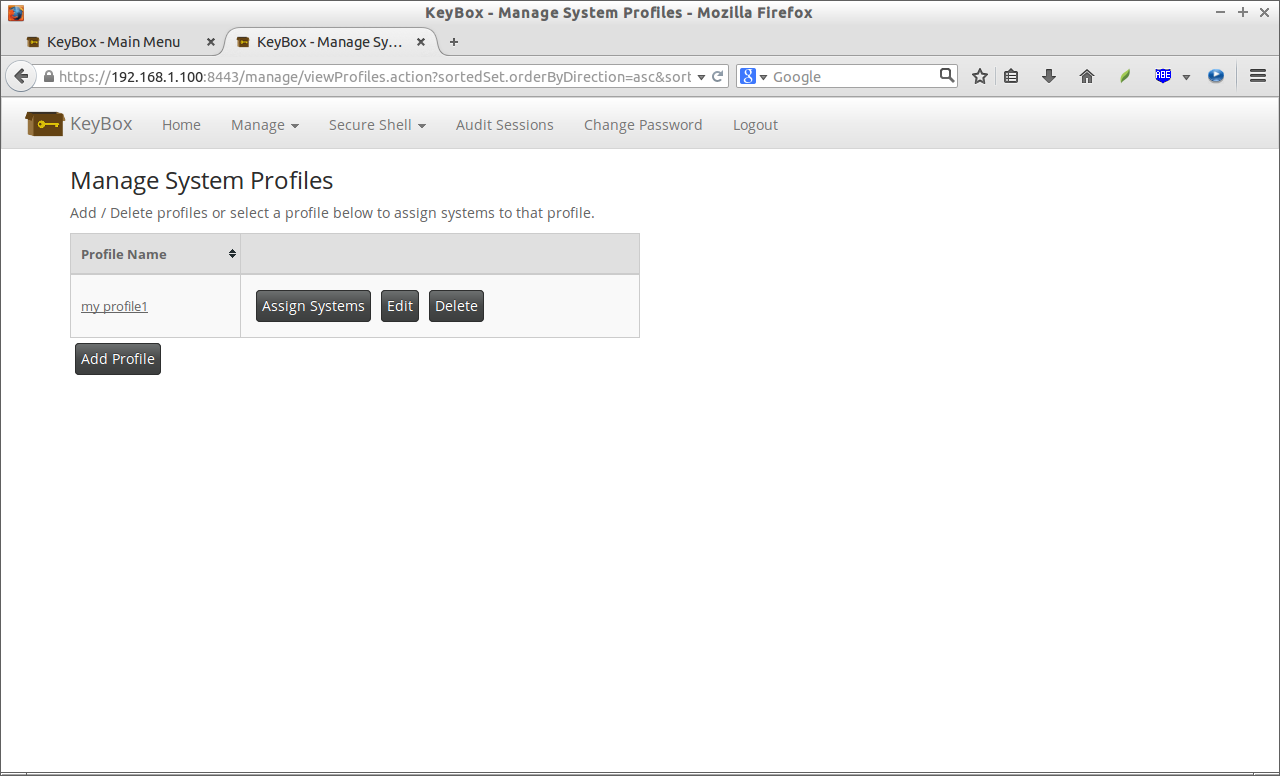
Now, head back to the Home screen, and click on the Profiles link to create new profile. Click Add profile, and then enter the profile name.
The new profile has been created.
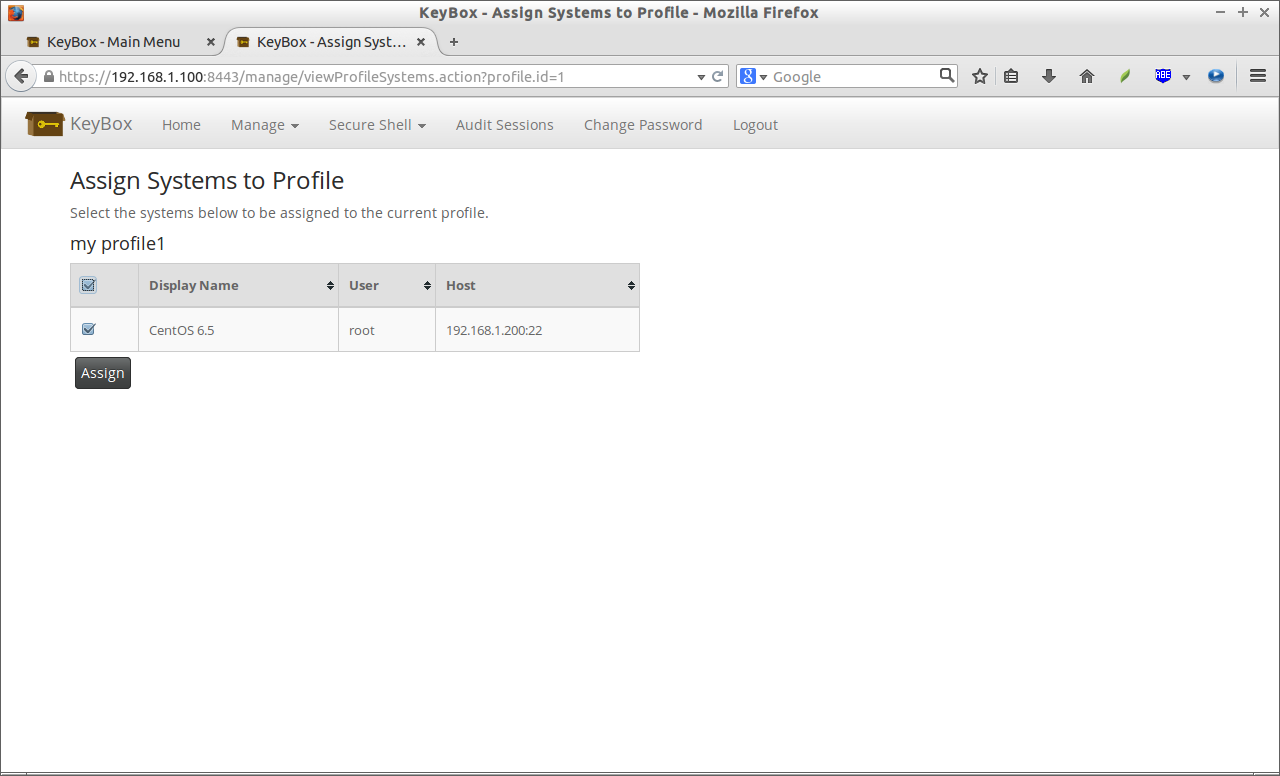
Now, add the systems to the profile. To do that, click on the Assign Systems link. Select the systems you want to add to the profile.
Like this way, you can add as many as systems you want.
3. Creating Users, and Assign Profiles to them
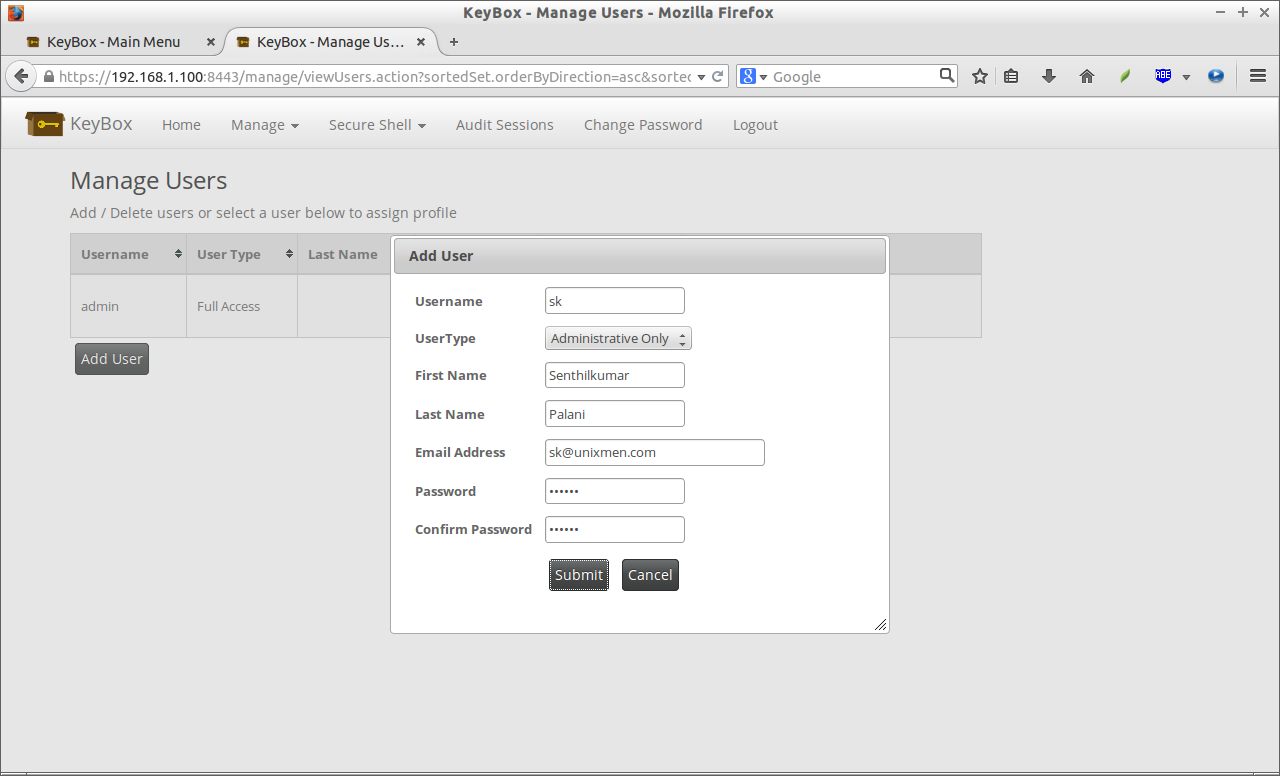
Click on the Users button on the main screen. Click Add user button to create new users.
Enter the required details such as user name, first name, last name, Email address etc. Also select the user type whether you want to give him full access or administrative rights only. As I already have a full access user, here I selected Administrative user type for my new user.
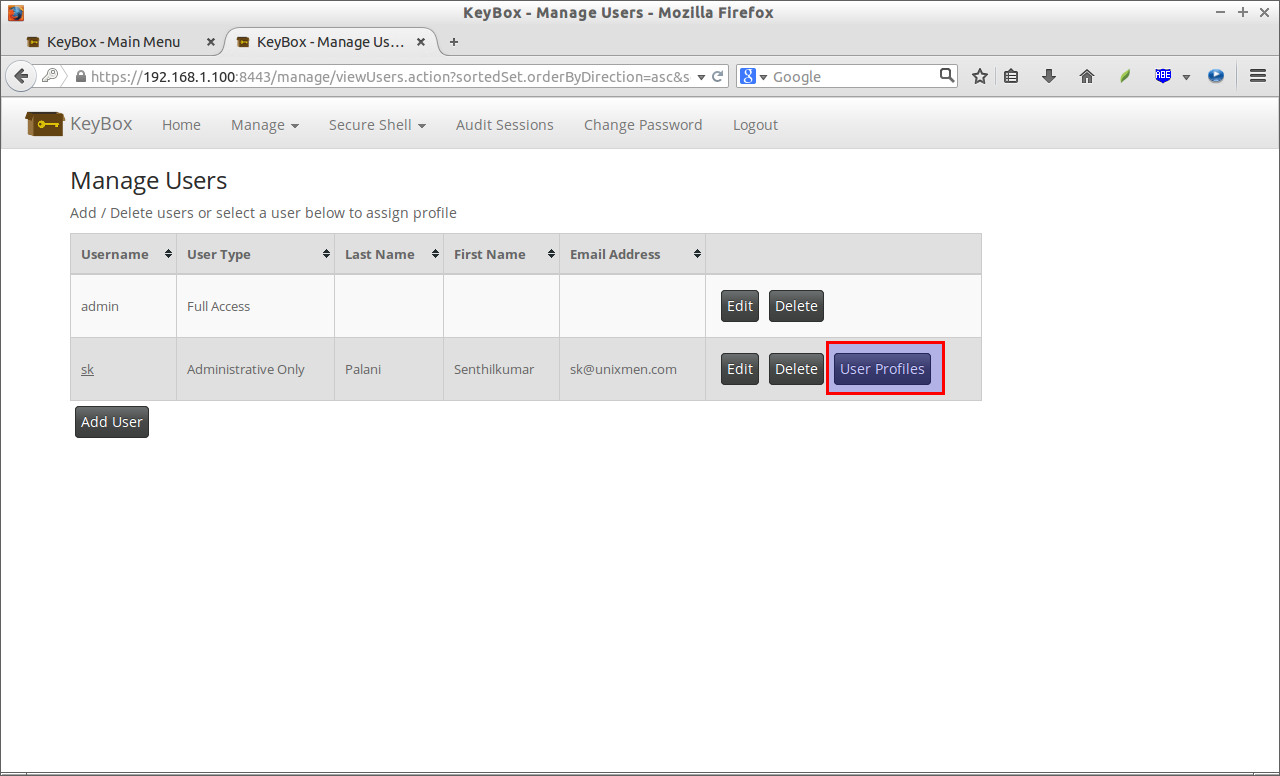
Now, click on the User Profiles button to assign profiles to the newly created user ‘sk’.
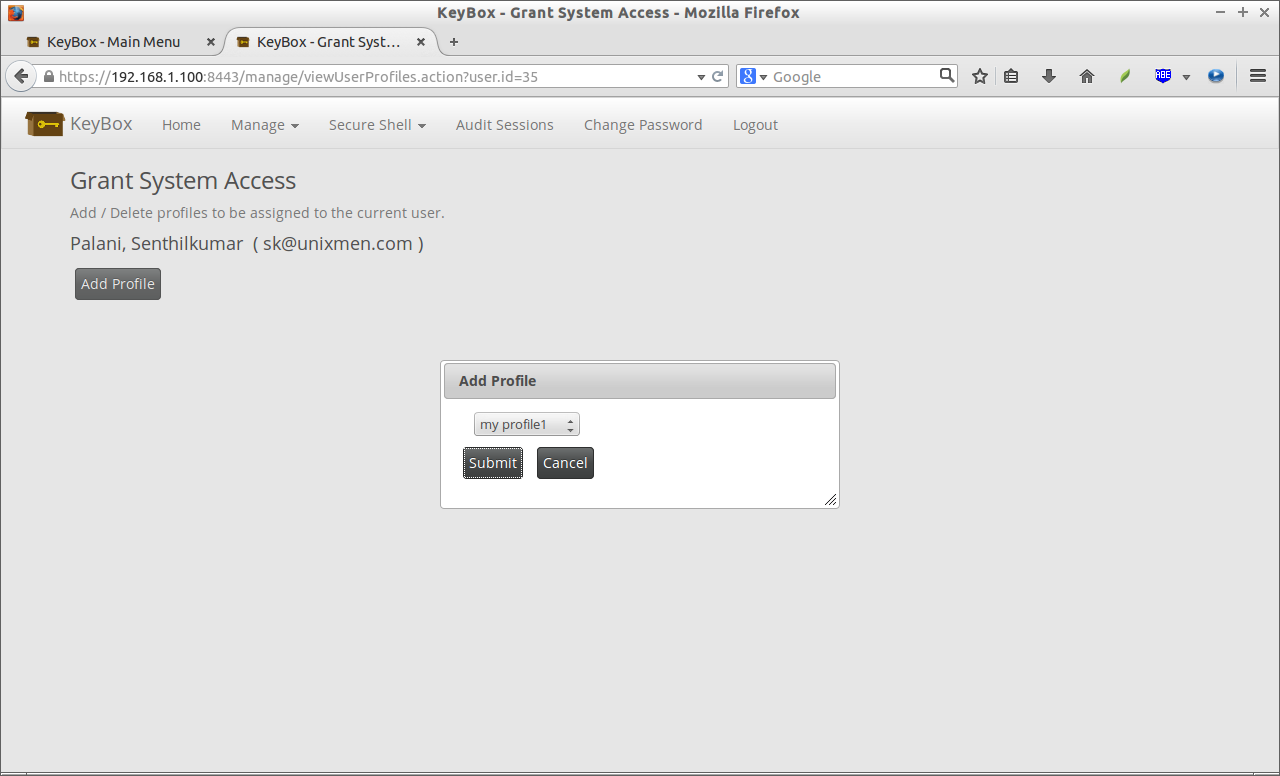
Click Add Profile button, and select the profile from the drop down box, and finally click Submit.
4. Adding Public SSH Keys to Systems or profiles
Now, you need to generate a new public SSH key in your KeyBox system. Here, I will show how to create a ssh key in Ubuntu like systems.
Open Terminal, and run the following command:
cd .ssh/
ssh-keygen
Enter your passphrase name twice. If you already have SSH keys, skip this step.
Sample output:
 Generating public/private rsa key pair.
 Enter file in which to save the key (/home/sk/.ssh/id_rsa):
 /home/sk/.ssh/id_rsa already exists.
 Overwrite (y/n)? y
 Enter passphrase (empty for no passphrase):
 Enter same passphrase again:
 Your identification has been saved in /home/sk/.ssh/id_rsa.
 Your public key has been saved in /home/sk/.ssh/id_rsa.pub.
 The key fingerprint is:
 57:ae:0d:3b:d2:04:4c:59:88:fc:f1:1d:7c:54:2c:e3 sk@sk
 The key's randomart image is:
 +--[ RSA 2048]----+
 |     . ..+.. ..o.|
 |      oo+   o + .|
 |       .oo ..+ o |
 |        ...o. E  |
 |        S + .    |
 |         + =     |
 |        . = .    |
 |         . .     |
 |                 |
 +-----------------+
Copy the public SSH key:
cat id_rsa.pub
Sample output:
ssh-rsa AAAAB3NzaC1yc2EAAAADAQABAAABAQC6MdXJzO2hK/gG7WoJlMzzUNrbi/BtTBgCCNbErw/z3T+2BBcytLmA3h4xeTBQpa0BYhSsNL4XA4dAUC3yuA14M4eApJ0csf64r9z2dyQGeK6kkeWoXjyWbX10vcnChxdMHZEY0fY6EEUx/hyJ5sdiJOW+gaXD2MQ2I/RAKzYjb6u6J6GNh4DYr8bZQ8IfWd0SbUjfl2jZ353maUVsZ32SjunwYO8qQtIZdxi8azidU03qRHoZNkl+GAtr5qT5gVXqAJ3JtpwC48ma0X1iiF59qWkA49PZG9jHb+WckFGyA+x/EG6e57xCg5X7x57YRTVEQABeWWCvKAVWh8JG2t5R sk@sk
Copy the above output, and head back to the KeyBox home screen.
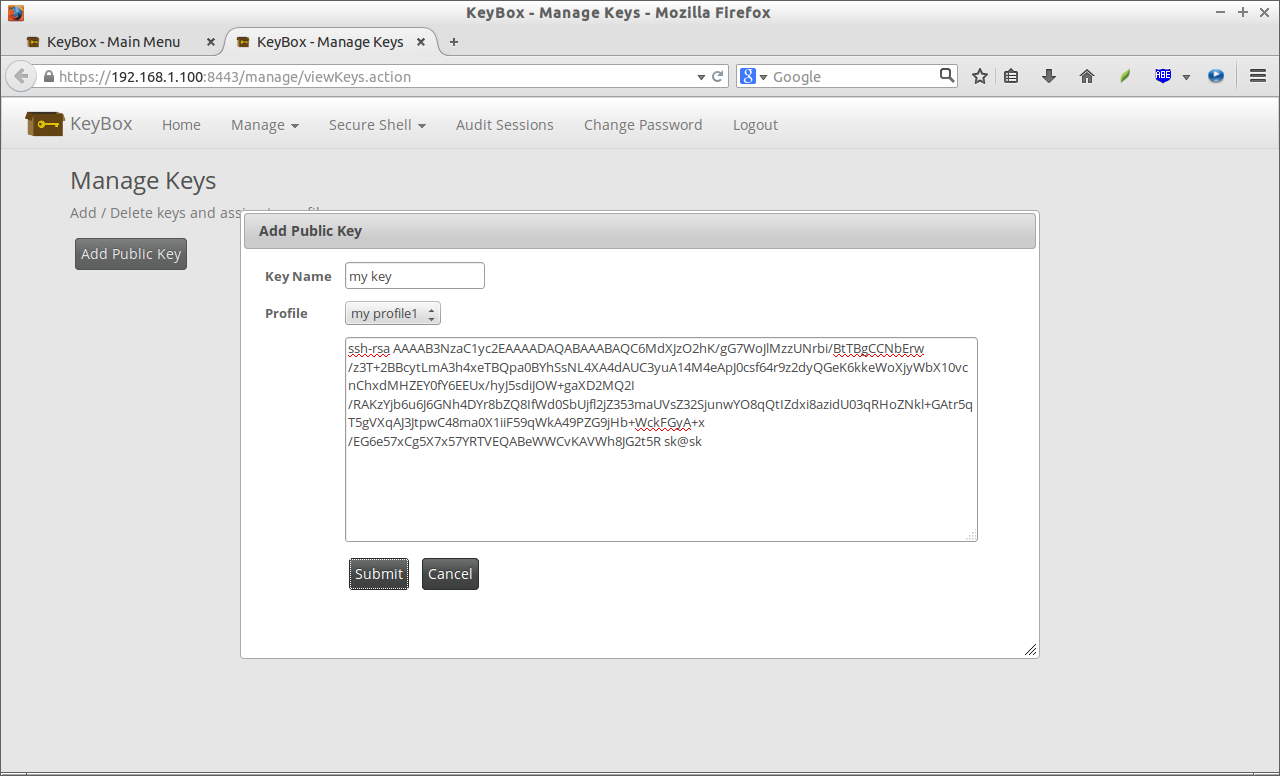
Click on the Public SSH Keys from the home page. Then, click Add Public Key button, select the systems or profiles from the drop-down box, and paste the SSH public key in Public Key column box.
You can assign the public key to single systems if you want. in my case, I assigned the key to my profile.
5. Distribute SSH Keys to Remote Systems or Profiles
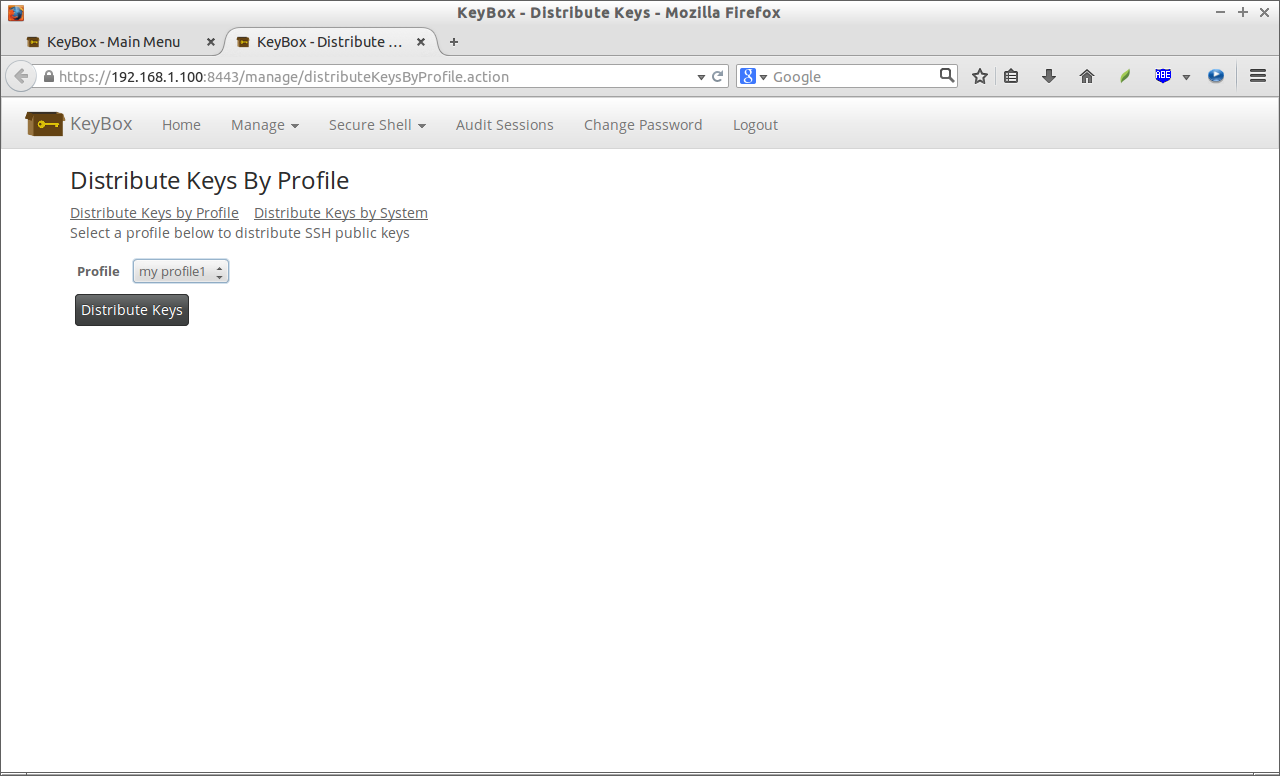
From the KeyBox home page, click on the link that says: Distribute SSH keys. You’ll be redirected new page. You can either distribute the SSH keys to a single or all systems, or a particular profile.
That’s it. We have completed all necessary tasks. Now, let us see how to manage remote systems via keybox web console.
6. Composite SSH Terminals
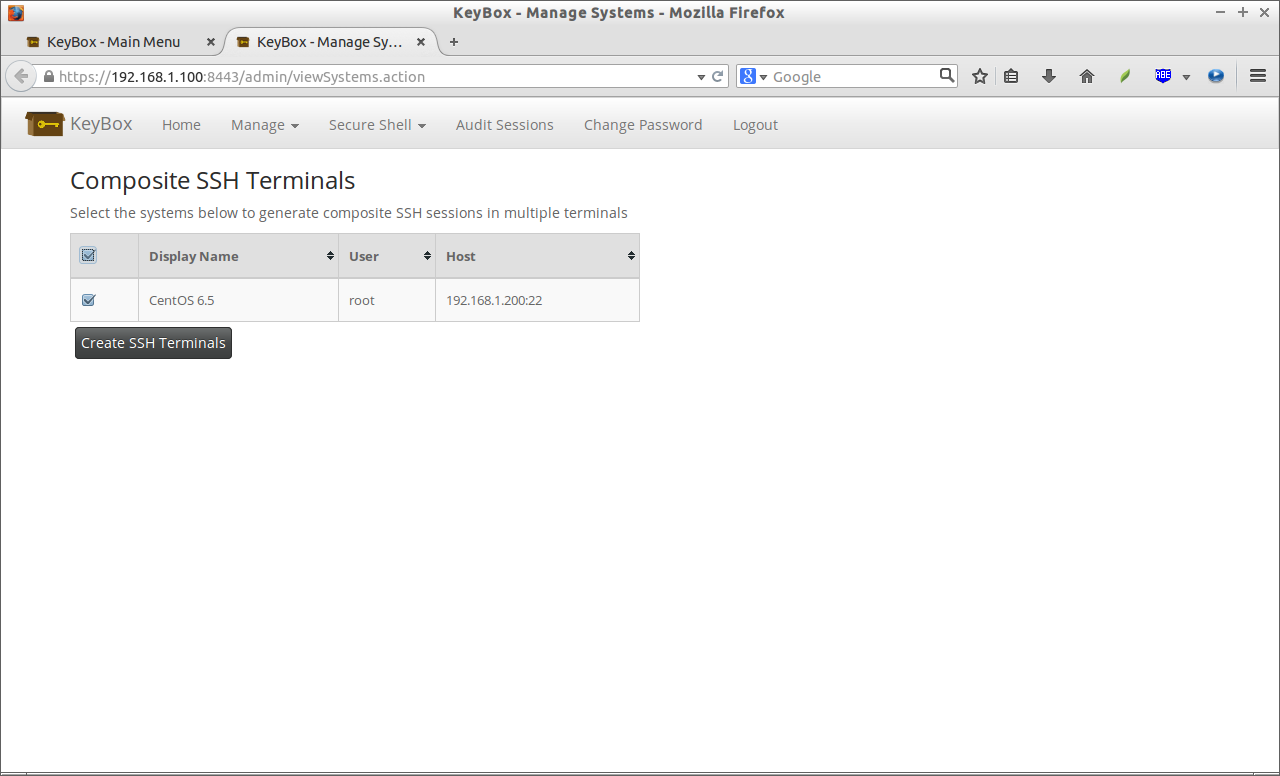
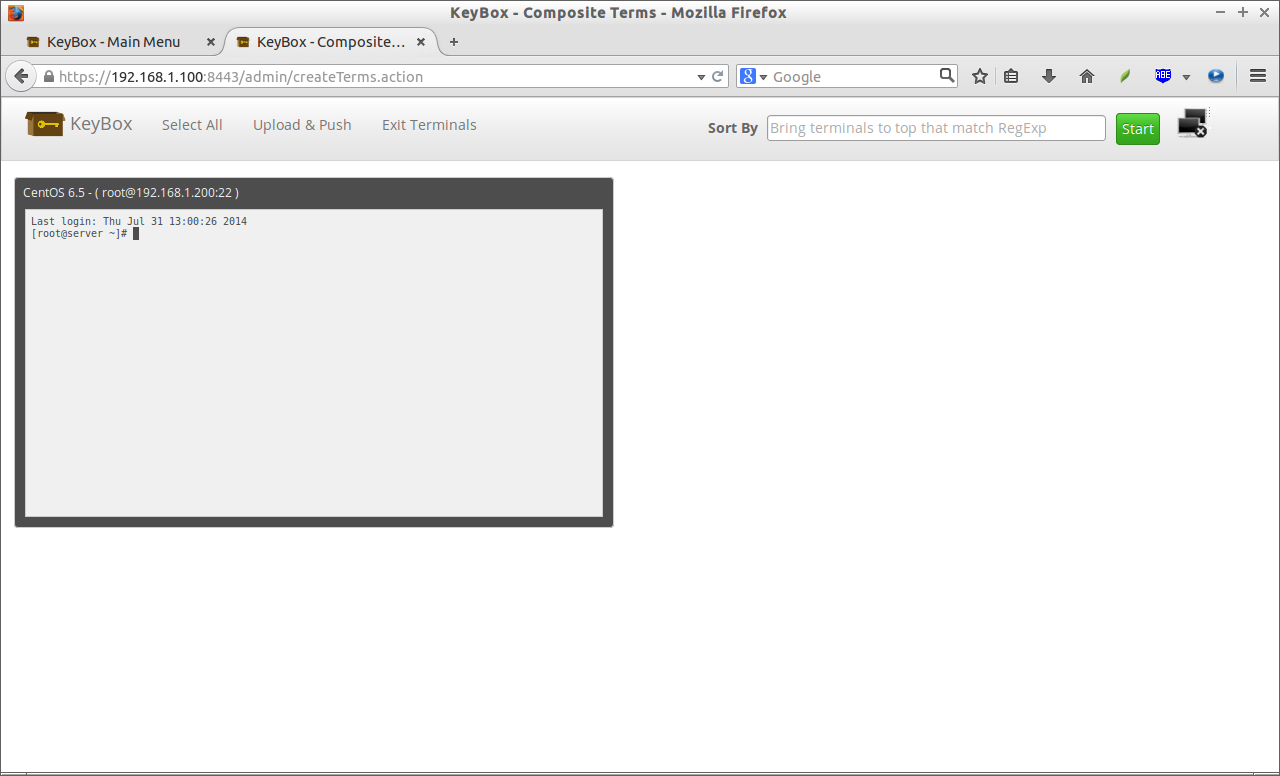
Click on the Composite SSH Terminals from the KeyBox home page. Select the system to create SSH Terminals. In my case, I have added only one system (CentOS 6.5).
Once you clicked the Create SSH Terminals button, you will pleased with your remote system Terminal right at the KeyBox web console.
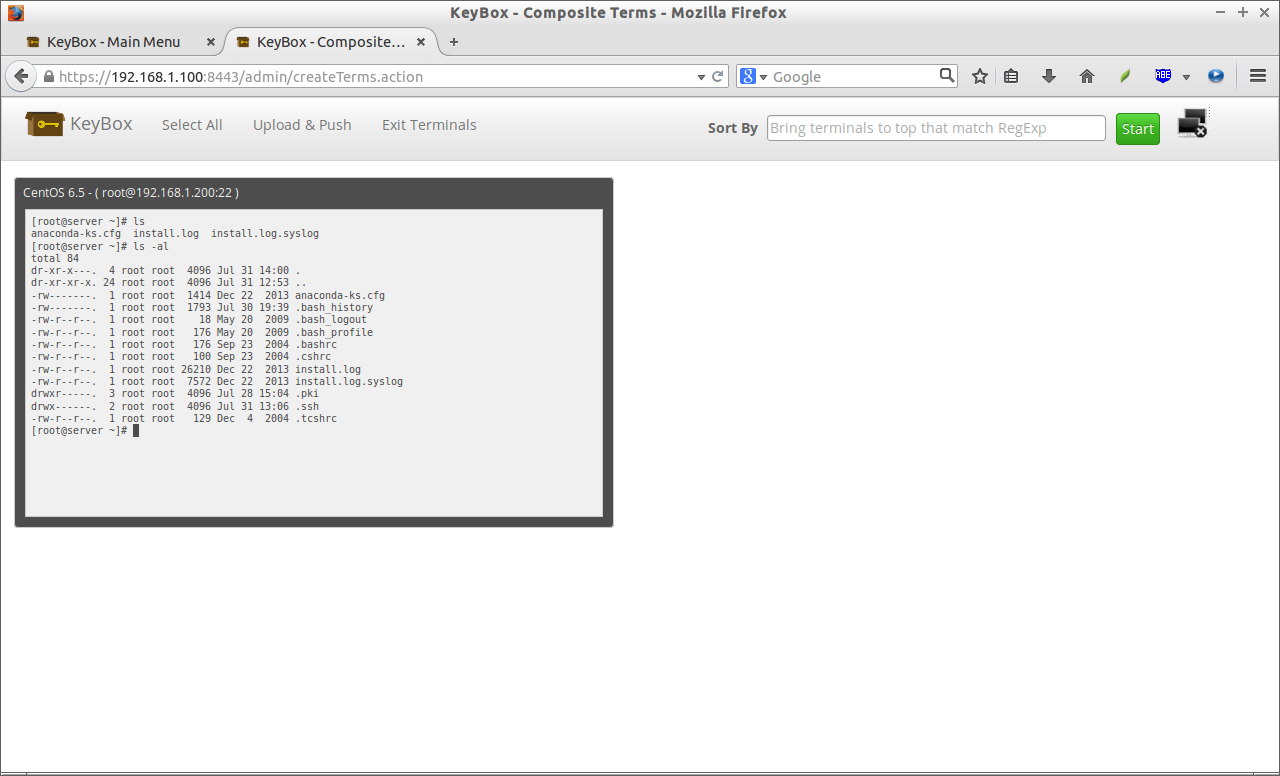
From here, you can run commands, and manage the systems as the way you do in local systems.
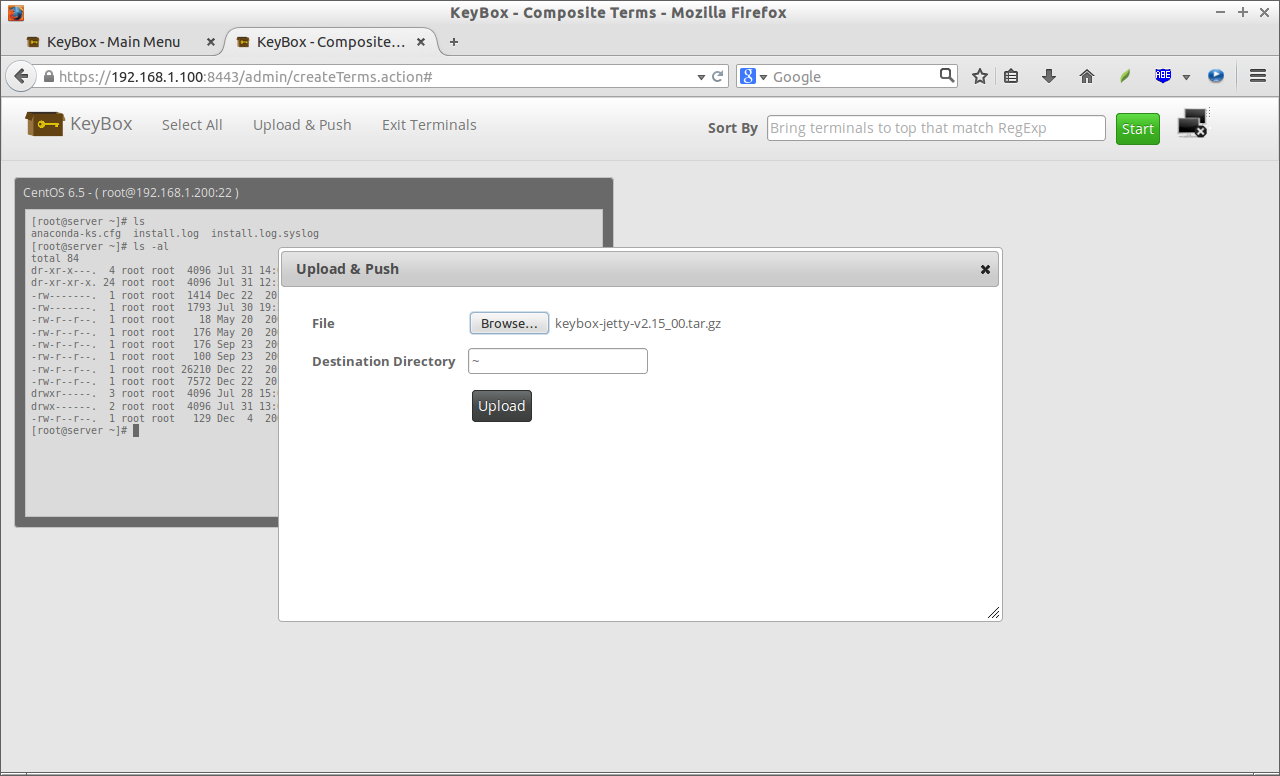
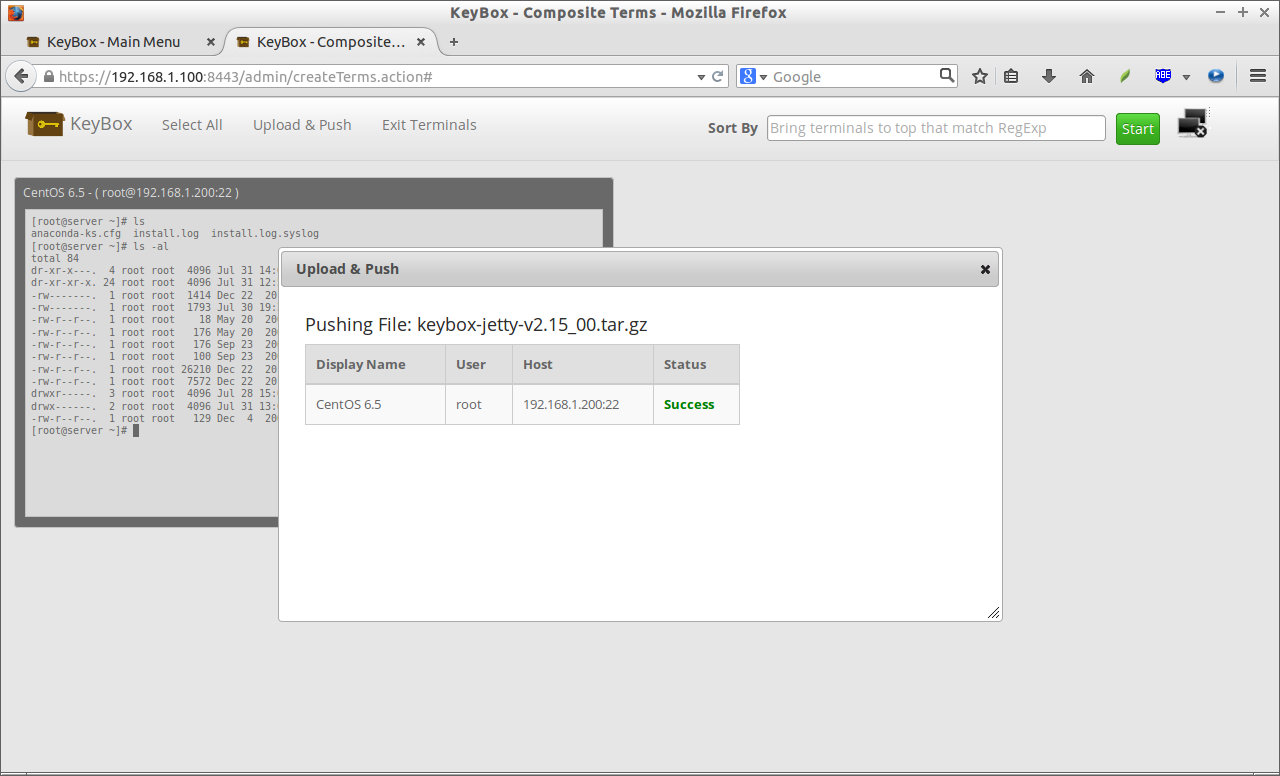
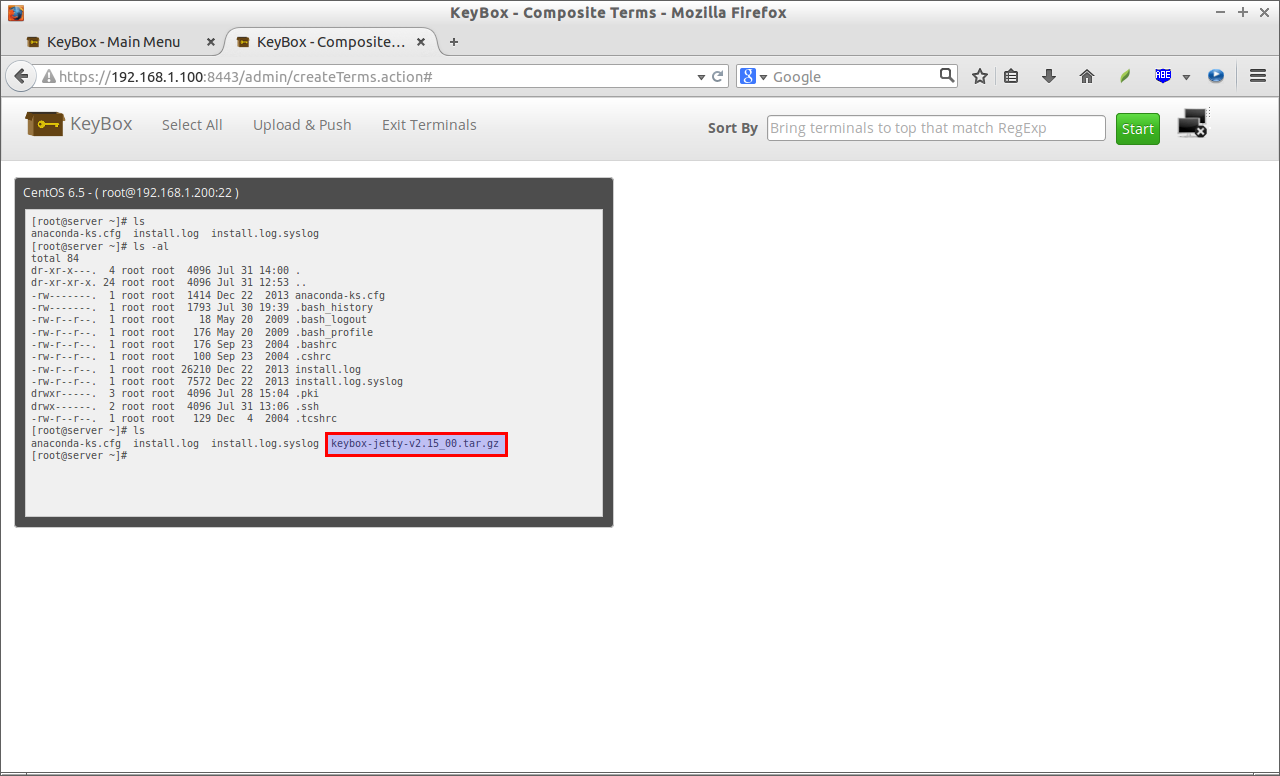
Also, you can upload or push files from your local system(keybox system) to remote system. To do that, click on the Upload & Push link on the top menu bar. Select the file you want to upload, and click Upload.
That’s it. The file has been uploaded successfully.
Verify it using “ls” command:
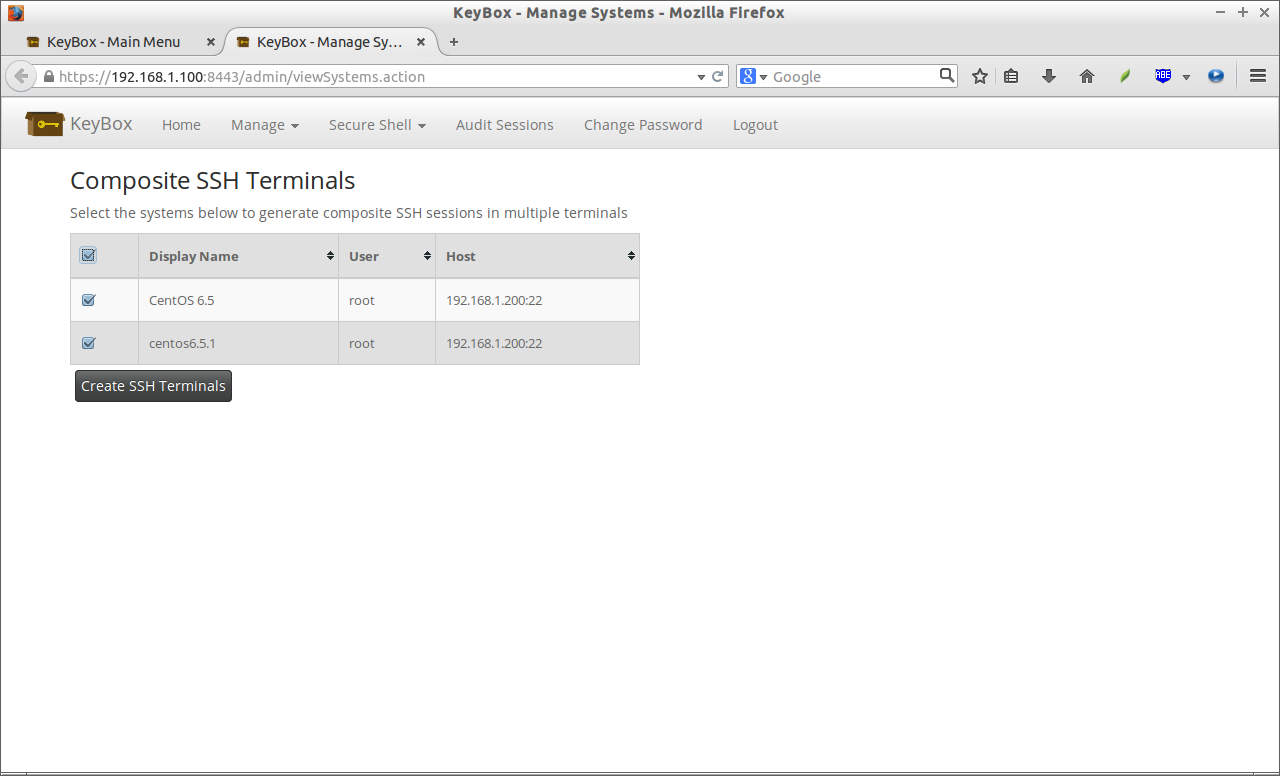
Do you want multiple Terminals of the same host to perform different commands at once? Well, that’s possible too. Just add the system again from the Systems menu, assign users and profiles, and distribute public SSH keys. Then, go to the Composite SSH Terms link from the KeyBox home screen, select all systems, and click Create SSH Terminals button. As you in the below screenshot, I have created two same systems with different names.
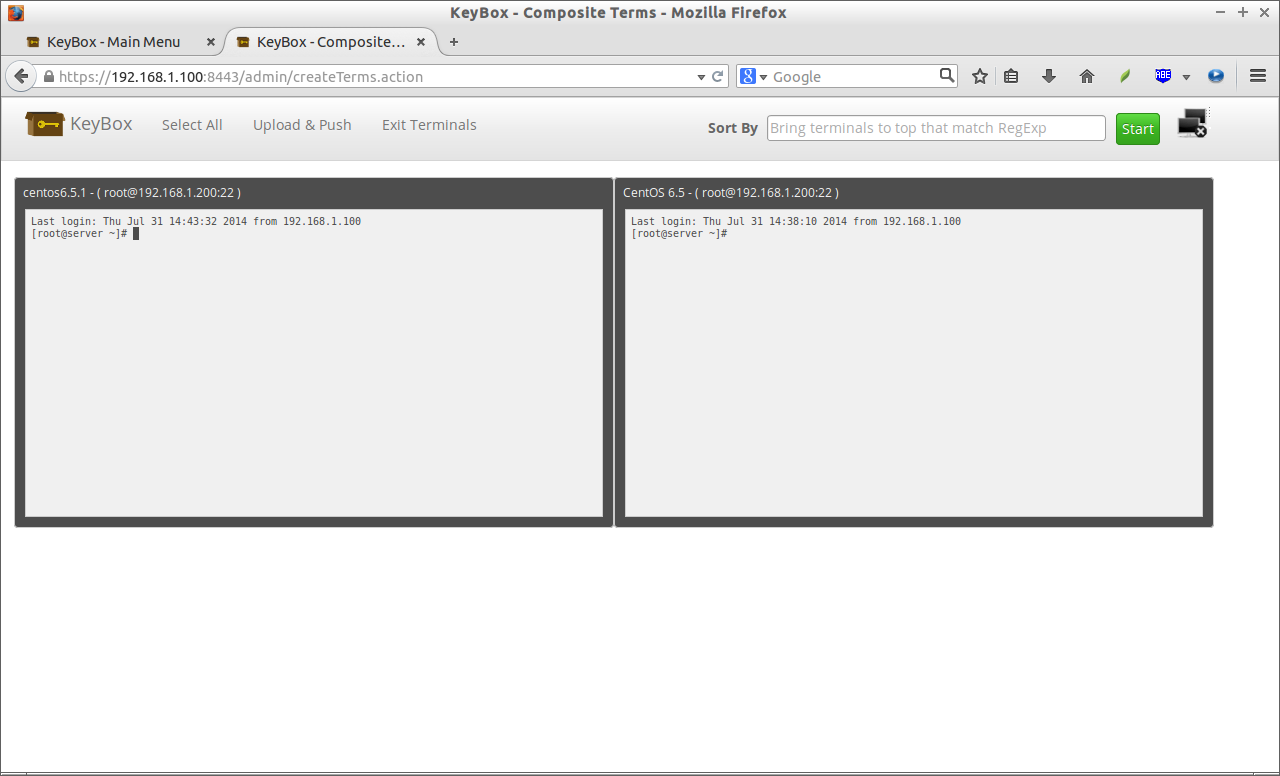
Now, click on the button Create SSH Terminals. You’ll see the two terminals of same system as shown below.
Like this way, you can create multiple Terminals of the same system, and/or add multiple different systems to manage them effectively from a center place.
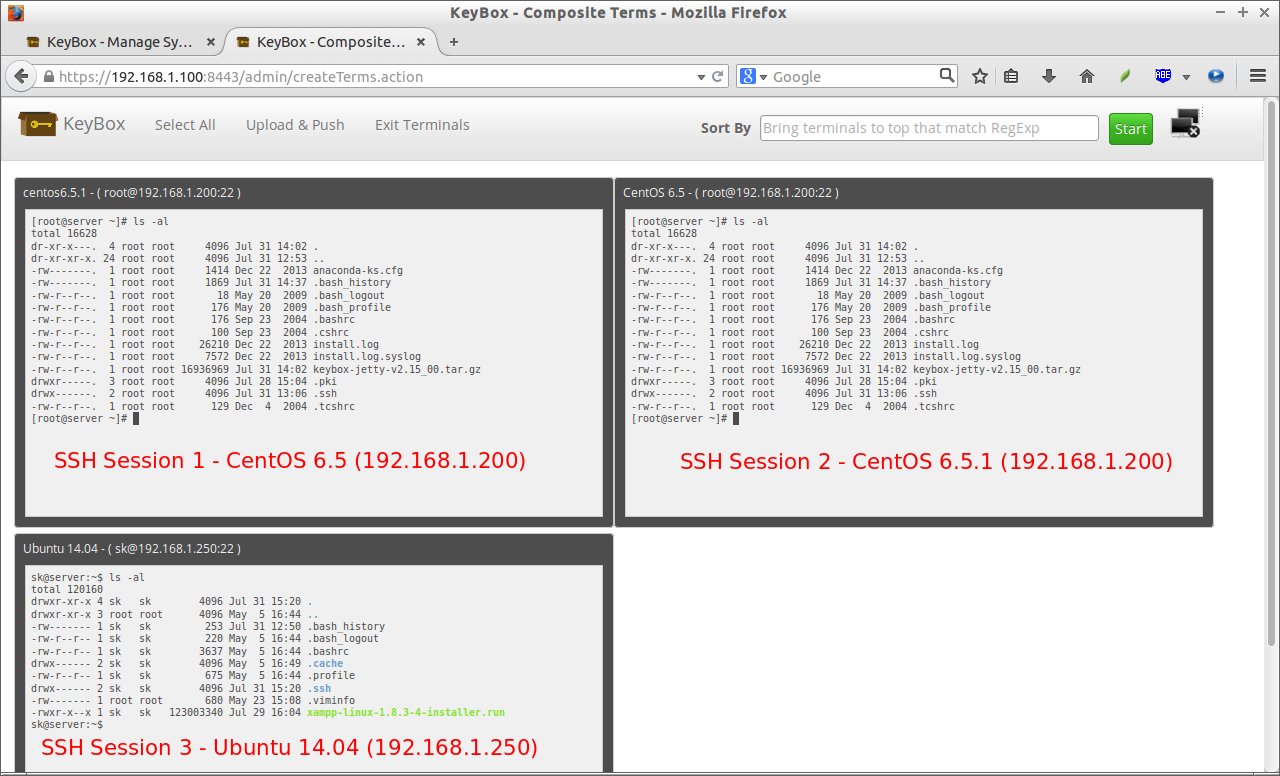
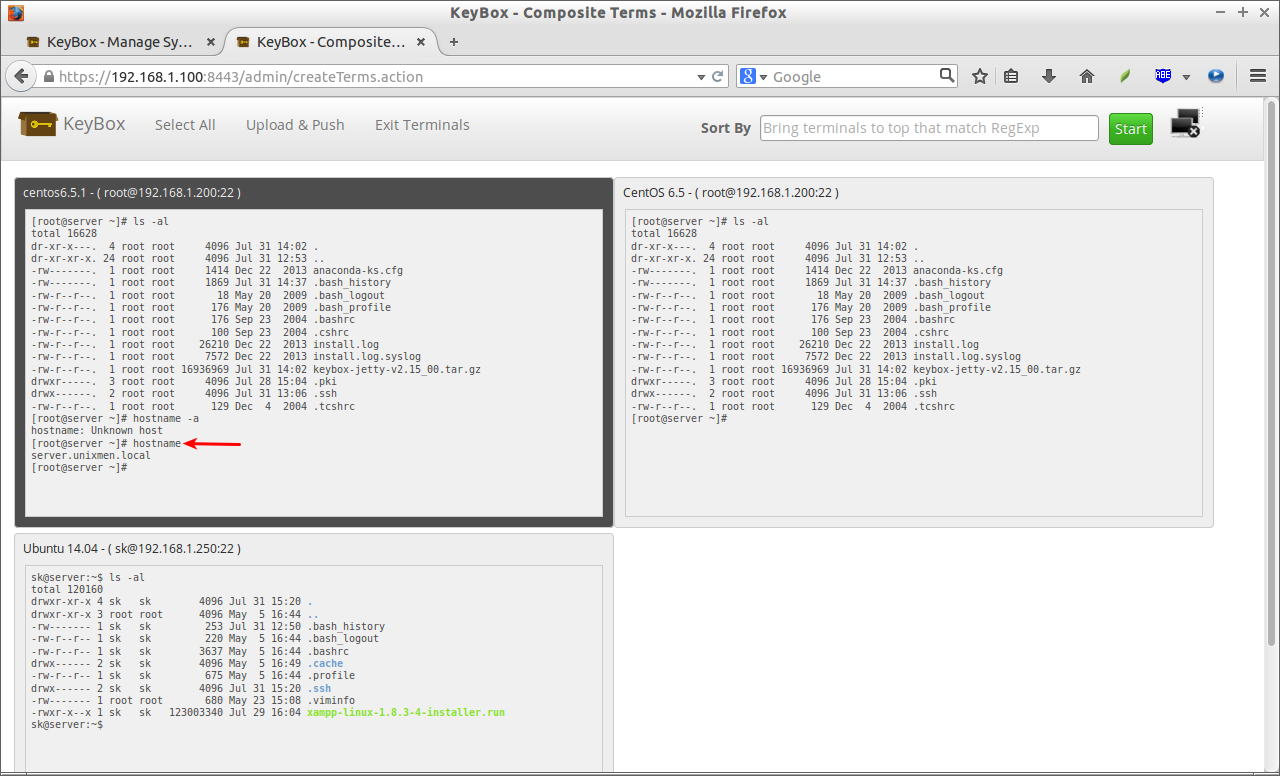
For example, I have again added a remote system running with Ubuntu 14.04 LTS to the KeyBox system. Now, I can manage three SSH sessions simultaneously.
As you see above, I have executed the command “ls -al” in three sessions simultaneously. If you want to run command on any single session, just select the particular session, and run the commands you want. The command will not be executed in the remaining sessions. Refer the following screenshot.
As you see above, I have executed the command “hostname” in the first session.
That’s all for now. Hope this tool is useful for you.
Cheers!
Reference:


