
Graylog: a powerful logs management system
Graylog is an open source logs management system which parses and enriches log messages, wire and event data from any source, thus providing a centralized configuration management system for third-party collectors, like fluentd, beats and nxlog. For example, with Graylog it is possible to enrich log messages with geo-coordinates translated from IP addresses, or to map a user ID to a user name.
Features
A few of Graylog’s most notable features include:
- Central logs management system, which gives your team access to runtime configuration and log data without touching the Graylog servers.
- Grouping users into roles to simplify permissions management. Graylog has a very powerful system for restricting data access to users, which can really come in handy.
- LDAP integration.
- REST API usage for programatically log data accessing.
Goals
This tutorial will cover Graylog installation and basic configuration on a machine running Ubuntu 16.04.
Prerequisites
- One server running Ubuntu 16.04 with at least 2 GB of RAM.
- MongoDB.
- Elasticsearch 2.x.
- Oracle JDK 8.
Getting started
If your system matches the above listed prerequisites, you can start the Graylog 2 installation process.
Keep server update:
$ sudo apt-get update && sudo apt-get upgrade
$ sudo apt-get install apt-transport-https uuid-runtime pwgen
Configure Elasticsearch
As noted above, Graylog 2.0.0 (and higher) requires Elasticsearch 2.x. You’ll want to modify the Elastisearch configuration file:
, setting the cluster name so that the it matches the one set in the Graylog configuration file. In this tutorial, the cluster name chosen is graylog.
With a text editor, open the Elasticsearch configuration file:
$ sudo $EDITOR /etc/elasticsearch/elasticsearch.yml
Search for the
line and uncomment it. Next, modify as follows:
# ---------------------------------- Cluster -----------------------------------
#
# Use a descriptive name for your cluster:
#
 cluster.name: graylog
#
Save and close the file, then restart the Elastisearch service:
$ sudo systemctl restart elasticsearch
Install Graylog
Once the server configuration is complete, we can move onto Graylog installation. Configure the Graylog repository with the following commands:
$ wget https://packages.graylog2.org/repo/packages/graylog-2.2-repository_latest.deb
$ sudo dpkg -i graylog-2.2-repository_latest.deb
Next, install the package:
$ sudo apt-get update && sudo apt-get install graylog-server
At the end of installation process, enable Graylog to start at boot time:
$ systemclt enable graylog-server
Before starting Graylog, we’ll need to configure it.
Configure Graylog
The Graylog configuration file is
. Well have to edit some parameters in this file before we can start the logs management program.
First of all, we need to set the
value. This must be at least 64 characters long. We will generate it using pwgen.
You can install this tool with apt:
$ sudo apt-get install pwgen
Next, using sed, we write the generated characters directly into the Graylog configuration file:
$ sudo -E sed -i -e "s/password_secret =.*/password_secret = $(pwgen -N 1 -s 128)/" /etc/graylog/server/server.conf
In order to check that everything was done correctly, use the following code:
$ cat /etc/graylog/server/server.conf | grep password_secret
The command should display the
line. In our case:
password_secret = hjg5nBbZQcgLVW3do5uw1irfbq9UiRwhISZgPie8r96dejt4hgWdHUJcIaK1onQfFFatbrPZ3WV4yEhoqX9ITtaEUmn9SKn2aRT62uCO9KRZGK81q2xrO1aMQnOELPqP
The next step is to set the
, which is the SHA-256 hash of our desired password. First, execute the following command:
$ sudo sed -i -e "s/root_password_sha2 =.*/root_password_sha2 = $(echo -n '<strong>your_<span class="highlight">password</span></strong>' | shasum -a 256 | cut -d' ' -f1)/" /etc/graylog/server/server.conf
To be able to connect to Graylog, we must also configure the
and
values to hostname or the public IP address of the machine we can connect to. Web interface URI and REST API must be accessible by everyone using the web interface and this means that Graylog must listen on a public network interface.
Open the Graylog configuration file:
$ sudo $EDITOR /etc/graylog/server/server.conf
In this file, search for the
line, which, by default, is:
# REST API listen URI. Must be reachable by other Graylog server nodes if you run a cluster.
# When using Graylog Collectors, this URI will be used to receive heartbeat messages and must be accessible for all collectors.
rest_listen_uri = http://127.0.0.1:9000/api/
Replace the
with the server public IP.
Next, search for the
line:
# Web interface listen URI.
# Configuring a path for the URI here effectively prefixes all URIs in the web interface. This is a replacement
# for the application.context configuration parameter in pre-2.0 versions of the Graylog web interface.
#web_listen_uri = http://127.0.0.1:9000/
Uncomment it, and change the IP, just as you did in the
step.
Save and close the file, then start Graylog:
$ sudo systemctl start graylog-server
Check the Graylog status using the following code:
$ sudo systemctl status graylog-server
graylog-server.service - Graylog server
   Loaded: loaded (/usr/lib/systemd/system/graylog-server.service; enabled; vend
   Active: active (running) ...
Testing Graylog
With a web browser on a client, go to
. The browser will show a login page

Use admin as user name, and the password entered in the configuration step (‘your_password‘).
After logging in, you’ll see a ‘Getting Started’ page:

By going on System > Inputs, we have access to inputs configuration.
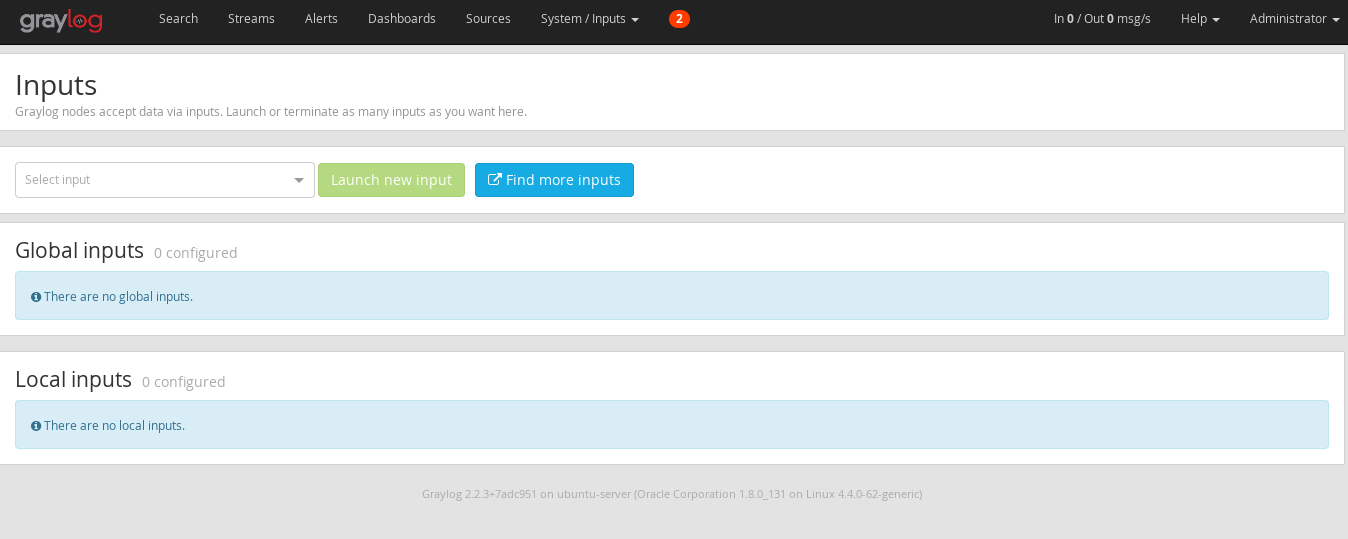
This is where all inputs will be configured, which is the first step of data collecting in Graylog for logs management.
Conclusion
At this point we have a Graylog server correctly up and running on an Ubuntu 16.04 machine. In a future guide we will see how to configure inputs and send data from a server to this powerful logs management system.
We will also see how to configure a multi-node Graylog system, for more advanced logs management.


