Have you ever wanted a utility to manage and publish the files/folders hosted in your remote web servers easily and as well as more effectively, then Mollify is definitely a worth trying tool. Not only for webservers, you can also use it to serve out files from a centralized server to your clients on the network.
Mollify is a Web file manager that will help the web masters to manage and publish files hosted in a webserver. It has simple and intuitive user interface that allows different users can have access to different files, and with different permissions.
Features
From the project website,
– MySQL or SQLite database support.
– Single sign on and LDAP authentication.
– Published folders are fully configurable, underlying file system structure is not revealed.
– Each user and group can have different folders published.
– User self registration with optional e-mail confirmation and user folder creation.
– Customized notifications from different user events.
– File level user access control, editable from client by admin users.
– File and folder details and actions available directly from context popup menu.
– File actions available: download, rename, copy, move and delete.
– Folder actions available: create, copy, move, rename and delete.
– File editing directly in browser.
– Extract archives.
– Collect files from different locations into drop box, and perform actions to them later.
– Search files and folders.
– Support for downloading files and folders in zipped format.
– Support for editable file and folder descriptions.
– Support for file preview and view.
– Support for viewer and previewer plugins, allows extending supported types.
– Support for public links for file downloads and uploads.
– Support for commenting files and folders.
– Event logging.
– Server plugin system for extending features.
– Support for accessing files from native client (ie. from Mac or Windows file manager or iPhone, Android etc smartphone) via WebDAV protocol.
Prerequisites
Hence Mollify is a web based file manager, installation is much easy. Just download the Mollify installation file and copy it to web root folder and access the Mollify installation from your browser. You’re done! If you’re trouble in setting up web server, look at the following link to setup Web server.
– Install LAMP Server On CentOS/RHEL/Scientific Linux 6
Creating Database for Mollify
Now let us create a database for Mollify. For example, here i create database called ‘mollifydb’ and database user called ‘mollifyuser’ with password ‘centos’. To do that, Log in to your mysql server with command:
# mysql -u root -p
Create database, database user with password as mentioned above.
Welcome to the MySQL monitor.  Commands end with ; or \g.
Your MySQL connection id is 2
Server version: 5.5.35 MySQL Community Server (GPL) by Remi

Copyright (c) 2000, 2013, Oracle and/or its affiliates. All rights reserved.

Oracle is a registered trademark of Oracle Corporation and/or its
affiliates. Other names may be trademarks of their respective
owners.

Type 'help;' or '\h' for help. Type '\c' to clear the current input statement.

mysql> create database mollifydb;
Query OK, 1 row affected (0.04 sec)

mysql> GRANT ALL ON mollifydb.* TO mollifyuser@localhost IDENTIFIED by 'centos';
Query OK, 0 rows affected (0.01 sec)

mysql> flush privileges;
Query OK, 0 rows affected (0.00 sec)

mysql> exit
Bye
Getting Mollify
Go to the project download page and get the latest version.
# wget http://mollify.googlecode.com/files/mollify_2.3.1.zip
Unzip Mollify installation package:
# unzip mollify_2.3.1.zip
Move the extracted mollify directory to your web root folder:
# mv mollify/ /var/www/html/mollify
Then create a empty configuration file for Mollify in mollify/backend directory as shown below.
# vi /var/www/html/mollify/backend/configuration.php
Add the following lines. Make sure you’ve replaced the correct database name, database user and password with your own values.
<?php
 $CONFIGURATION = array(
 "db" => array(
 "type" => "mysql",
 "host" => "localhost",
 "database" => "mollifydb",
 "user" => "mollifyuser",
 "password" => "centos",
 "table_prefix" => "mollify_"
 )
 );
 ?>
Save and close the file.
Restart mysql service after creating the configuration file.
# service mysqld restart
Installing Mollify
Navigate to URL http://domain-name/mollify/backend/install or http://ip-address/mollify/backend/install.
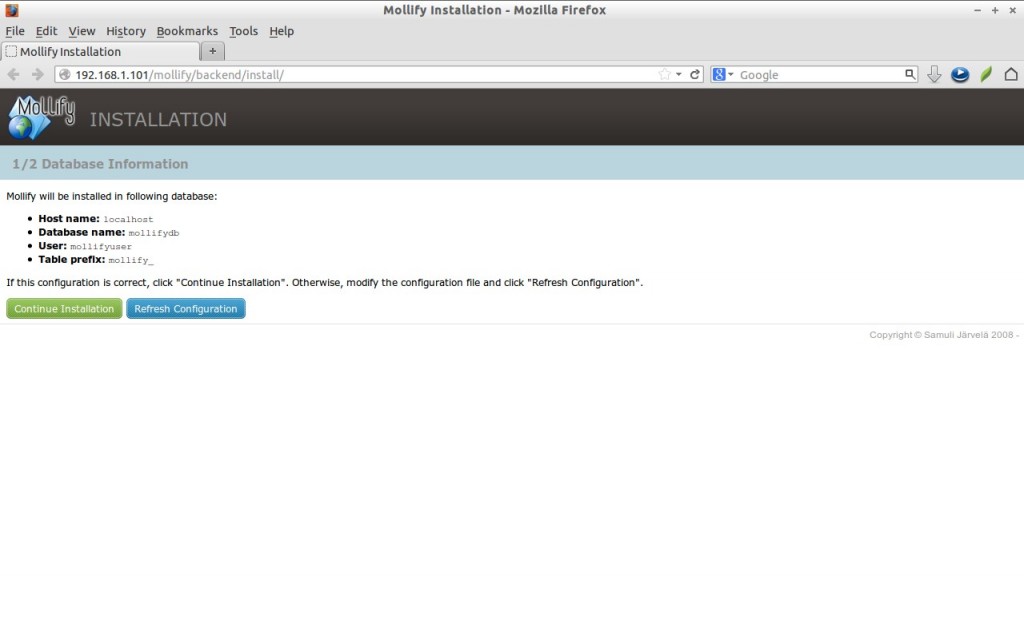
You will see the following screen. The installer will detect automatically the database details which we have created in the previous steps. If all details seems Ok, Click Continue Installation button. Otherwise, modify the configuration file with correct database details and click Refresh Configuration.
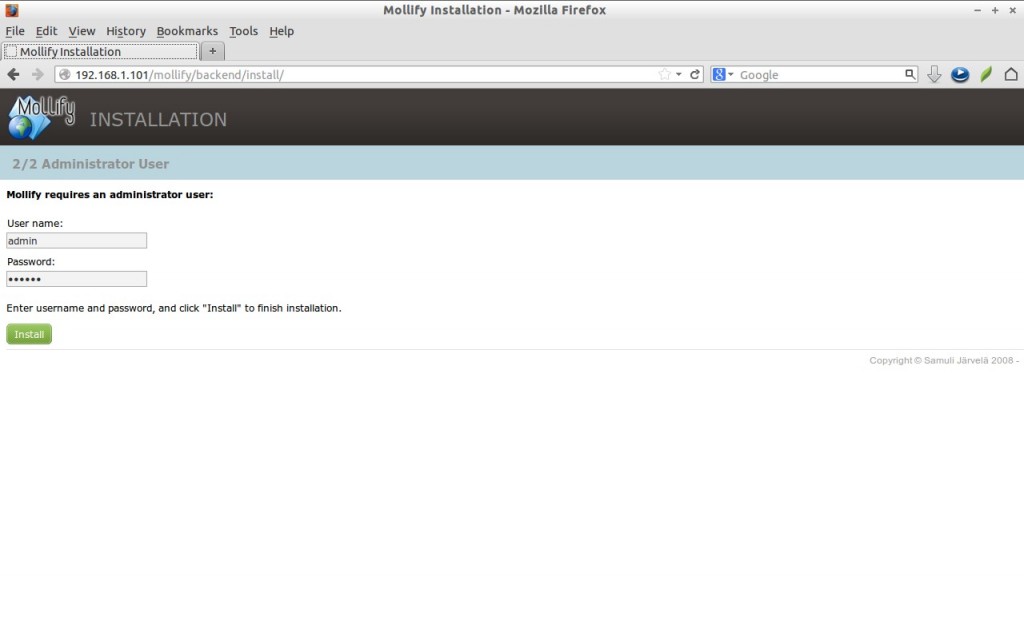
Next you’ll be asked to create the administrative user and its password. In my case, i create a user called admin with password centos.
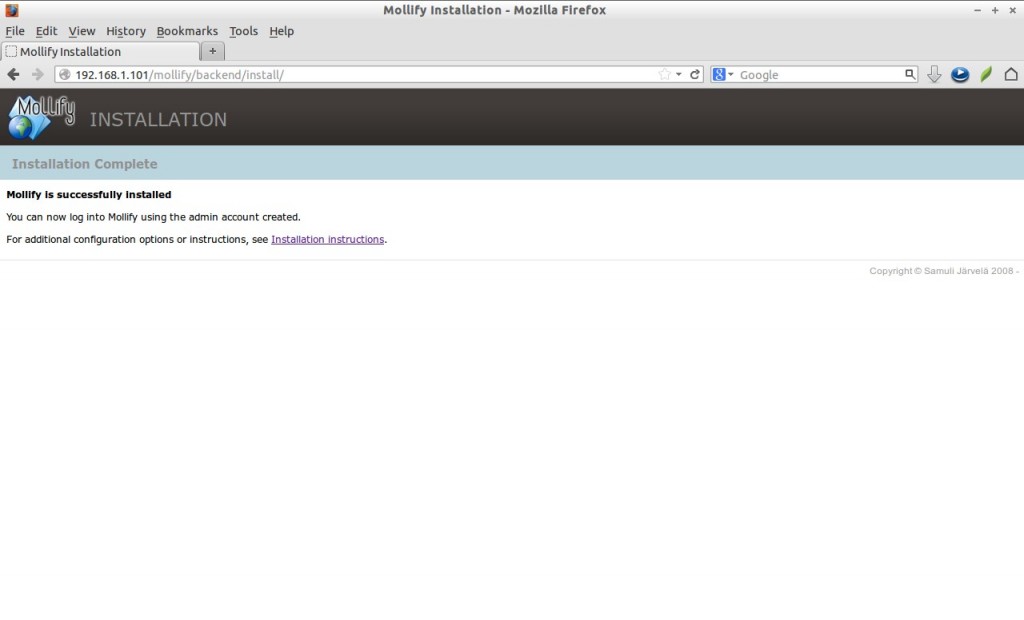
The installation is completed now.
Usage of Mollify
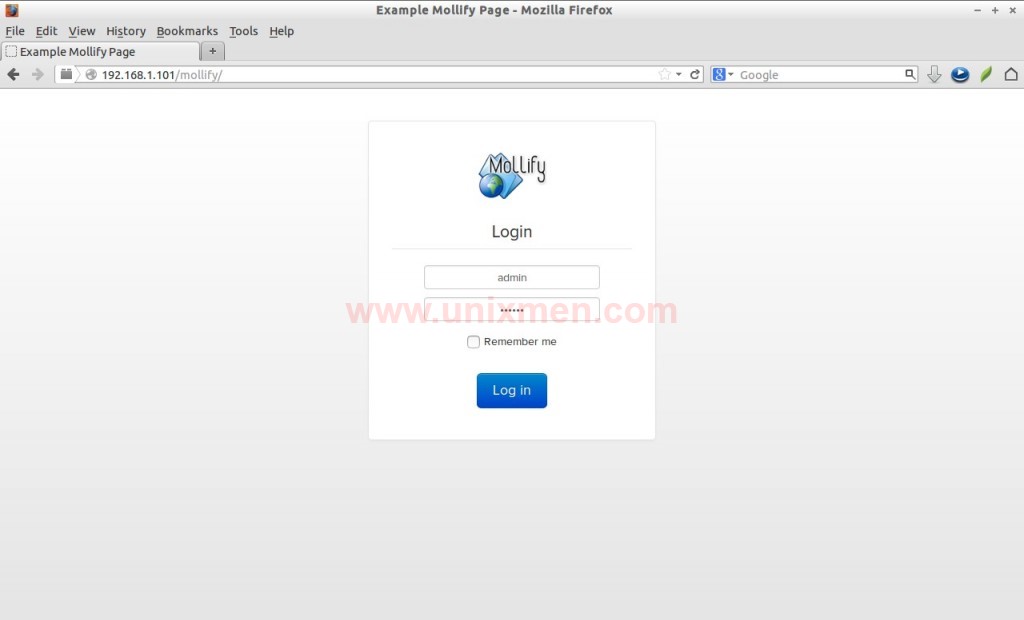
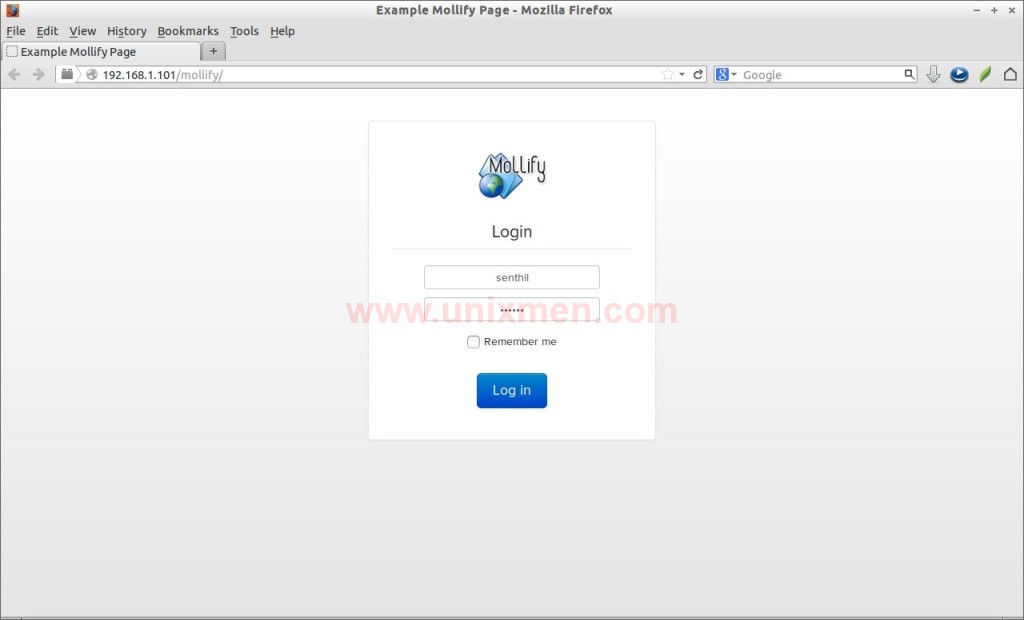
Mollify usage is simple and straight forward. First let us log in to administrative console using URL http://ip-address/mollify. It will ask you to enter the user details. Log in with admin user.
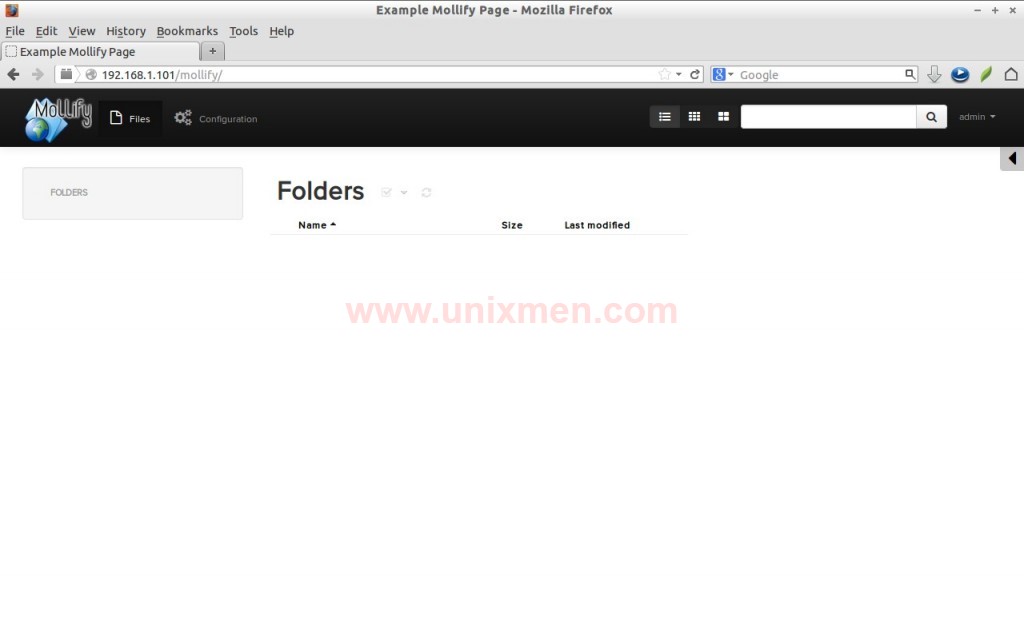
This is how my administrative page looks.
Mollify supports single and multi-user configuration. In single user configuration, the permissions of all files/folders are same for every users. In mult-user configuration users can have different access permissions to different files.
Let us get started further.
Add Published Folders
For example, let us create a folder called unixmen with full permission. Make sure that you’ve given full permission to the published folder. Don’t create the published folder inside your website directory , because users will able to see/access/delete the contents of your website.
# mkdir /var/www/unixmen
# chmod -R 777 /var/www/unixmen
Log in to the Mollify web console with admin user.
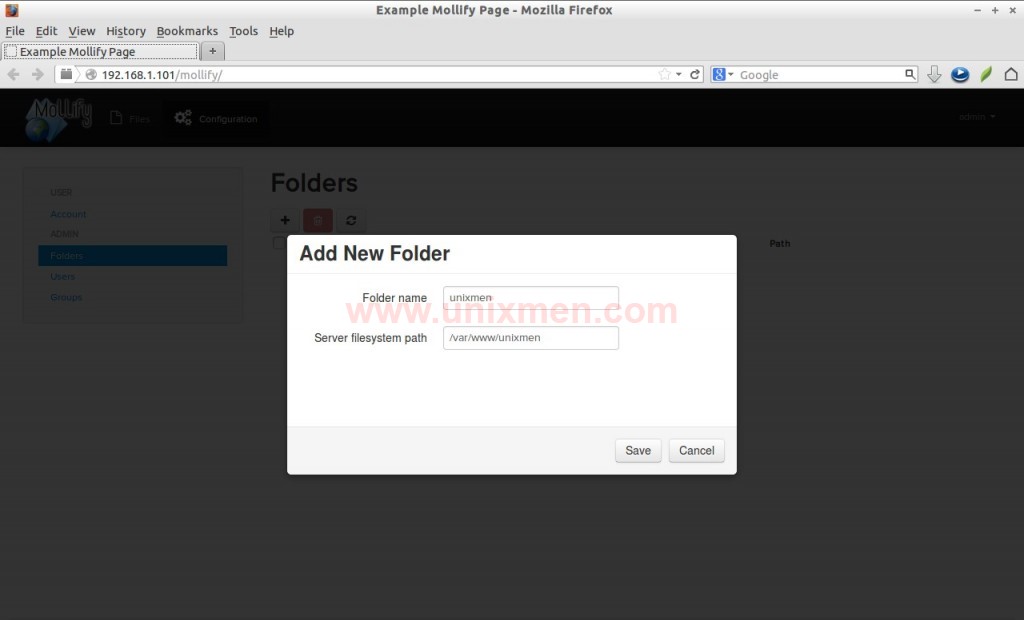
Click on the Configuration tab on the top menu. Navigate to Folders section in the left pane. Now click on the (+) sign on the right side, enter the folder name of your choice and enter the folder exact path that you’ve created earlier.
Now the folder unixmen has been added. You can create as many as folders you want and they can be accessible via web browser by users. Now let us create some users and assign permissions for them over the published folder.
Create Users
Here i am going to create two users named senthil and kumar respectively and then i assign read-write permission for user senthil over published folder and read-only permission for user kumar.
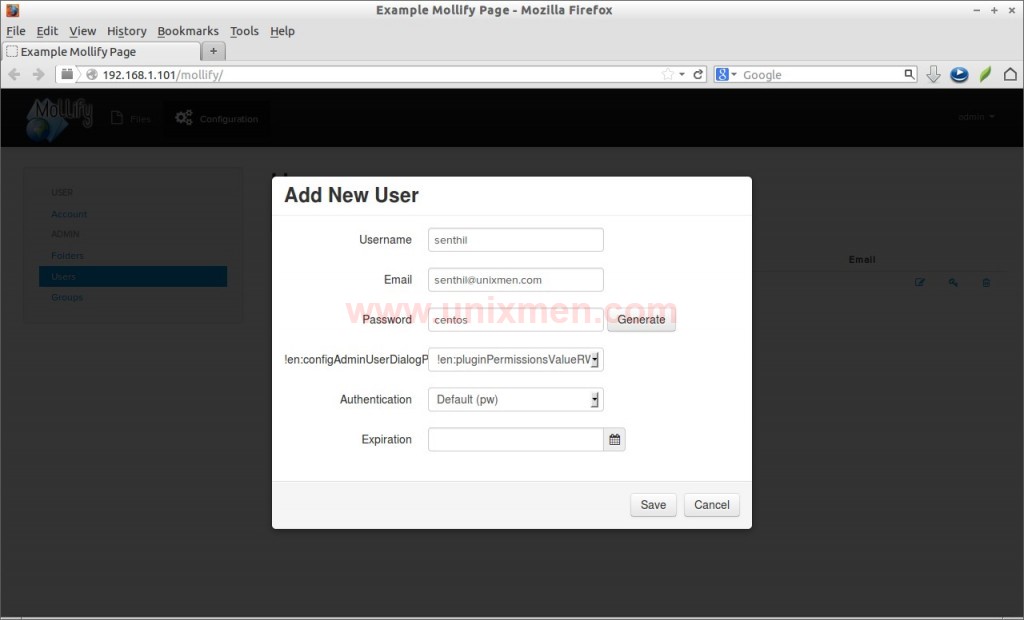
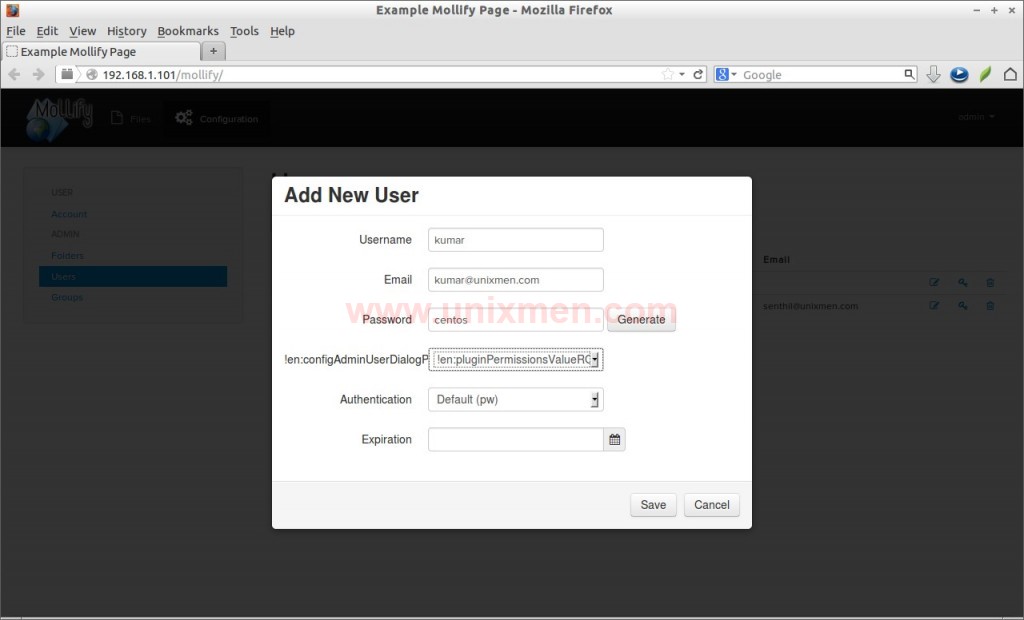
First let us create user called senthil and assign full permission over unixmen folder. To do that, go to Users tab and click the (+) sign on the right side.
Enter the username, mail id, password and select the read-write permission from the permissions drop-down box.
By this way, create another user called kumar with read-only permission. Assign the required permissions from the permissions drop-down box. In my case i selected read-only permission.
Assign Published folders to users
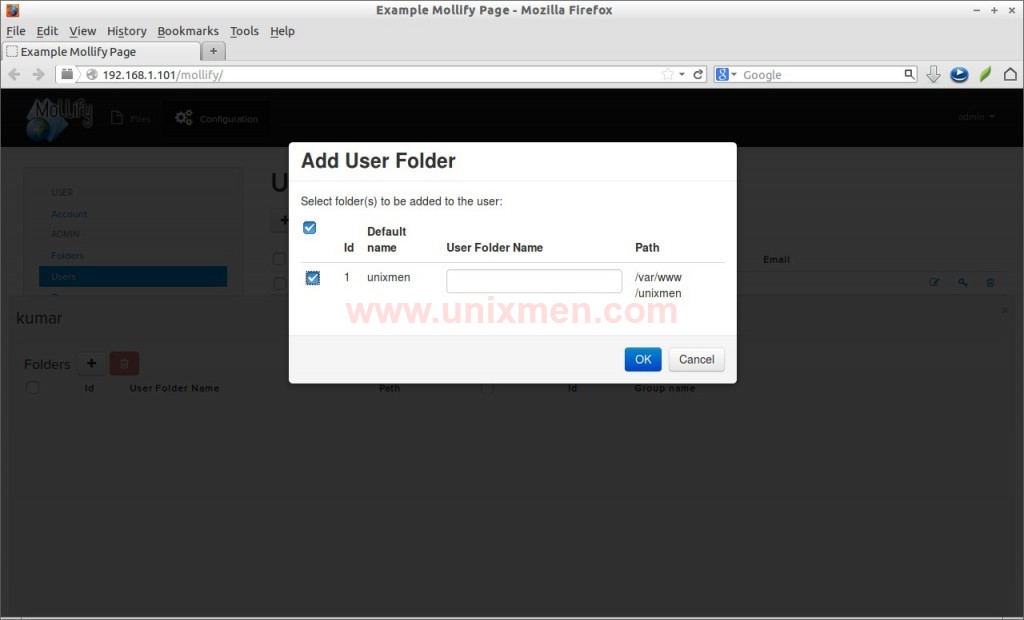
After creating users, you have to assign the published folders to the users. To do that, click on the respective user. A new window will come over from the bottom. Click on the (+) sign and select the published folder(unixmen).
Like this way, you can assign as many users as you have in your server to the published folders.
Adding Groups
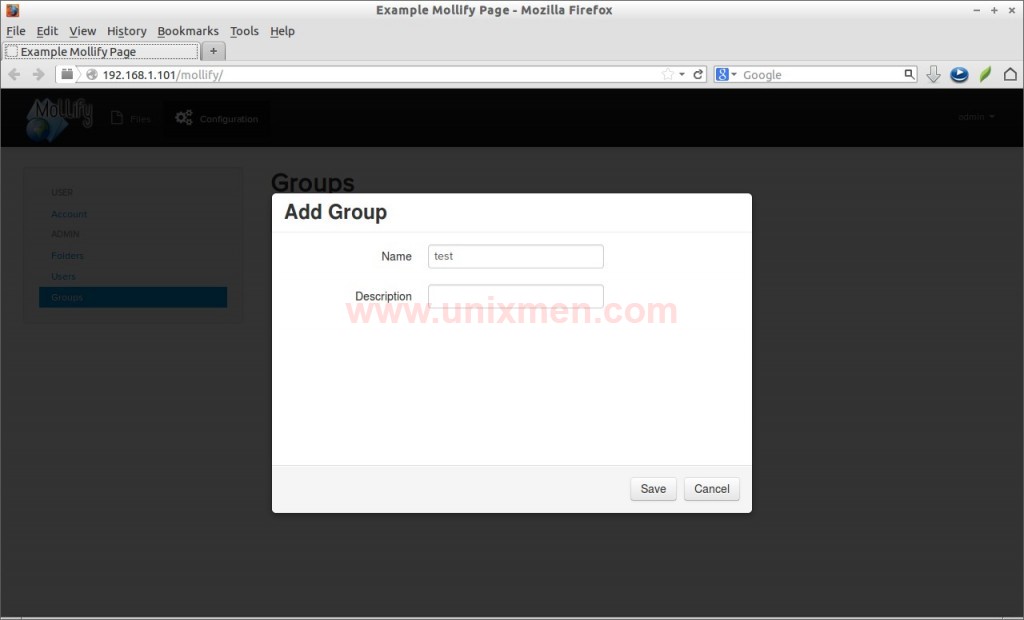
Go to Groups tabs in the administrative console, click on the (+) sign on the right side. Enter the group name and click Save.
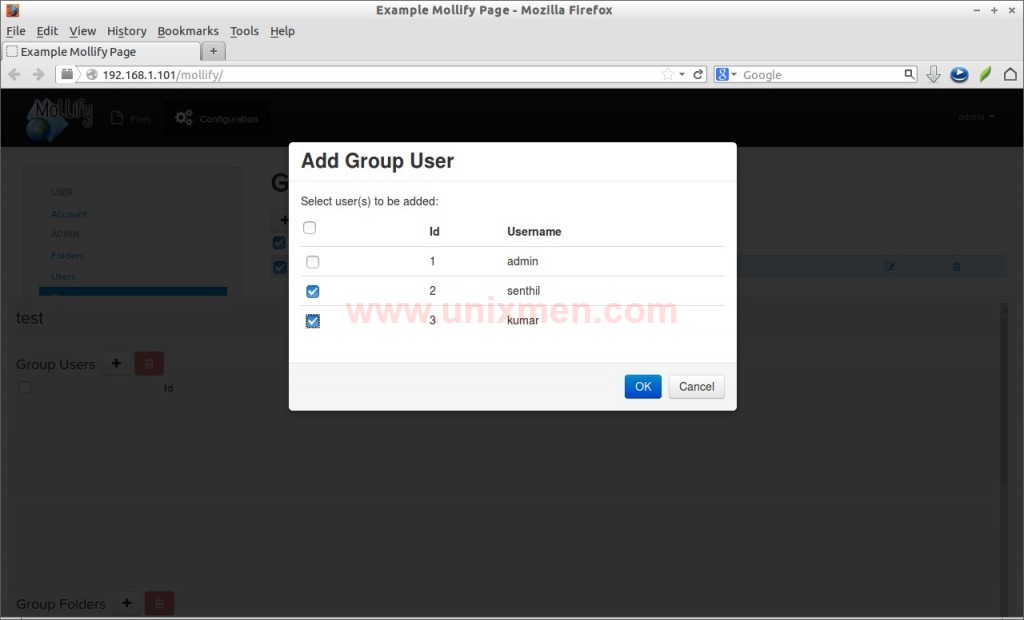
To assign users to the group, click on the respective group, click on the (+) sign and select the users you want to assign to the group.
We created all users, groups and published folders now. What’s next? Guess what? Yes, you’re right! Exit from the admin user and log in to Mollify console with newly created user.
For example, i am going to log in with user senthil.
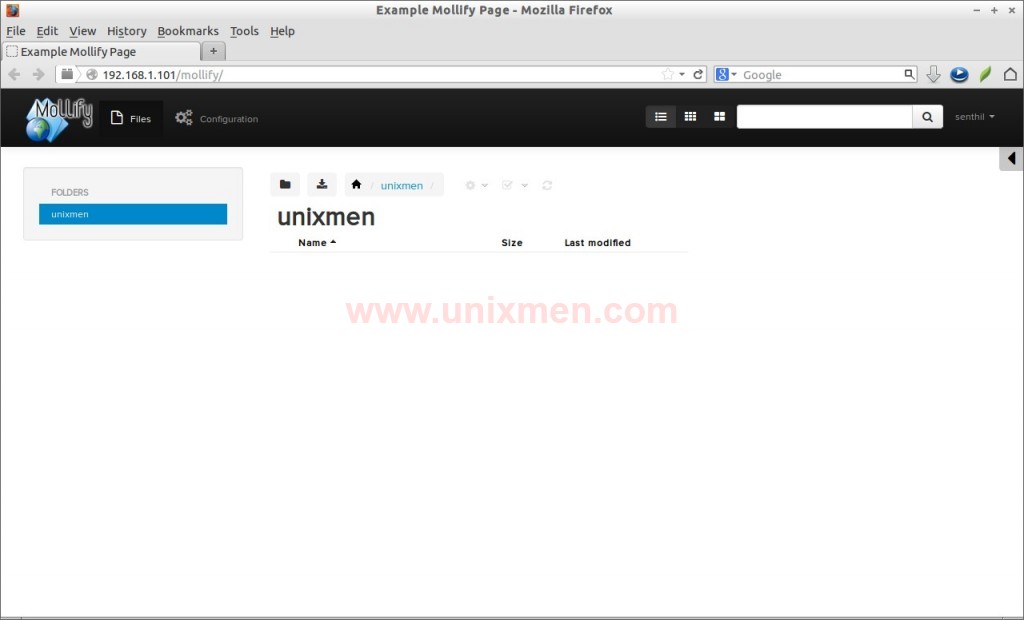
The user will now be able to access the published folder(i.e unixmen).
As i mentioned before, the user senthil has full permission, so that he can able to create, delete, rename folders and also upload files into the folders as well.
Create folders and files
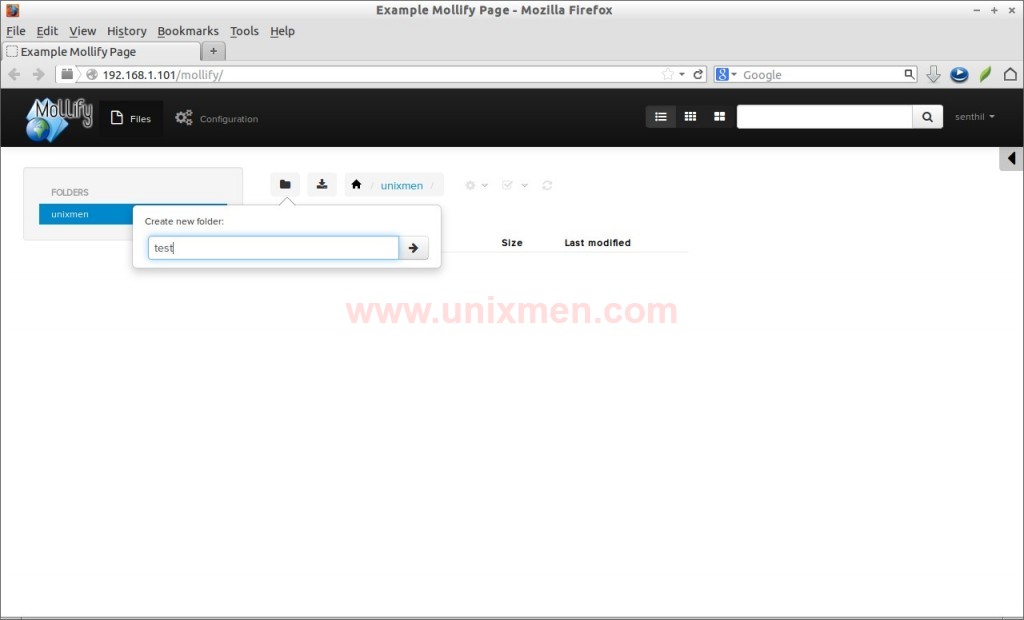
To create a new folder, click on the folder icon on the top and enter the name of your choice and click on the right arrow.
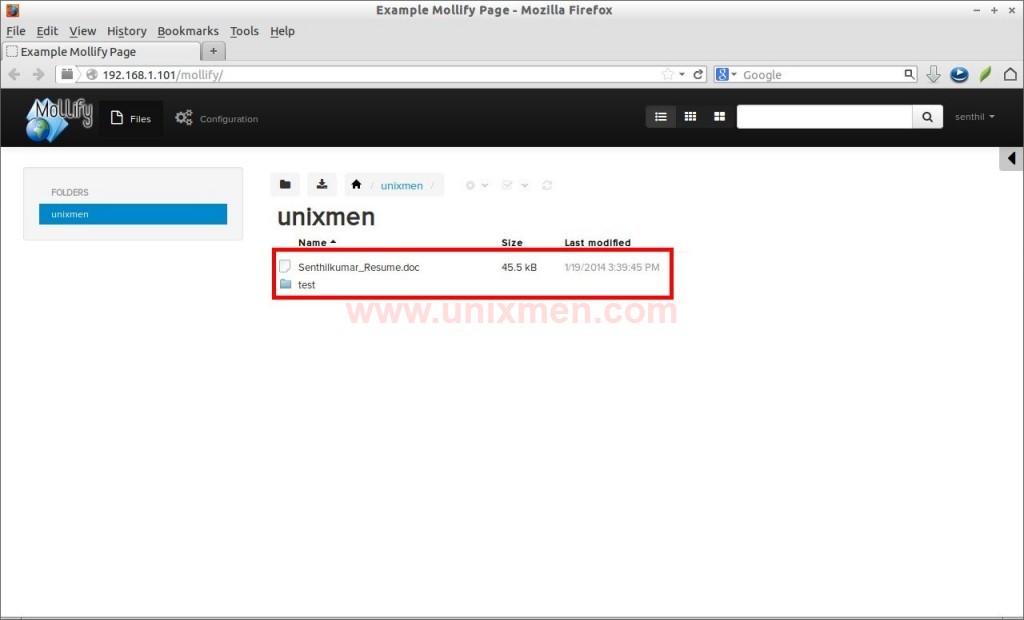
The same method goes for upload files. Click on the down arrow button next to the the folder icon on the top. Select the files you want to upload and you’re done.
As you see in the above picture, i created a folder called test and uploaded a document file into unixmen folder.
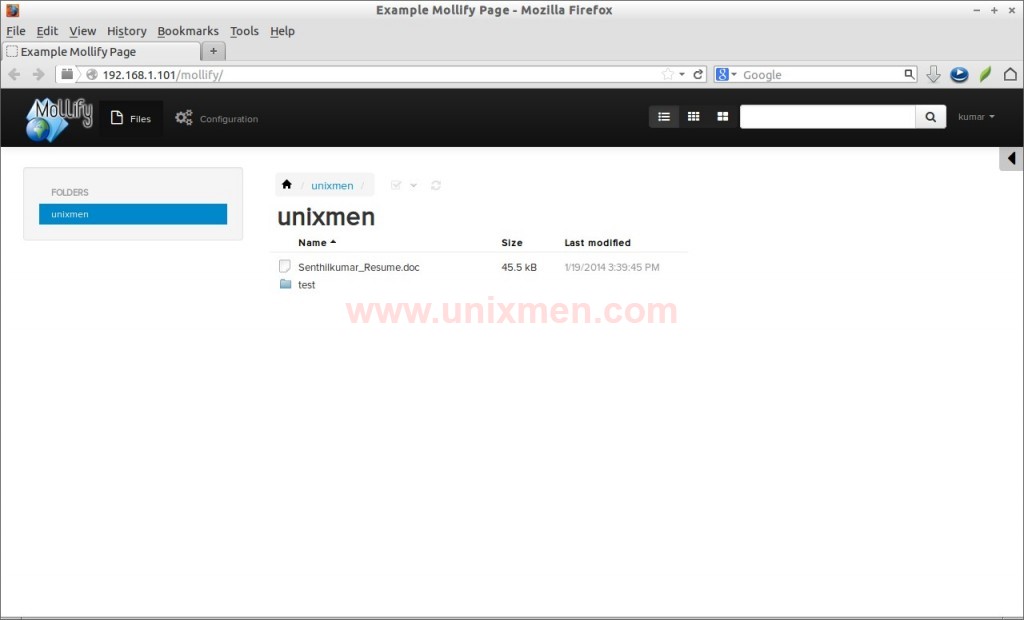
So what if you log in with the user kumar who has just read-only permission? That’s simple, he won’t able to do anything except viewing and downloading the files. The options for creating, uploading folders/files will be disabled for the user kumar. The below screenshot shows the user kumar dashboard.
Working with files/folders
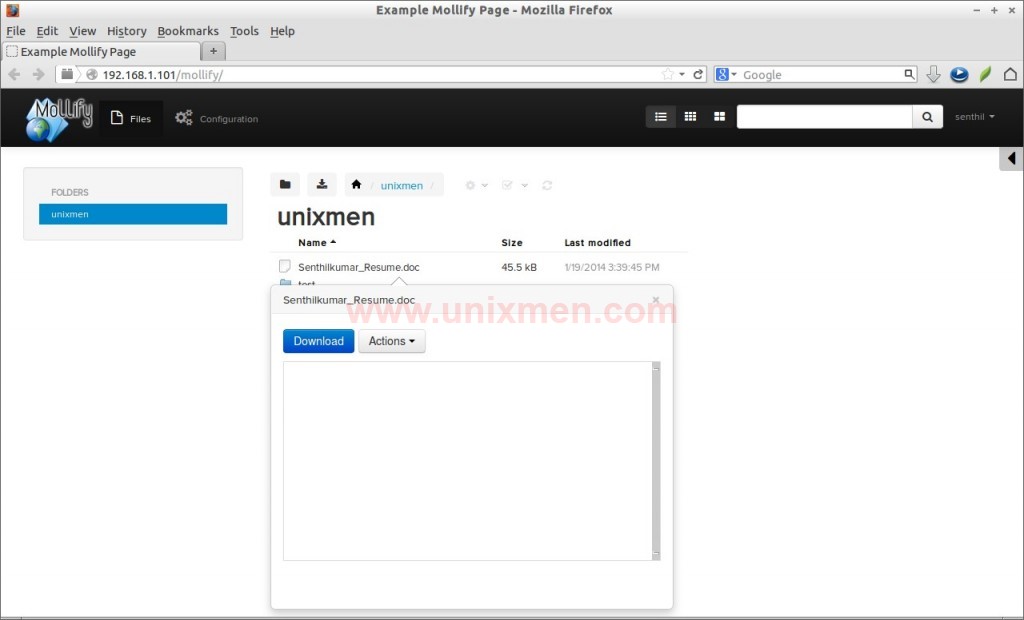
You want to download a file, what will you do? Just click on the file you want to download. A new drop-down window will open. Click Download button and you’re done.
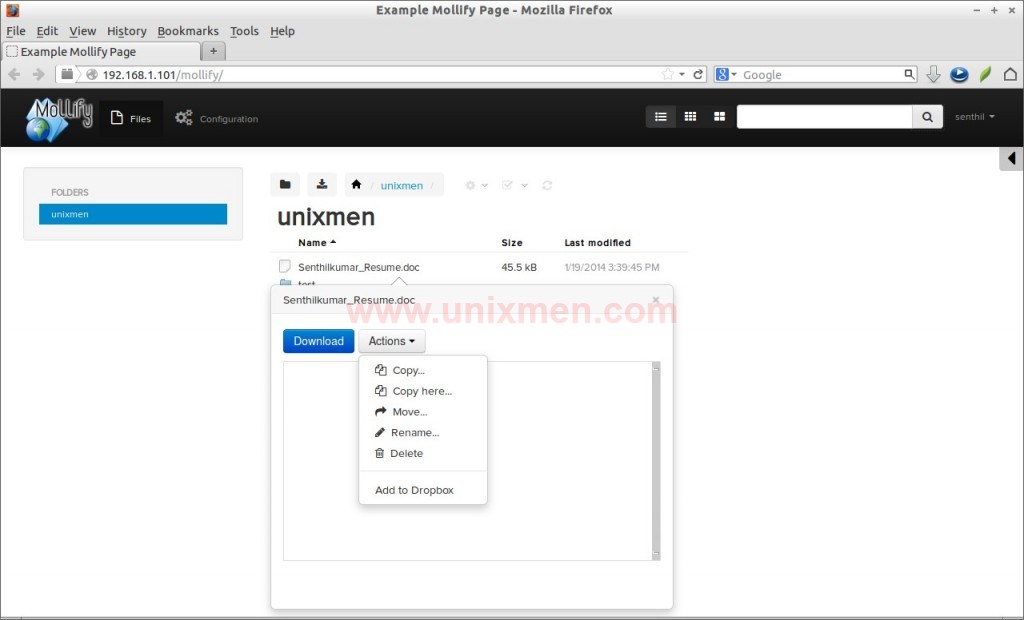
Like this way, you can copy, move, rename and delete the folders and files using the Actions button next to the Download button.
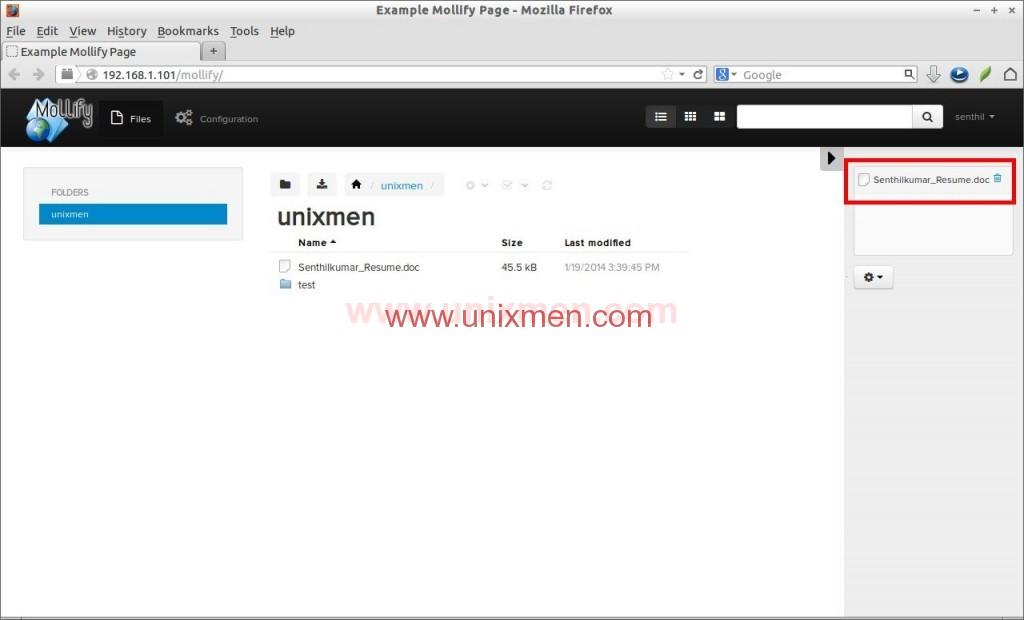
You may notice a option Add to Dropbox in the Actions drop-down menu. What is it exactly? It doesn’t has any connection with popular Cloud service Dropbox. Instead it simplifies the work of downloading files one after another. That is you can move the files that you want to download to Dropbox and later you can download them all at once. Dropbox feature is somewhat similar to shopping cart. Just add all the files to dropbox and download them all in one go.
To download the files in the dropbox, click on the files and select Download. Much simple, isn’t it? Yeah it is.
That’s it for now. We came to the end of this guide. So either you want to manage and publish files in your webserver or to setup a centralized self-hosted web file server, then Mollify is the right solution for you. Give it a try, you’ll agree with me.
Good luck!
Reference Links:


