phpMyBackup Pro is a very easy to use, free, web-based MySQL backup application, licensed under the GNU GPL. It is used to create scheduled backups, manage and restore them, download or email them and a lot more.
We can take backup MySQL databases from the command line itself, but suppose if you don’t have direct access to the server, then this tool help you to backup/restore MySQL databases via web browser.
Major Features
– backup of one or more databases with or without data, table structure.
– three types of compression such as no compression, gzip or zip.
– scheduled backups using a small php script.
– interface for management of the backups (viewing, restoring, downloading, deleting).
– backup directly onto FTP server and sending of backups by email.
– platform independent – only webserver and PHP needed to run.
– shell mode (to use manually or by cron script).
– backup of whole file directories (on a FTP server)..
– backup databases from different accounts on several MySQL servers.
– one installation can be used for all MySQL users of one MySQL server.
– highest security through two alternative login methods (HTTP or HTML) .
– easy to use interface and very easy to install.
– several language packages available.
– online help (included in pMBP) and FAQ on this website.
Install phpMyBackupPro
This how-to was tested on CentOS 6.4 and Debian 7. I am not sure about other distributions.
In order to install phpMyBackupPro, your server should have installed and configured properly with Apache and PHP.
If you haven’t installed the above packages, install it with command:
On RHEL/CentOS based systems:
# yum install httpd php php-mysql -y
On Debian/Ubuntu based systems:
# apt-get install php5 libapache2-mod-auth-mysql php5-mysql
Getting And Installing phpMyBackupPro
Now download the latest version phpMyBackupPro from here. Alternatively you can download it from terminal using the following command:
# wget http://sourceforge.net/projects/phpmybackup/files/phpMyBackupPro/phpmyBackupPro%202.4/phpMyBackupPro-2.4.zip
Extract the zip file using command:
# unzip phpMyBackupPro-2.4.zip
The files will be extracted in a folder called “phpMyBackupPro” in your current directory. Change to the directory using command:
# cd phpMyBackupPro-2.4
Move the phpMyBackupPro folder to /usr/share/ directory.
# mv phpMyBackupPro/ /usr/share/phpmybackup
Now create a file called “phpmybackup.conf” under “/etc/httpd/conf/” directory in RHEL based systems. If you are using debian based systems, then create the file under “/etc/apache2/conf.d/” directory.
On RHEL/CentOS:
# vi /etc/httpd/conf/phpmybackup.conf
On Debian/Ubuntu:
# vi /etc/apache2/conf.d/phpmybackup.conf
Append the following lines in it.
<IfModule mod_alias.c>
Alias /mysqlbackup /usr/share/phpmybackup
</IfModule>
<Directory /usr/share/phpmybackup>
Options None
Order allow,deny
allow from all
</Directory>
Save and exit the file.
Restart Apache service using the following command:
On RHEL/CentOS:
# service httpd restart
On Debian/Ubuntu:
# /etc/init.d/apache2 restart
We need to setup write permissions for the following files and folder.
# cd /usr/share/
On RHEL/CentOS systems:
# chown -R root:apache phpmybackup
On Debian/Ubuntu systems:
# chown -R root:www-data phpmybackup
# chmod g+w /usr/share/phpmybackup/global_conf.php
# chmod -R g+w /usr/share/phpmybackup/export/
In RHEL/CentOS based systems, edit /etc/httpd/conf/httpd.conf file,
# vi /etc/httpd/conf/httpd.conf
In Debian/Ubuntu based systems, edit /etc/apache2/apache2.conf file,
# vi /etc/apache2/apache2.conf
Add the following line at the end.
Include /etc/httpd/conf/phpmybackup.conf
Now you will be able to access phpMyBackupPro from your browser with URL http://ip-address/mysqlbackup or http://domain-name/mysqlbackup.
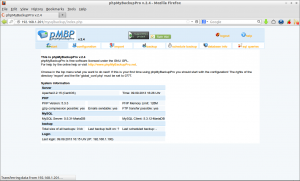
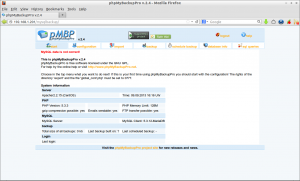
The following screen should appear.
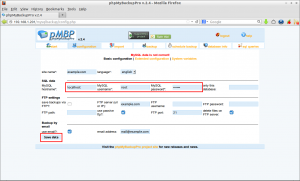
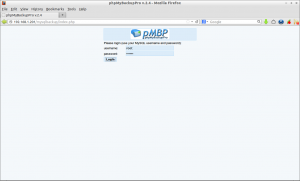
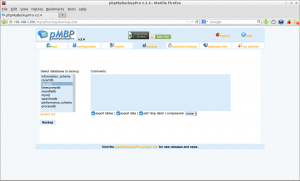
Click on the Backup tab. Select the database you want to backup and Click Backup. The selected databases will be backed up and sent to the mail that you have configured earlier.
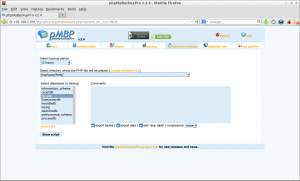
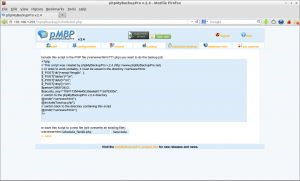
Click on the Schedule backup tab. Select the backup period(ex.12 hours), select the directory where the php file will be placed, select the database to backup, select the compression method etc. Click on Show script button.
Restore Database
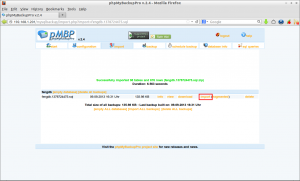
Click on the import tab. This will display all the database backup’s that you’ve taken before. Click on the import link of the desired database that you want to import.
