
Today you will have a great tool that we help you to backup your network configuration.
rConfig is a free open source network device configuration management utility for network engineers to take frequent configuration snapshots and backup of their network devices.
This tool is the first tool that can make those kind of operations, because you choose what commands you want to run against your devices. Simply configure this tool with the list of commands you wish to apply to a category of devices, and add devices to the category. Create a scheduled task, and rConfig will do the rest. The current Version 3 now has a Configuration Compliance Management utility to enable you to monitor device configurations for policy compliance.
rConfig is completely open source, meaning, you can customize it, add features as you please and is written in native PHP. You will not have to install any extra modules to PHP for this tool to work.
Features
RConfig has many features like :
- Free & open source ;
- Customizable device commands ;
- Configuration Compliance Management ;
- Bulk configuration deployment ;
- One-Click download of configurations ;
- Native PHP implementation ;
- Extremely fast configuration output compare and search features ;
- Built-in scheduler based on CRON ;
- Built-in reporting ;
- System backup feature ;
- Telnet and SSHv2 support.
Requirements
Before start installing rConfig you need to have those requirements:
Minimum Hardware requirements
- Stand alone / dedicated server (physical or virtual) ;
- 100 GB Hard Disk Space free ;
- 1 GB Ram ;
- Intel x86_64 CPU.
Minimum Software requirements
- CentOS 6.3 Minimal (with rConfig build) ;
- PHP 5.3.3 ;
- Apache 2.2.15 ;
- MySQL 5.1.61 ;
- CRON.
Let’s start.
rConfig Server configuration
rConfig depends heavily on interaction with CentOS built-in tools and utilities to complete certain tasks and features. An example is search. it uses the Linux find and grep utilities installed with CentOS to carry out very fast and efficient searches across downloaded configuration files. and also reads from and writes to the filesystem.
First steps to do is to install LAMP server under your centos server.
yum install httpd php mysql mysql-server
For more details you can check our article Install LAMP Server (Apache, MySQL, PHP) On RHEL, CentOS, Scientific Linux 6.5/6.4
Some CentOS configuration files need to be edited before rConfig can be installed.
Update the sudoers file, using visudo.
visudo
CTRL+D to scroll to end of file and add the following lines to the sudoers file:
apache  ALL = (ALL) NOPASSWD: /usr/bin/crontab, /usr/bin/zip, /bin/chmod, /bin/chown, /usr/bin/whoami
Defaults:apache !requiretty
rConfig should be installed as a dedicated standalone server. Whether a physical server or virtual, your server should be dedicated for rConfig use only. This is currently the only supported method for rConfig installations. If rConfig is shared with any other application i.e. internal websites etc… the updated Apache settings and other Operating Systems settings may interfere with rConfig operations.
rConfig installation
At this point you are ready to upload rConfig to the server for installation. You need to download the rConfig package and upload it to the server.You can download rConfig from this the official website http://www.rconfig.com/.
So after download the rConfig, upload it to /home directory on your CentOS Server.
Then, navigate to /home and extract the rConfig ZIP file per the following command.
cd /home
unzip rconfig-*
Now you need to give permissions to Apache server
chown -R apache /home/rconfig
Now you need to update the httpd.conf file from its default to the preconfigured httpd.conf file packaged with rConfig.
mv /etc/httpd/conf/httpd.conf /etc/httpd/conf/httpd.conf.original
cp /home/rconfig/www/install/httpd.conf.new /etc/httpd/conf/httpd.conf
service httpd restart
Now you finished the console configuration and you need to go to your browser and open this page http://ipaddress-Hostname/install/ to complete the installation.
rConfig web installation
After you open the rConfig page under your browser you will see this first screenshot.
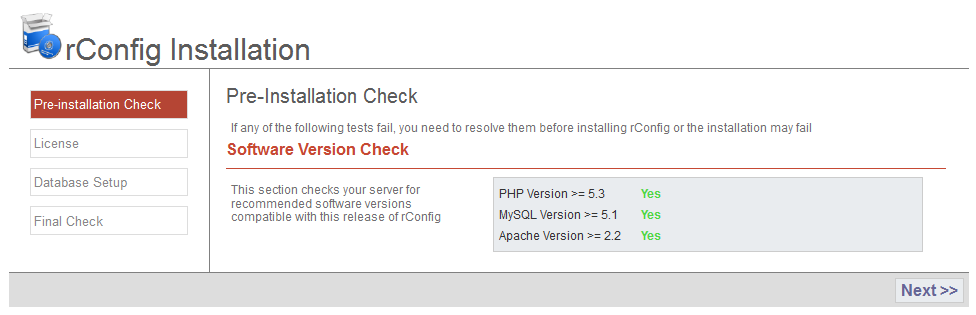
This screen lets you know if you have the correct and up to date software versions installed. You should correct any errors before you proceed.
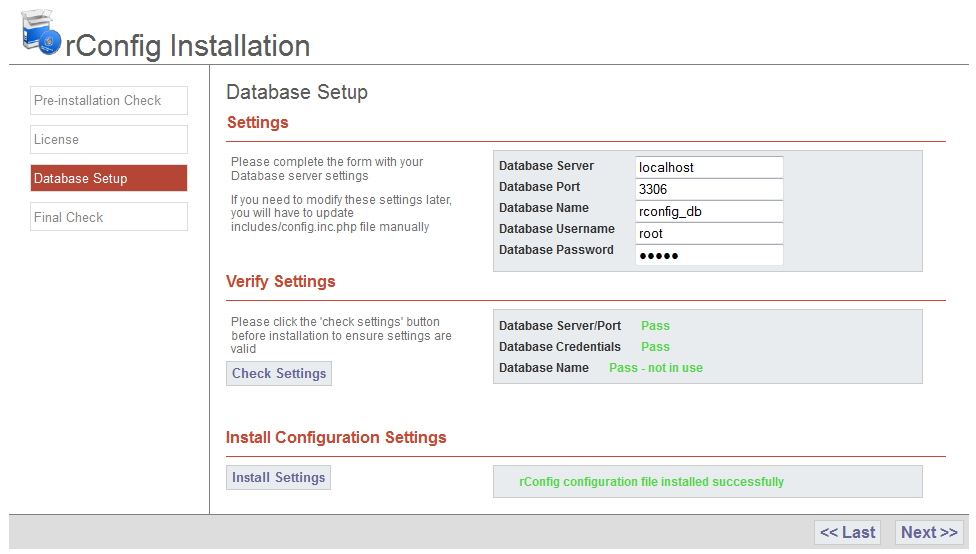
The next screen is where you enter your database settings for rConfig. It is advised that you create a non-root database account for the rConfig database. If the database is installed on the same server as rConfig, then you may enter localhost as the ‘Database Server’. Click ‘Check Settings’ to validate the settings you’ve entered, and click ‘Install’ to create and install the rConfig database.
The final screen allows you to confirm that all rConfig paramaters are installed correctly before you run rConfig for the first time. Just click on the ‘Final Check’ button. If there are any failures or errors, you must correct these before you can use rConfig. For more security you need to remove or rename the install directory.
Command to remove the install directory is:
rm -fr /home/rconfig/www/install/
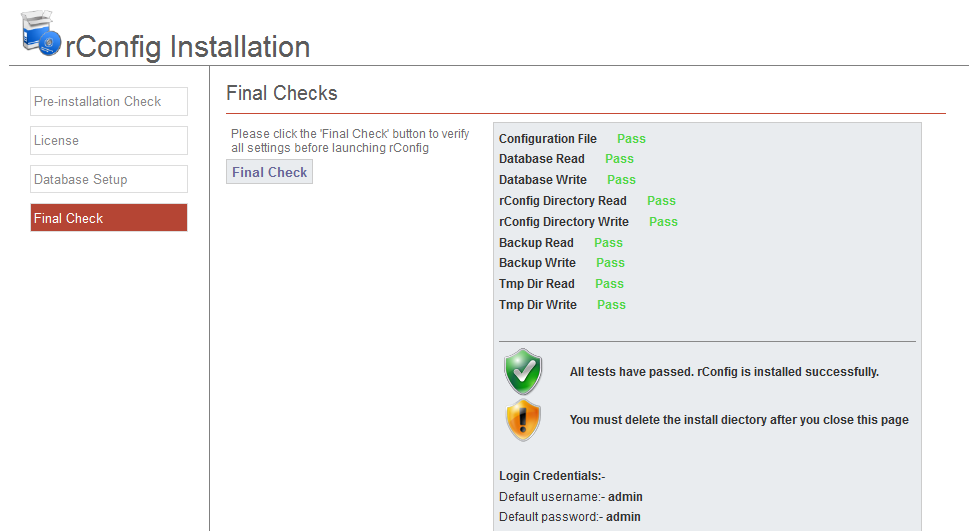
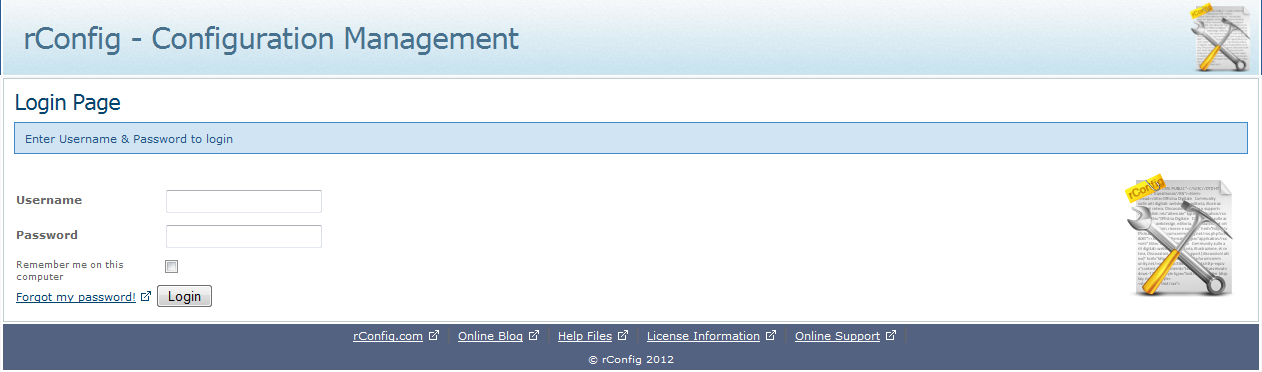
Now you can log into rConfig web application with admin : admin for username and password.
Enjoy your rConfig tool and thank you 🙂


