CS-Cart is an open source e-commerce shopping cart solution that can be used to setup your free online shopping store such as eBay, Snapdeal and Flipkart etc. CS-Cart is the best shopping cart solution for building an ecommerce website from a small web store to a virtual shopping mall. A ready storefront, support for many payment and shipping options, full inventory control, unlimited products, promotional tools, and other features out of the box.
CS-Cart comes with three editions: Ultimate(Free), Ultimate (Paid), Multi-vendor(Paid). Please visit this page to view the comparison of these three editions. In this tutorial let us build a free online e-store using CS-Cart software.
We already have shown you how to setup online store using Prestashop in our previous tutorial. In this how-to let us build a online store using using CS-Cart. This how-to was tested on CentOS 6.4, although it will work on other RPM based distro’s. My test box hostname and IP address are server.unixmen.com and 192.168.1.200/24. Replace the values with your own where it appropriate.
Prerequisites
First you have to install and configure LAMP server. Visit any one of the following links to setup LAMP server.
– Install LAMP (Apache, MariaDB, PHP) Server On CentOS 6.4.
– Install LAMP (Apache, MySQL, PHP) Server On CentOS 6.4.
Now install the following prerequisites too.
# yum install php-mcrypt php-pdo php-cli php-mysql php-gd php-xml libtool-ltdl mhash mcrypt -y
Create Database and User for CS-Cart
For instance, here i am going to create a database called “cscartdb” and database user called “cscartuser” for CS-Cart.
# mysql -u root -p
Enter password:
Welcome to the MariaDB monitor.  Commands end with ; or \g.
Your MariaDB connection id is 3
Server version: 5.5.31-MariaDB MariaDB Server

Copyright (c) 2000, 2013, Oracle, Monty Program Ab and others.

Type 'help;' or '\h' for help. Type '\c' to clear the current input statement.

MariaDB [(none)]> create database cscartdb;
Query OK, 1 row affected (0.02 sec)

MariaDB [(none)]> GRANT ALL ON cscartdb.* TO cscartuser@localhost IDENTIFIED BY 'centos';
Query OK, 0 rows affected (0.01 sec)

MariaDB [(none)]> flush privileges;
Query OK, 0 rows affected (0.00 sec)

MariaDB [(none)]> exit
Bye
Firewall and SELinux Settings
Allow the apache default port “80” through iptables/Router. Edit file /etc/sysconfig/iptables,
# vi /etc/sysconfig/iptables
Add the following lines.
-A INPUT -p udp -m state --state NEW --dport 80 -j ACCEPT
-A INPUT -p tcp -m state --state NEW --dport 80 -j ACCEPT
Now restart the iptables service.
# /etc/init.d/iptables restart
I don’t want to mess up with SELinux, so here i disabled it.
Edit file /etc/selinux/config,
# vi /etc/selinux/config
Set the SELINUX value as “disabled”.
SELINUX=disabled
Restart the system to take effect the saved changes.
Getting CS-Cart Software
Download the latest version from here. I downloaded it my current directory.
Note: Here you can host your e-store in two methods.
1. Directly from the web root folder, so that you can access your website by navigating to http://domain-name/.
2. Alternatively create a sub directory in web root folder and host website from the sub-directory i.e you can access your website using URL http://domain-name/sub-directory-name.
Here, for testing purpose, i create a sub-directory directory called “cscart” under apache root folder and copy the cs-cart zip file to the cscart folder.
# mkdir /var/www/html/cscart
# cp cscart_v4.0.1-ultimate.tgz /var/www/html/cscart/
Now go to the cscart directory and extract the cs-cart zip file.
# cd /var/www/html/cscart/
# tar -zxvf cscart_v4.0.1-ultimate.tgz
Adjust the following files/folders permissions as shown below.
Run the following commands one by one in your terminal.
# chmod 666 config.local.php
# chmod -R 777 design/ images/ var/
# find design -type f -print0 | xargs -0 chmod 666
# find images -type f -print0 | xargs -0 chmod 666
# find var -type f -print0 | xargs -0 chmod 666
Begin CS-Cart Installation
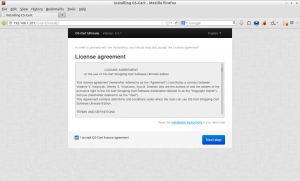
Now navigate to “http://domain-name/cscart/install” or “http://ip-address/cscart/install” from your web browser. The following screen should appear.
Accept the license agreement and click Next.
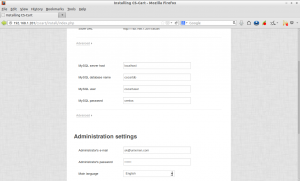
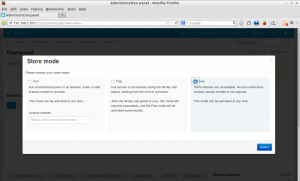
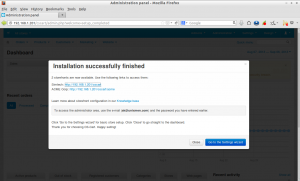
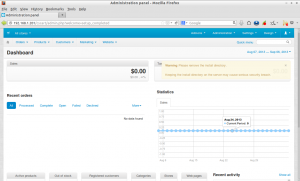
– View orders, sales reports, shipment details etc.
– create new products, categories etc.
– Administer and create users and groups etc.
– Add contents to your website etc.
Also you can import/export the data’s and upgrade it to Paid version.
Access Your Store
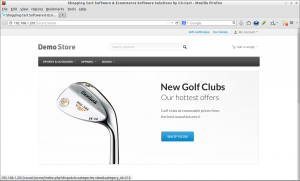
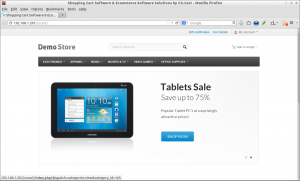
You can access your online store by navigating to “http://domain-name/cscart” or “http://ip-address/cscart”. The default site is look like below.
After CS-Cart installation, remove the install/ directory.
# rm -fr install/
Change the following folders/files permissions to secure your e-store as shown below.
# chmod 644 config.local.php
# chmod 644 design/ .htaccess images/.htaccess
# chmod 664 var/.htaccess var/themes_repository/.htaccess
# chmod 644 design/index.php images/index.php
# chmod 664 var/index.php var/themes_repository/index.php
Thats’t. Happy selling with your new e-store.


