The openSUSE 13.2 stable version is out few days ago. For more details, read the openSUSE 13.2 release announcement and new features of 13.2 here.
This tutorial is intended to those who are looking for how to upgrade to openSUSE 13.2 from 13.1 and older versions. Use this guide at your own risk. Neither I, nor Unixmen team, is not responsible for any kind of data loss or damage. Don’t attempt to upgrade directly from openSUSE 12.3 to 13.2. First, upgrade to 13.1, and then to 13.2.
To upgrade openSUSE 12.3 to 13.1, refer the following link.
Preliminary notes
We strongly insist you to backup all important data before starting the upgrade process. Be mindful that if your upgrade process stops unfortunately due to power or Internet failure, you will be resulted with a unstable or broken system. So make sure that have an uninterrupted power supply and stable Internet connection. If you consider to upgrade multiple systems, then it would be better to download an ISO image and install them one by one.
Update The System
All set? Well, let us start the upgrade procedure.
To find the current running openSUSE version, enter the following command:
cat /etc/os-release
Sample output:
NAME=openSUSE
VERSION="13.1 (Bottle)"
VERSION_ID="13.1"
PRETTY_NAME="openSUSE 13.1 (Bottle) (x86_64)"
ID=opensuse
ANSI_COLOR="0;32"
CPE_NAME="cpe:/o:opensuse:opensuse:13.1"
BUG_REPORT_URL="https://bugs.opensuse.org"
HOME_URL="https://opensuse.org/"
ID_LIKE="suse"
Well, let us begin to upgrade from openSUSE 13.1 to 13.2. Disable all OBS repositories or any third party repositories first, perform the upgrade, then re-enable them.
First let us check whether the update repository exists and enabled. To do that enter the following command in Terminal:
zypper repos --uri
Sample Output:
# | Alias                     | Name                               | Enabled | Refresh | URI
--+---------------------------+------------------------------------+---------+---------+---------------------------------------------------------------------
1 | openSUSE-13.1-1.10        | openSUSE-13.1-1.10                 | Yes     | No      | cd:///?devices=/dev/disk/by-id/ata-VBOX_CD-ROM_VB2-01700376,/dev/sr0
2 | repo-debug                | openSUSE-13.1-Debug                | No      | Yes     | http://download.opensuse.org/debug/distribution/13.1/repo/oss/
3 | repo-debug-update         | openSUSE-13.1-Update-Debug         | No      | Yes     | http://download.opensuse.org/debug/update/13.1/
4 | repo-debug-update-non-oss | openSUSE-13.1-Update-Debug-Non-Oss | No      | Yes     | http://download.opensuse.org/debug/update/13.1-non-oss/
5 | repo-non-oss              | openSUSE-13.1-Non-Oss              | Yes     | Yes     | http://download.opensuse.org/distribution/13.1/repo/non-oss/
6 | repo-oss                  | openSUSE-13.1-Oss                  | Yes     | Yes     | http://download.opensuse.org/distribution/13.1/repo/oss/
7 | repo-source               | openSUSE-13.1-Source               | No      | Yes     | http://download.opensuse.org/source/distribution/13.1/repo/oss/
8 | repo-update               | openSUSE-13.1-Update               | Yes     | Yes     | http://download.opensuse.org/update/13.1/
9 | repo-update-non-oss       | openSUSE-13.1-Update-Non-Oss       | Yes     | Yes     | http://download.opensuse.org/update/13.1-non-oss/
As you see above, the openSUSE-13.1-Update repository is available, and enabled. If it is not enabled, enable it using command:
zypper modifyrepo --enable repo-update
If update repository doesn’t exist, you can add it using the following command:
zypper addrepo --check --refresh --name 'openSUSE-13.1-Update' http://download.opensuse.org/update/13.1/ repo-update
Now update your current version to latest packages using commands:
sudo zypper refresh
sudo zypper update
It will take a while depending upon your Internet connection speed. Please be patient.
After updating the system, reboot it to apply the new changes.
Upgrade
As I mentioned already, disable any third party or OBS repositories before proceed to upgrade.
To list the current available repositories, enter the following command.
zypper lr
Sample output:
# | Alias                     | Name                               | Enabled | Refresh
--+---------------------------+------------------------------------+---------+--------
1 | openSUSE-13.1-1.10        | openSUSE-13.1-1.10                 | Yes     | No
2 | repo-debug                | openSUSE-13.1-Debug                | No      | Yes
3 | repo-debug-update         | openSUSE-13.1-Update-Debug         | No      | Yes
4 | repo-debug-update-non-oss | openSUSE-13.1-Update-Debug-Non-Oss | No      | Yes
5 | repo-non-oss              | openSUSE-13.1-Non-Oss              | Yes     | Yes
6 | repo-oss                  | openSUSE-13.1-Oss                  | Yes     | Yes
7 | repo-source               | openSUSE-13.1-Source               | No      | Yes
8 | repo-update               | openSUSE-13.1-Update               | Yes     | Yes
9 | repo-update-non-oss       | openSUSE-13.1-Update-Non-Oss       | Yes     | Yes
If you have any third party repository, then remove it using command:
zypper rr <alias>
You might want to backup your current repositories. To do that enter the following command to backup all your current repositories.
cp -Rv /etc/zypp/repos.d /etc/zypp/repos.d.bak
Then change all repositories to new version. Here i am going to upgrade openSUSE 13.1 to 13.2, so the command will be:
sudo sed -i 's/13\.1/13\.2/g' /etc/zypp/repos.d/*
Now check if all repositories changed to new version.
zypper lr
Sample output:
# | Alias                     | Name                               | Enabled | Refresh
--+---------------------------+------------------------------------+---------+--------
1 | openSUSE-13.2-1.10        | openSUSE-13.2-1.10                 | Yes     | No
2 | repo-debug                | openSUSE-13.2-Debug                | No      | Yes
3 | repo-debug-update         | openSUSE-13.2-Update-Debug         | No      | Yes
4 | repo-debug-update-non-oss | openSUSE-13.2-Update-Debug-Non-Oss | No      | Yes
5 | repo-non-oss              | openSUSE-13.2-Non-Oss              | Yes     | Yes
6 | repo-oss                  | openSUSE-13.2-Oss                  | Yes     | Yes
7 | repo-source               | openSUSE-13.2-Source               | No      | Yes
8 | repo-update               | openSUSE-13.2-Update               | Yes     | Yes
9 | repo-update-non-oss       | openSUSE-13.2-Update-Non-Oss       | Yes     | Yes
As you see in the above output, all repositories has been changed to 13.1 version.
Now update the repository list with following command:
sudo zypper ref
It is strongly recommended that you should run this upgrade inside tmux to protect the upgrade process in case anything should go wrong with the X session during the upgrade. tmux package is available in the main openSUSE repositories.
Install it using command:
sudo zypper in tmux
Finally, it is time to upgrade. Enter the following command in Terminal to switch to tmux.
tmux
Enter the following command in terminal to start the upgrade.
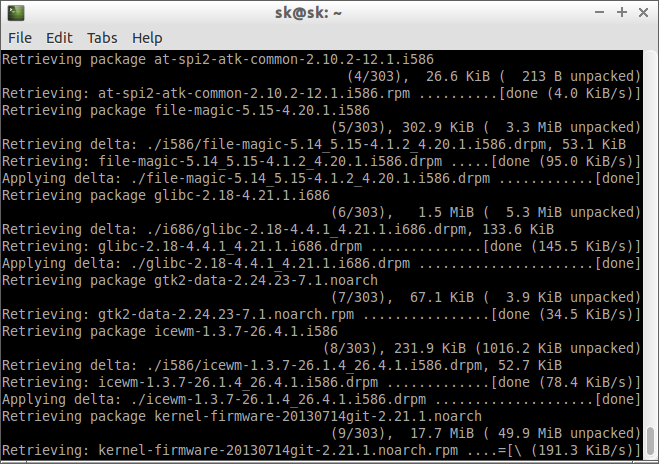
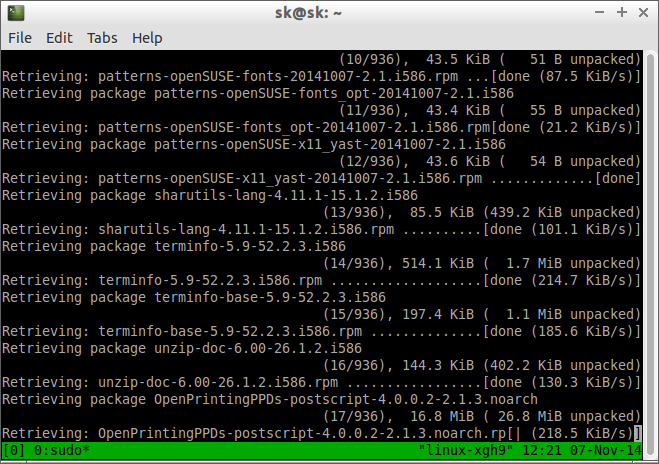
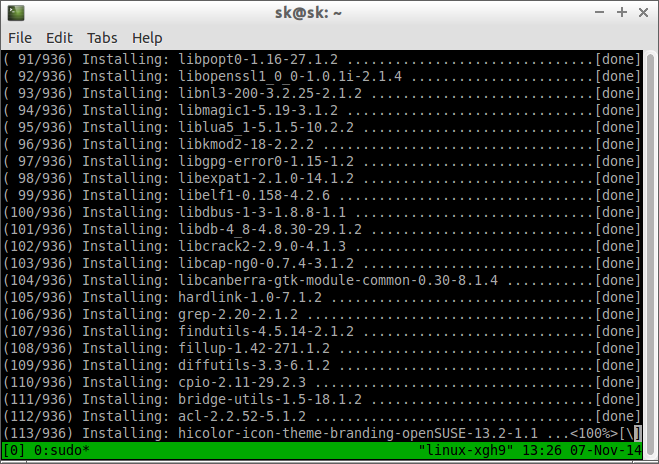
sudo zypper dup
After upgrade, reboot your system to run with new openSUSE 13.2 version.
As i mentioned above, to find the current version of openSUSE, run the following command:
cat /etc/os-release
Sample output:
NAME=openSUSE
VERSION="13.2 (Harlequin)"
VERSION_ID="13.2"
PRETTY_NAME="openSUSE 13.2 (Harlequin) (x86_64)"
ID=opensuse
ANSI_COLOR="0;32"
CPE_NAME="cpe:/o:opensuse:opensuse:13.2"
BUG_REPORT_URL="https://bugs.opensuse.org"
HOME_URL="https://opensuse.org/"
ID_LIKE="suse"
Please be mindful that if upgrade process terminate due to power or Internet failure, then you’ll be end up with broken system. So be prepared and do upgrade.
In my personal opinion, the upgrade process took too much time and irritated me many times with an error “failed digestive system…” message often. I simply pressed “r” to retry the upgrade process. In some cases, the retry doesn’t help me, so I press “a” to abort the package download and continue the upgrade. openSUSE upgrade process is definitely not easy as Ubuntu or other distribution upgrade methods.
Also, the boot loader still displayed the older version number (13.1) in the boot menu. You have to change it manually after logging into the system. If you don’t care about the version number in the boot menu, just ignore i, and continue to use the new version 13.2.
Good Luck!


